
Lawn
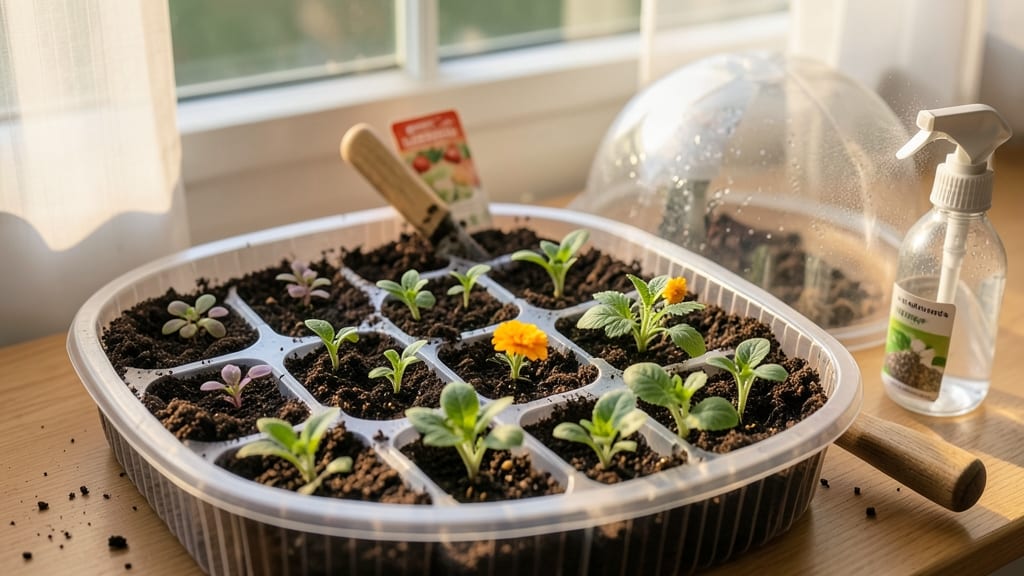
Starting seed trays right means fast germination and fewer seedling casualties. The key is that moisture-locking layer—just a thin sheet of plastic or damp paper towel between the tray bottom and soil.
I’ve lost count of the seeds I’ve watched sprout in days instead of weeks, simply by keeping that layer consistently damp without overwatering.
You’ll need a sturdy seed tray with drainage holes, a lightweight potting mix designed for seedlings, and a clear plastic dome or plastic wrap to retain humidity. Most garden centers sell pre-made seed-starting kits, but you can DIY with a shallow container and a few extra supplies.
The goal is to mimic the cozy, moist environment seeds crave before they push through the soil.
Once your trays are set up, you’ll see tiny green hooks breaking the surface in as little as 3-5 days for fast germinators like lettuce or radishes. Keep the soil surface damp (not soggy) and place trays in a warm spot—70-75°F works best for most seeds.
A sunny windowsill or a seedling heat mat speeds things up even more.
Transplanting becomes a breeze when seedlings are sturdy enough, and the moisture-locking layer means you’ll spend less time fussing with watering. This method works for both indoor starts and outdoor cold frames, so you can adapt it to your growing season. Ready to give it a try?
📚 In This Guide
- What you need
- Instructions
- Tips and common mistakes
- Wrapping up and next steps
What you need
- ● Seed trays: 10-inch x 20-inch plastic or biodegradable trays (2–4 trays, depending on quantity of seeds).
- ● Potting mix: Seed-starting mix (sterile, lightweight, and well-draining; 1–2 cubic feet per tray).
- ● Moisture-locking layer: Option 1: Clear plastic wrap or a humidity dome (1 per tray).
- ● Option 2: A spray bottle with water (for misting).
- ● Seeds: Your chosen variety (follow packet instructions for spacing).
- ○ Grow lights or sunny windowsill: 12–16 hours of light daily (optional but recommended for fast germination).
- ● Watering can or spray bottle: With a fine nozzle for gentle watering.
- ● Trowel or small shovel: For mixing and leveling soil.
- ● Flat, sturdy surface: A table or countertop to work on.
- ● Bottom tray or saucer: To catch excess water and prevent soggy soil.
- ● Heating mat: For faster germination (especially for cool-season crops).
- ● Labeling tags: To track seed varieties and planting dates.
- ● Perforated tray: If using plastic wrap, small holes can help with airflow.
- ● Compost or worm castings: A handful mixed into the soil for extra nutrients.
How to build moisture-locking seed trays for faster germination
Here's the straightforward method I use to create seed trays that keep moisture locked in while preventing rot—ideal for fussy seeds like lettuce or herbs.
Assemble the Base Layer for Drainage
Start with a clean, flat-bottom tray or container that's at least 6 inches deep. Line the bottom with a layer of ½-inch pebbles or coarse sand—this creates essential drainage while keeping moisture above. I use river rocks because they stay sterile and don't break down over time.
Spread the pebbles evenly across the entire base. Press them down lightly so they don't shift later, but don't compact them too tightly. This layer ensures excess water drains away from roots while maintaining humidity at the seed level. If your tray has drainage holes, skip this step entirely—just move to the next layer.
Add the Moisture-Retaining Layer
Place a piece of landscape fabric or coffee filter over the pebbles (or directly over the tray bottom if no pebbles). This layer keeps the growing medium from washing into the drainage layer while allowing water to pass through freely. Secure it with small rocks or clips if needed to prevent shifting.
Next, add a 1-inch layer of horticultural perlite or vermiculite. These materials hold moisture without compacting, creating the perfect environment for seeds to germinate quickly. Spritz this layer lightly with water until it feels damp but not soggy—you want it to hold moisture without pooling.
Prepare the Growing Medium Layer
Pour a 2-inch layer of seed-starting mix over the perlite. Use a sterile mix designed for seedlings—regular garden soil compacts too much and can harbor pathogens. I like to sift the mix through a fine mesh screen to remove any large clumps before adding it.
Gently level the surface with your fingers or a small rake. Press down very lightly to remove air pockets, but don't compact it—you want the mix to stay loose enough for tender roots to penetrate easily. This layer should feel like a damp sponge when squeezed, not dripping or bone-dry.
Sow Seeds and Maintain Moisture
Scatter seeds evenly across the surface, following the spacing guidelines on your seed packet. For tiny seeds, I use a toothpick to place them individually—this prevents overcrowding and makes thinning easier later. Cover them with a ¼-inch layer of fine vermiculite or additional seed mix.
Mist the entire tray with a spray bottle until the top layer looks uniformly damp. Place a clear plastic dome or wrap plastic over the tray to trap humidity. Check daily and remove the cover for 10 minutes to air out the seeds—this prevents fungal growth while keeping moisture locked in. You'll see germination in 5-10 days, depending on the seed type.
Transition to Humidity Control
Once seeds sprout, remove the plastic cover completely. At this stage, you want to maintain moisture without suffocating the seedlings. Water gently from the bottom by adding water to the tray's reservoir (if equipped) or by pouring water into the pebble layer—this ensures roots stay hydrated without disturbing the seedlings.
Monitor the moisture level closely. The top layer should stay damp but never wet. If condensation forms on the inside of the tray, it's too humid—ventilate for a few hours. Strong seedlings will have sturdy stems and vibrant color within 2-3 weeks, ready for transplanting.
Tips & tricks for perfect seed starting trays
Here's what I've learned after years of experimenting with seed trays—these small details make all the difference between weak seedlings and strong starts.
Drainage Layer Depth: That ½-inch layer of pebbles or sand in Step 1 is non-negotiable for fussy seeds like lettuce. If you're using a tray without drainage holes, make it ¾-inch thick instead—this prevents waterlogging while maintaining humidity at the seed level. I've seen seeds rot when this layer is too thin, so don't skimp here.
Moisture Balance in Step 2: When spritzing the 1-inch perlite layer, aim for "damp but not soggy"—it should feel like a wrung-out sponge. Too much water here creates anaerobic conditions that prevent germination. I test by squeezing a handful: if water drips out, you've overdone it. This is especially critical for seeds that need consistent moisture like herbs.
Seed Spacing Secret: For tiny seeds in Step 4, use a toothpick to place them individually rather than scattering. This prevents overcrowding and makes thinning easier later. I mark a grid on the tray bottom with a pencil to maintain even spacing—this visual guide saves me from uneven germination patterns.
Ventilation Timing: That 10-minute daily ventilation in Step 4 is crucial for preventing fungal growth. I set a timer so I don't forget—condensation on the plastic dome is your first warning sign of too much humidity. For seeds sensitive to dampness like basil, you might need to ventilate for 15 minutes instead.
Pro Tips for Starting Seed Trays
- Here's what I've learned after years of experimenting with seed trays—these small details make all the difference bet...
- Drainage Layer Depth: That ½-inch layer of pebbles or sand in Step 1 is non-negotiable for fussy seeds like lettuce. ...
- Moisture Balance in Step 2: When spritzing the 1-inch perlite layer, aim for "damp but not soggy"—it should feel like...
Frequently asked questions
Got questions about starting seed trays? You’re not alone! Here are some of the most common concerns—and their straightforward answers—to help you get your seeds off to the best start.
What’s the best time of year to start seeds in trays?
Timing depends on your climate and plant type. For cool-season crops (like lettuce or spinach), start indoors 6–8 weeks before the last frost. Warm-season plants (tomatoes, peppers) need to wait until after the frost date or start indoors 8–12 weeks early. Check your local frost dates for precision!
How do I keep the soil in seed trays moist without drowning the seeds?
Use a spray bottle for gentle watering—avoid overhead pouring to prevent seed displacement. Aim for consistent moisture, not soggy soil. A moisture-locking layer (like coconut coir or perlite) helps retain humidity while allowing airflow. Mist lightly daily or when the top inch feels dry.
Can I reuse seed trays from last year?
Yes, but sterilize them first! Soak trays in a 10% bleach solution (1 part bleach to 9 parts water) for 10 minutes, then rinse thoroughly. This kills fungi, bacteria, and pests. Avoid reusing trays with visible mold or cracks, as they can harbor diseases.
What if my seeds aren’t germinating in the trays?
Check these common culprits: old seeds (test viability), wrong soil temp (use a heat mat if needed), lack of light (seeds need 12–16 hours of light daily), or too-deep planting (most seeds need 1/4-inch coverage max). If using peat pots, ensure they’re not waterlogged.
Are there alternatives to traditional seed trays?
Try biodegradable pots (made from peat or coconut husks), egg cartons (for small seeds), or repurposed containers (yogurt cups, muffin tins) with drainage holes. For large-scale starts, grow mats or germination domes create humidity without trays.
Wrapping up and next steps
Starting seeds with moisture-locking seed trays is your secret weapon for faster germination and healthier seedlings! 🌱 By layering materials like sphagnum moss, coconut coir, and a breathable barrier, you create the perfect microclimate for tiny roots to thrive.
Whether you're a seasoned gardener or just starting out, this method makes seed starting effortless—and the results speak for themselves.
Now that you’re armed with the know-how, grab those trays and get planting! 🌿 Next, experiment with different seed types or tweak the layers to find your perfect setup. Happy growing—your future garden starts right here!