
Lawn
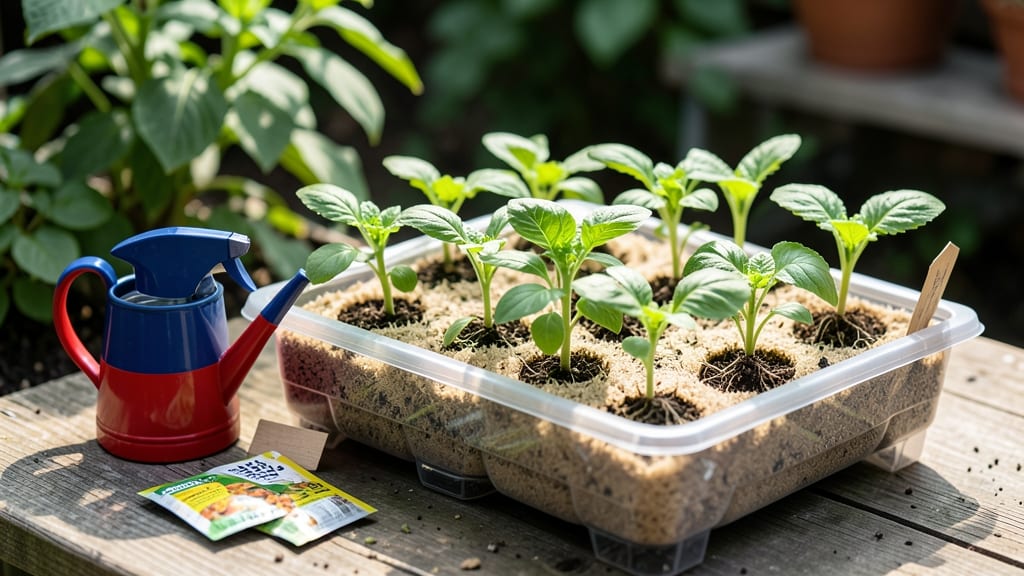
A self-watering seed starter transforms your seedling routine from fussy to foolproof. 🌱 I’ve killed more seedlings than I’d like to admit—until I discovered these game-changers. The secret? A reservoir that delivers moisture exactly when needed, so you’re not glued to a spray bottle every morning.
Most starters use a simple wick or reservoir system to keep soil consistently damp without drowning roots. Commercial options run $15–$30 for 24–72 cell trays, while DIY versions (like repurposed plastic containers with a water tray) cost pennies. The payoff?
Stronger roots, fewer leggy seedlings, and less stress when you’re swamped. By week 3, you’ll see sturdy sprouts ready for transplanting—no more weak, etiolated seedlings that collapse at the first breeze. The key is filling the reservoir right and monitoring for mold (a quick vinegar spray fixes it fast).
Whether you’re a black thumb or a weekend warrior, this method cuts seedling care time by 70%. Let’s get those seeds sprouting without the guesswork!
📚 In This Guide
- What you need
- Instructions
- Tips and common mistakes
- Wrapping up and next steps
What you need
- ● Container: A clear plastic bottle (16–32 oz), plastic tub, or seed starter tray with drainage holes.
- ● Drill or hole punch: To create drainage holes (if using a non-porous container).
- ● Potting mix: Lightweight, seed-starting mix (avoid garden soil—it’s too dense!). Quantity: Enough to fill your container ¾ full.
- ● Seeds: Your chosen variety (fast-sprouting options like basil, marigolds, or lettuce work great for beginners!). Quantity: Follow packet instructions.
- ● Water reservoir: DIY option: A smaller bottle (e.g., 8 oz) with the bottom cut off to fit inside your main container.
- ● Pre-made option: A self-watering seed starter kit with a built-in reservoir.
- ● Wick material: A strip of felt, cotton rope, or paper towel (to connect the reservoir to the soil). Length: Long enough to reach from the reservoir to the soil.
- ● Scissors or utility knife: For cutting wicks or containers.
- ● Humidity dome or plastic wrap: To retain moisture while seeds germinate.
- ● Grow light or sunny windowsill: Seeds need 12–16 hours of light daily.
- ● Label markers: To track seed varieties (trust us, you’ll forget what’s what!).
- ● Tray or saucer: To catch excess water and keep your setup tidy.
Step-by-Step guide to building your own self-watering seed starters
Here's how to create a foolproof system that keeps seedlings happy while you focus on other tasks.
🪴 Step 1: Gather Your Materials and Tools
You'll need a clear plastic container with lid (like a 1-gallon takeout tub), a small piece of landscape fabric, potting mix, seed packets, and a permanent marker. I like using containers with a removable lid—it doubles as a humidity dome during germination. Cut a 2-inch square in the bottom of the container for drainage, then line the inside with landscape fabric to prevent soil from washing out.
Fill the container ¾ full with moistened potting mix, pressing down gently to remove air pockets. Leave about ½ inch of space at the top for water. The fabric will wick moisture up from the reservoir you'll create below, so don't pack it too tightly.
💧 Step 2: Set Up the Water Reservoir
Place your filled container inside a slightly larger tray or shallow bin—this will hold the water. Fill the outer tray with 1-2 inches of water until the fabric at the bottom of the container soaks it up. You'll see moisture wicking into the soil within minutes. This reservoir ensures roots always have access to water without drowning the seeds.
Here's the trick: Don't let the soil touch the water—keep the bottom of the container ½ inch above the waterline. If it sits directly in water, the soil will stay soggy and seeds may rot. Test by lifting the container slightly—if water rises to the fabric but doesn't drip into the soil, you're set.
☀️ Step 3: Plant Your Seeds and Seal for Germination
Sow seeds ¼ inch deep, following packet instructions for spacing. Mist the soil lightly with water until evenly damp—you shouldn't see puddles, just a slightly darker surface. Place the lid on the container to create a humidity dome, then position it in bright, indirect light (a sunny windowsill works). Most seeds germinate best at 70-75°F, so avoid cold drafts.
Check daily for condensation on the lid—this means your humidity levels are perfect. If the soil looks dry at the surface but the fabric is still damp, your system is working. Don't water from above—the reservoir does all the work. You'll see sprouts in 5-14 days, depending on the seed type.
🌱 Step 4: Transition to Hands-Off Growth Mode
Once seedlings emerge, remove the lid and move them to full sun (or under grow lights for 14-16 hours daily). The reservoir will keep roots hydrated for 1-2 weeks, but you may need to top off the outer tray's water every 3-5 days. Watch for leggy seedlings—if stems stretch toward the light, they need brighter conditions or a closer light source.
When the first true leaves appear (not the initial seed leaves), it's time to thin. Use small scissors to snip excess seedlings at soil level, leaving the strongest one per cell. This prevents overcrowding and gives remaining plants room to grow. The fabric wicking system ensures no transplant shock from uneven moisture.
⏰ Step 5: Prepare for Transplanting
About 3-4 weeks after sowing, when seedlings have 3-4 true leaves, they're ready to move. Gently remove the container from the water tray and let excess moisture drain for 10 minutes. The fabric keeps roots intact, so you can transplant the entire soil block into the garden or larger pots without disturbing delicate roots.
Here's where it gets clever: The self-watering design means you can skip the hardening-off process. Since seedlings grew in stable moisture, they adapt to outdoor conditions faster. Plant on a cloudy day or in late afternoon to reduce stress, then water normally—your plants will already be accustomed to consistent hydration.
Tips & tricks for perfect self-watering seed starters
Between us, these little containers are game-changers for anyone who's ever struggled with inconsistent watering. Here's what nobody tells you about making them work flawlessly.
Fabric Placement: When lining your container with landscape fabric in Step 1, make sure it covers the entire drainage hole but doesn't overlap more than ½ inch onto the sides. Too much fabric can create air pockets that prevent proper wicking, while too little might let soil slip through. I like to fold it neatly over the edges to create a clean barrier—this keeps the reservoir working efficiently for the full 3-4 weeks.
Temperature Matters: That 70-75°F range in Step 3 isn't just a suggestion—it's crucial for germination. If your home runs cooler, place the container on top of your fridge (not inside) to create a warm microclimate. For warmer climates, move it to a shaded spot during peak afternoon heat. The key is maintaining this range consistently—fluctuations can delay sprouting or cause uneven growth.
Lighting Strategy: For the 14-16 hours of light in Step 4, position your container where it gets morning sun and afternoon shade. If using grow lights, place them 6-12 inches above the seedlings and adjust as they grow. I've seen beginners burn seedlings by keeping lights too close—watch for leaf edges turning crispy as your early warning sign. Rotate the container daily so all seedlings get even exposure.
Make-Ahead Move: You can actually assemble your complete self-watering system up to 2 weeks before planting! Just store the empty container with fabric in place, then add moistened potting mix when ready. This gives you a head start when seed packets arrive unexpectedly. The fabric stays pliable for weeks, and the container maintains its structural integrity perfectly. Just remember to add fresh water to the reservoir right before sowing.
Pro Tips for Self Watering Seed Starter
- Between us, these little containers are game-changers for anyone who's ever struggled with inconsistent watering. Her...
- Fabric Placement: When lining your container with landscape fabric in Step 1, make sure it covers the entire drainage...
- Temperature Matters: That 70-75°F range in Step 3 isn't just a suggestion—it's crucial for germination. If your home ...
Frequently asked questions
Got questions about self-watering seed starters? You’re not alone—these handy tools make gardening easier, but they can still raise a few curiosity points. Here’s what you need to know before diving in!
How often do I need to check my self-watering seed starter?
Most self-watering seed starters only need a quick glance every few days to ensure the water reservoir is topped off. Once set up, they’re designed to keep soil consistently moist for 1-2 weeks without manual watering. Just avoid letting the reservoir run dry—empty tanks can cause root stress or mold.
Can I use these for slow-germinating seeds like tomatoes or peppers?
Self-watering starters are perfect for slow starters because they maintain steady moisture—critical for seeds that need warmth and patience. Just place them in a warm spot (like a sunny windowsill or seedling heat mat) and monitor for 10-20 days until sprouts appear.
What happens if the water reservoir leaks or overflows?
Leaks usually mean the starter isn’t placed on a stable, level surface or the reservoir is overfilled. Fix it by:
- Draining excess water
- Ensuring the base sits flat
- Checking for cracks in the tray
Are self-watering starters better than regular seed trays?
It depends on your routine! Self-watering starters win for busy gardeners because they reduce the risk of over/under-watering and encourage stronger root growth. Regular trays require daily attention and can dry out faster. However, if you’re hands-on and thrive with frequent checks, traditional trays work too!
Can I reuse self-watering seed starters?
Yes! After your seedlings are transplanted, clean and sanitize the trays with a 10% bleach solution (rinse well) to kill bacteria. Let them dry completely before storing. Reusing them saves money and reduces waste—just avoid reusing soil unless it’s sterilized!
Wrapping up and next steps
Growing your own plants has never been easier—or more rewarding! With a self-watering seed starter, you can enjoy the magic of sprouting seeds without the daily fuss.
Whether you're a busy parent, a traveler, or just someone who loves low-maintenance gardening, this hands-off approach lets you nurture life while saving time and stress.
Ready to take the next step? Start small—pick a few easy seeds like herbs or lettuce—and let your new system work its magic. Soon, you’ll be harvesting fresh, homegrown goodness with confidence! 🌱