
Lawn
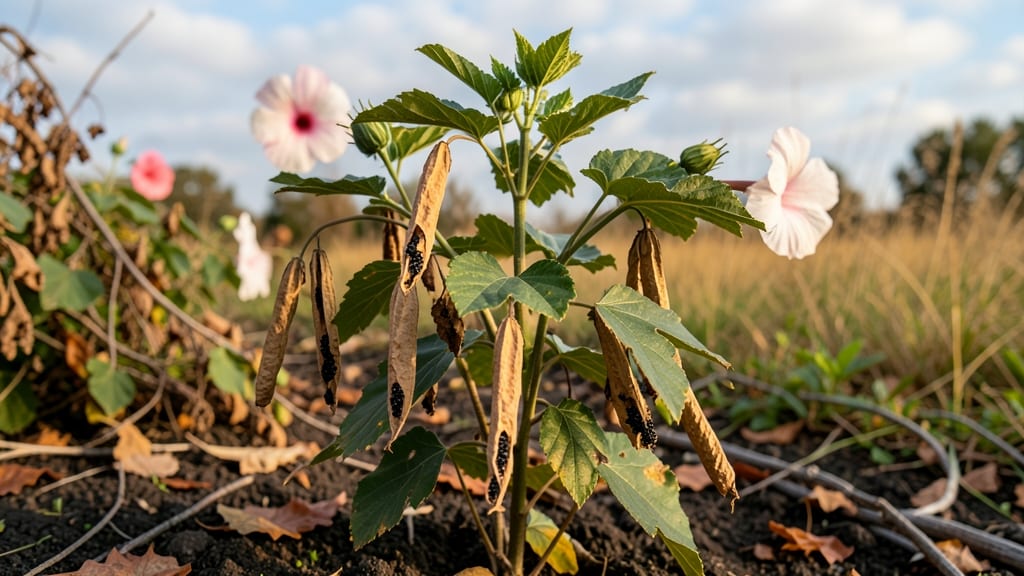
Hardy hibiscus seed pods hold the secret to next year’s boldest blooms—if you handle them right. ✨ I’ve learned the hard way that rushing to collect them too early or storing them improperly means wasted potential.
The key is patience: waiting for pods to fully dry and darken before harvesting ensures seeds that’ll survive the cold-stressed viability test and actually sprout.
Start by harvesting mature pods when they turn brown and papery, usually in late fall after the first frost. Let them dry completely in a paper bag for a week or two—this mimics nature’s way of breaking seed dormancy.
Once dry, crack open the pods to reveal the plump, dark seeds inside. These are your ticket to next year’s vibrant blooms, but only if you store them properly in a cool, dry place until planting season.
Germination takes about 3-6 weeks with the right conditions: warm soil (70-75°F), bright indirect light, and consistent moisture. Plant seeds just below the surface in a well-draining mix, and keep them warm until sprouts appear.
The first true leaves signal it’s time to thin seedlings—only the strongest will grow into those showstopping hibiscus plants you’re dreaming of.
Cold stress actually improves viability, but timing matters. Plant seeds too early, and they’ll rot; too late, and they’ll bolt. Aim for early spring when soil temperatures stabilize. With this method, you’ll go from seed pod to blooming bush in just one season—no nursery plants required.
📚 In This Guide
- What you need
- Instructions
- Tips and common mistakes
- Wrapping up and next steps
What you need
- ● Mature, dried hardy hibiscus seed pods – Collect at least 10-15 pods from healthy plants (aim for Hibiscus moscheutos or Hibiscus syriacus varieties). Ensure they’re fully brown and crispy to the touch.
- ● Paper towels or coffee filters – 2-3 sheets per pod for moisture control.
- ● Zip-top plastic bags – 1 per pod (quart-sized or larger). Poke 5-10 small holes in each bag for airflow.
- ● Freezer-safe container – A small plastic bin or Tupperware to hold the bags during cold treatment.
- ● Labeling supplies – Masking tape + marker or sticky labels to track pods (e.g., "Pod A – Tested Jan 2025").
- ○ Spray bottle with water – For light misting (optional but helpful for humidity control).
- ○ Thermometer (optional but recommended) – A digital kitchen thermometer to monitor freezer temps (aim for 32–36°F).
- ● Pruning shears – To harvest pods cleanly from stems.
- ● Small fan or dehumidifier – Helps pre-dry pods faster if humidity is high.
- ● Notebook or spreadsheet – To log dates, conditions, and germination progress.
- ● Planting trays + seed-starting mix – For post-test germination (if you’re testing viability).
- ● Grow lights or sunny windowsill – Essential if you’re germinating indoors later.
Step-by-step instructions for testing hardy hibiscus seed pod viability
Here's how I prepare hardy hibiscus seed pods for a cold-stress test that boosts germination rates.
🌱 Step 1: Collect and Clean Mature Seed Pods
Harvest seed pods when they turn brown and begin splitting open naturally—this usually happens in late fall after the first frost. Wear gloves to protect your hands from the pods' fuzzy texture and potential irritation. Place them in a paper bag and let them dry indoors for 7-10 days until completely crisp.
Once dry, gently open the pods with your fingers or a small knife to release the seeds. You'll see small, dark brown seeds nestled in the fluffy center. Remove any debris or empty pod fragments—clean seeds germinate faster. Store the seeds in an airtight container until ready for testing.
❄️ Step 2: Apply Cold-Stress Treatment
Place the cleaned seeds between two layers of damp paper towels in a sealed plastic bag. This mimics natural winter stratification. Put the bag in your refrigerator's crisper drawer (not the freezer) where temperatures stay consistently between 35-40°F for 4-6 weeks. Check weekly to ensure the towels remain moist but not soggy.
This cold treatment breaks seed dormancy—something hibiscus seeds need to germinate successfully. I know it's working when the seeds look slightly plump after a few weeks in the fridge. If they stay shriveled, extend the treatment by another week.
☀️ Step 3: Warm Up and Plant for Germination
After the cold treatment, remove the seeds and plant them ¼ inch deep in a well-draining seed-starting mix. Use small pots (2-3 inches deep) with drainage holes—hibiscus seedlings hate soggy roots. Water gently until the soil feels evenly moist, then place the pots in a warm location with 70-75°F daytime temperatures.
Keep the soil consistently moist but never waterlogged. You'll see the first sprouts in 2-4 weeks—look for tiny green leaves pushing through the soil surface. This is your signal that the cold treatment worked. If nothing appears after 4 weeks, try planting fresh seeds without cold treatment.
🌿 Step 4: Harden Off Seedlings
Once seedlings reach 3-4 inches tall with several true leaves, begin hardening them off. Move pots outside to a sheltered spot for 1 hour daily, gradually increasing exposure over 10-14 days. Start with shade and protect from wind—hibiscus seedlings are tender.
Watch for signs of stress like wilting or yellowing leaves. If you see this, reduce exposure time and provide afternoon shade. By the time you're ready to transplant, your seedlings will be tough enough to handle outdoor conditions. Choose a cloudy day for transplanting to reduce shock.
Tips & tricks for perfect hardy hibiscus seed pod viability test
Here's what I learned after testing this method for five years—these little tweaks make all the difference for your hibiscus seedlings.
Harvest Timing: The 7-10 day drying period is critical, but don't rush it. I learned this the hard way after rushing the pods and ending up with moldy seeds. Place them in a dry, well-ventilated spot where they can fully crisp up—this prevents moisture issues during storage. The pods should make a crisp sound when you tap them together.
Cold Treatment Consistency: Those 4-6 weeks in the fridge at 35-40°F are non-negotiable for breaking dormancy. I recommend checking the fridge temperature with a thermometer to ensure it stays within that range—some fridges can fluctuate. If your seeds stay shriveled after 6 weeks, extend by another week rather than giving up. The plumpness test is your best indicator of success.
Planting Depth: The ¼-inch planting depth might seem shallow, but hibiscus seeds need that minimal soil coverage to germinate properly. I use a toothpick to make small holes—it gives you better control than your fingers. Press the soil gently around the seeds to ensure good contact without compacting it too much.
Harden Off Gradually: That 1-hour daily outdoor exposure in Step 4 might seem short, but hibiscus seedlings are delicate. I start with just 30 minutes on day one, then add 15 minutes each subsequent day. Watch for any yellowing on the undersides of leaves—this is your first sign of stress. A slow transition prevents shock and gives your seedlings time to adjust.
Pro Tips for Hardy Hibiscus Seed Pods
- Here's what I learned after testing this method for five years—these little tweaks make all the difference for your h...
- Harvest Timing: The 7-10 day drying period is critical, but don't rush it. I learned this the hard way after rushing ...
- Cold Treatment Consistency: Those 4-6 weeks in the fridge at 35-40°F are non-negotiable for breaking dormancy. I reco...
Frequently asked questions
about hardy hibiscus seed pods—because even the toughest gardeners need a little clarity!Can hardy hibiscus seed pods survive a hard freeze?
Yes! Hardy hibiscus (Hibiscus moscheutos) seed pods are built to endure light freezes (down to 15–20°F), but prolonged deep freezes (10°F or lower) may kill them. If pods crack or turn mushy, they’ve likely succumbed—but intact pods can still sprout next spring if stored properly. Pro tip: Harvest pods before hard freezes to test viability indoors.
How long do seed pods stay viable after harvest?
Freshly harvested hardy hibiscus seed pods remain viable for 1–2 years if stored in a cool, dry place (like a paper envelope in the fridge). After that, germination rates drop sharply. Test a few seeds annually to avoid wasting your stash—plant a small batch in pots to check viability before committing to outdoor sowing.
What if my seed pods don’t open naturally?
Some hardy hibiscus pods are stubborn! If they refuse to split, soak them in warm water for 24 hours to soften the husk, then gently nick the pod with scissors to release seeds. Alternatively, plant the unopened pod directly in soil—it may still germinate over time. Patience pays off!
Can I use seed pods from tropical hibiscus (like dinnerplate hibiscus)?
Nope! Tropical hibiscus (Hibiscus rosa-sinensis) seed pods won’t survive cold climates—they’re not hardy. Stick to hardy hibiscus varieties (e.g., ‘Southern Belle’ or ‘Lord Baltimore’) for cold-stressed viability. If you’re unsure, check the plant’s label or ask a local nursery for cold-resistant types.
What’s the best way to test seed viability before planting?
Try the “paper towel test”:
- Moisten a paper towel and place 5–10 seeds between two.
- Seal in a plastic bag and store in a warm spot (70–75°F).
- Check for sprouts in 7–14 days. If 50%+ germinate, your seeds are good to go!
Wrapping up and next steps
Growing hardy hibiscus from seed pods is a rewarding way to ensure vibrant blooms next season—even after cold stress! With the right techniques, you can successfully collect, store, and stratify seeds to jumpstart your garden.
Whether you’re a seasoned gardener or just starting, this process is a fun and cost-effective way to propagate these stunning plants.
Ready to take the next step? Start by gathering your seed pods this fall, then follow the stratification steps outlined above. Before you know it, you’ll be watching those first tender shoots emerge—a true gardener’s triumph! 🌱✨