
Orchid Care
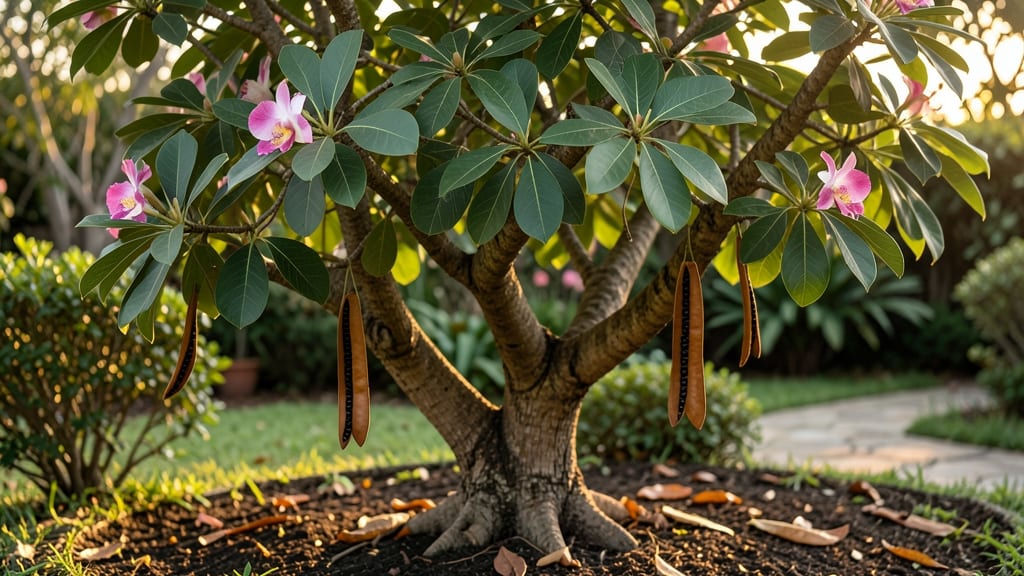
Extracting seeds from orchid tree pods is easier than you think—no special tools or green thumbs required. 🌱 The key is timing: pods turn from green to brown when they’re ready, and a gentle squeeze reveals the flat, papery seeds inside.
I’ve collected hundreds this way, and the process becomes second nature after just one try. You’ll need only three things: gloves (to avoid sticky sap), a clean bowl, and a damp paper towel for storage. Skip the fancy equipment—these seeds germinate best in simple conditions.
The real magic happens when you scatter them on moist, sterile soil and wait for the first green shoots. Those tiny seeds pack a surprise: they sprout faster than most people expect, often within 2-3 weeks if kept warm and humid.
You’ll watch them transform from specks into sturdy seedlings before your eyes, ready for transplanting in just a few months. This method works for all Bauhinia varieties, from dwarf types to towering specimens. The only challenge?
Patience—some seeds take longer to wake up, but persistence pays off with lush, fragrant trees that thrive in full sun or partial shade.
📚 In This Guide
- What you need
- Instructions
- Tips and common mistakes
- Wrapping up and next steps
What you need
- ● Mature orchid tree seed pods: Harvest 3–5 fully ripe pods (brown, slightly papery, and slightly open). Pro tip: 💡 Collect them in dry weather to avoid mold!
- ● Sterilized container: A small glass jar, plastic bag, or silicone seedling tray (4" x 4" minimum). Why? Keeps seeds hygroscopic and contamination-free!
- ● Isopropyl alcohol (70% or higher): 1 small bottle (4 oz) for sterilizing tools.
- ● Sterilized tweezers or forceps: Fine-tip, stainless steel (for delicate seed handling).
- ● Sterilized scalpel or razor blade: For carefully opening pods without damaging seeds.
- ● Sterile distilled water: 2–4 oz (pre-chilled for shock-free handling).
- ● Sterile paper towels or coffee filters: 2–3 sheets (cut to fit your container).
- ● Plastic wrap or breathable lid: To seal the container and maintain humidity.
- ● Seed germination gel or agar: Pre-made or DIY (recipe: 1 tsp agar + 1 cup water, sterilized). Speeds up germination!
- ● Fungicide (e.g., hydrogen peroxide 3%): 1 tsp diluted in water for extra sterilization.
- ● Labeling tape & marker: To track pod sources and dates.
- ● Grow lights or sunny windowsill: For post-germination seedling care.
- ● Humidity dome or plastic bag: To create a mini greenhouse environment.
How to extract viable seeds from orchid tree pods
Here's the gentle method I use to coax seeds from orchid tree pods without damaging their delicate potential.
🌱 Step 1: Identify and Harvest Mature Pods
Wait until the seed pod turns from green to tan or brown and begins to split open naturally—this signals full maturity. Gently twist the pod from the stem with your fingers, avoiding any sharp tools that could crush the seeds inside. I like to harvest in the morning when humidity is high, as this helps preserve the seeds' moisture content.
Place the pod in a paper bag (not plastic) and seal it loosely. This traps rising moisture from the pod as it dries, which helps release seeds naturally. Leave it in a warm, shaded spot for 3-5 days—you'll hear seeds rattling inside when they're ready. If the pod still feels firm after a week, it needs more time to dry.
🪴 Step 2: Extract Seeds Without Damaging Them
Once the pod is completely dry and crumbly, carefully open it by making a small slit along one side with a clean pair of scissors. Avoid pressing or squeezing—the orchid tree seeds are microscopic and easily crushed. Tap the pod gently over a white piece of paper (the contrast helps you spot the tiny seeds).
You'll see what looks like dust, but among it are thousands of tiny, powdery seeds. I use a soft paintbrush to sweep the contents onto the paper, then examine under a hand lens to confirm seed presence. The seeds themselves are nearly invisible, but their presence will be obvious as a fine, gritty texture mixed with the pod's fibers.
☀️ Step 3: Prepare Seeds for Germination
Orchid tree seeds require a symbiotic fungus to germinate, which you won't find in home conditions. Instead, we'll prepare them for tissue culture or commercial propagation. Mix the extracted seeds with a sterile, moistened agar gel (available from orchid suppliers) in a small glass container. Seal it with a lid and label with the date.
Store the container in a cool, dark place at 60-65°F for 4-6 weeks. Check weekly for mold—if you see any, discard the batch immediately. The seeds won't grow visibly yet, but the fungus will begin colonizing them, preparing them for future transplanting. This step is critical; skipping it means the seeds will remain dormant indefinitely.
⏰ Step 4: Store or Transplant for Future Growth
After the 4-6 week fungal treatment, the seeds are ready for tissue culture or professional propagation. If you're not equipped for lab conditions, store the sealed container in a refrigerator (not freezer) for up to 6 months. The seeds remain viable but dormant until professional handling.
For home growers, this is where the process stops—orchid tree seeds require sterile lab conditions to develop into seedlings. However, you've now captured their genetic potential! Many nurseries accept pre-treated seeds for commercial propagation, so your work isn't wasted. Just keep the container sealed and stored properly until you're ready to send them off.
Tips & tricks for perfect orchid tree seed extraction
Working with orchid tree pods requires patience and precision—here's how to avoid common pitfalls while maximizing your success.
Timing is Everything in Step 1: The 3-5 day drying period is non-negotiable for seed viability. I've learned this the hard way—rushing the process means seeds won't release properly, while waiting too long risks mold. Place your paper bag in a spot that stays consistently warm (around 70-75°F) but avoids direct sunlight, which can overheat the pod. That gentle rattling sound you hear after 3-5 days? That's your cue the seeds are ready to be released.
Gentle Handling in Step 2: When making that initial slit with clean scissors, work slowly—there's no room for error with these microscopic seeds. I recommend using a new pair of scissors just for this task to avoid any contamination. After tapping the pod, examine the white paper under natural light first; sometimes the seeds are more visible in daylight than under artificial light. If you're struggling to see them, try using a black piece of paper instead—it creates better contrast with the light-colored seeds.
Fungal Treatment Precision in Step 3: Maintaining that 60-65°F temperature range is crucial during the 4-6 week fungal treatment. Too warm and you risk mold; too cool and the fungal colonization won't proceed properly. I use an old refrigerator thermometer to monitor the temperature in my storage spot. The agar gel should be just moist enough to keep the seeds hydrated but not soaking wet—think of it as damp, not dripping. This balance is what prepares the seeds for their next stage of development.
Pro Tips for Orchid Tree Seed Pods
- Working with orchid tree pods requires patience and precision—here's how to avoid common pitfalls while maximizing yo...
- Timing is Everything in Step 1: The 3-5 day drying period is non-negotiable for seed viability. I've learned this the...
- Gentle Handling in Step 2: When making that initial slit with clean scissors, work slowly—there's no room for error w...
Frequently asked questions
Got questions about orchid tree seed pods? You’re not alone! Here are some of the most common queries—plus straightforward answers to help you navigate the process with confidence.
How do I know when orchid tree seed pods are ready for harvesting?
Seed pods typically turn a dry, papery brown and begin to split open on their own—this is your cue! If you tap a pod and hear rattling seeds inside, it’s ready. Avoid harvesting too early; immature pods yield non-viable seeds. Pro tip: Harvest in mornings when humidity is lower to prevent mold.
How long does it take for orchid tree seed pods to mature?
Maturation time varies by species and climate, but most orchid tree pods take 6–12 months to ripen after flowering. In tropical climates, pods may mature faster (4–6 months), while cooler regions could extend this to a year. Patience is key—don’t rush it! Track your pods: Label them post-flowering to monitor progress.
Can I use orchid tree seeds from store-bought pods, or do I need fresh ones?
Store-bought pods are usually sterilized or dried for shipping, making their seeds non-viable. For germination, fresh, home-harvested seeds are ideal. If you’re buying seeds, opt for reputable suppliers selling pre-germinated or tissue-cultured options instead. Alternative: Ask local orchid nurseries for fresh seed sources.
Why did my orchid tree seed pods rot before opening?
Pod rot is often caused by excess moisture or fungal/bacterial infections. Ensure your tree is in a well-draining environment and avoid overhead watering. If pods develop black spots or slimy textures, remove them immediately to prevent spread. Prevent it: Spray pods with a fungicide (like neem oil) during humid seasons.
Do orchid tree seeds need special treatment to germinate?
Unlike some orchids, orchid tree (Bauhinia spp.) seeds don’t require stratification—just soak in warm water for 24 hours to soften the shell. Plant them 1/4-inch deep in a moist, sandy mix and keep in bright, indirect light. Germination takes 2–4 weeks. Troubleshooting: If seeds mold, rinse with hydrogen peroxide (3%) to disinfect.
Wrapping up and next steps
Extracting viable seeds from orchid tree seed pods may seem intimidating, but with the right approach, it’s a rewarding and stress-free process!
Remember, patience and precision are key—whether you’re sterilizing your tools, carefully slicing the pods, or nurturing those tiny seeds. 🌱 Now that you’re armed with knowledge, why not take the next step? Start with just one pod and experiment with the techniques shared here. Who knows?
You might just unlock a whole new world of orchid propagation—and maybe even share your success with fellow plant enthusiasts!