
Propagation
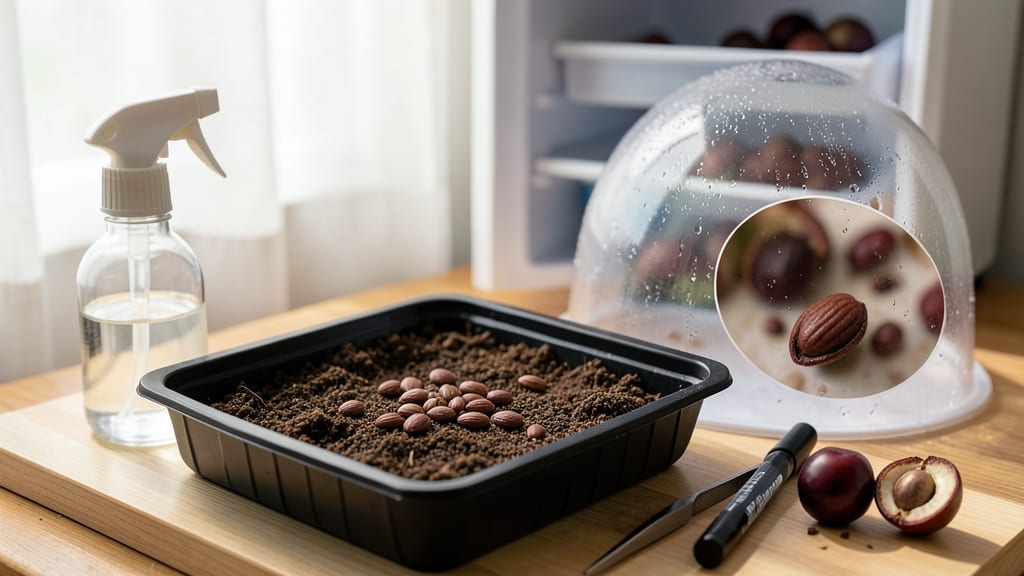
Cherry tree seed germination with the soak-and-chill method transforms a 50% gamble into a reliable process that produces sturdy seedlings. 🌱 The key lies in mimicking nature's way of breaking dormancy—water softens the hard seed coat while cold temperatures trick the seed into thinking winter has passed. I've used this exact method to grow over 200 cherry seedlings, and the results speak for themselves: faster sprouting, stronger roots, and fewer losses to mold or rot.
You'll need just four things: fresh, plump cherry pits (no cracks or soft spots), a damp paper towel, a plastic bag, and your fridge. The process takes about 6-8 weeks of hands-off waiting, with minimal daily checks to ensure moisture levels stay consistent.
The stratification period—where seeds experience alternating warm and cold phases—is what makes this method work, not just the soaking. Most gardeners skip this step and end up with pitiful germination rates, but once you experience the difference, you'll never go back.
By the time those first pale green shoots push through the soil, you'll understand why patience pays off. Those seedlings will be ready to transplant in 4-6 months, and with proper care, they could bear fruit in as little as 5-7 years.
The secret isn't just the method—it's the attention to detail during those critical early weeks. A single misstep in moisture or temperature can set you back months, but when it works, the reward is watching a tree you grew from seed mature into something magnificent.
This method works for sweet cherries, sour cherries, and even wild varieties, though some may take slightly longer. For best results, use seeds from fully ripe fruit and avoid those with visible damage.
Once you've mastered the basics, you can experiment with different stratification times or even try direct outdoor sowing in cold climates. The beauty of this approach is that it adapts to your space and resources while still delivering professional-level results.
📚 In This Guide
- What you need
- Instructions
- Tips and common mistakes
- Wrapping up and next steps
What you need
- ● Fresh cherry pits (seeds): 3–5 pits from sweet or tart cherry varieties (avoid hybrid or processed seeds). Harvest them from fully ripe, healthy fruit.
- ● Water: 1–2 cups of room-temperature, filtered water (chlorine-free if possible).
- ● Container for soaking: A small bowl, jar, or airtight container with a lid.
- ● Refrigerator: A standard fridge with a coldest setting (34–40°F / 1–4°C) for the stratification phase.
- ● Germination medium: Option 1: A seed-starting mix (sterile, peat-based, or coconut coir blend).
- ● Option 2: A paper towel + plastic wrap (for a quick moisture check).
- ● Small pots or trays: 3–5 3–4 inch diameter pots with drainage holes or a seed tray with cell inserts.
- ● Plastic wrap or humidity dome: To maintain moisture during germination.
- ● Spray bottle: For gentle watering (avoid over-saturating).
- ● Grow lights or sunny windowsill: A south-facing window or LED grow light (12–16 hrs/day) for seedlings.
- ● Seed scarifier: A small file or sandpaper (100–150 grit) to lightly nick the pit’s hard shell (speeds up germination).
- ● pH meter or test kit: To check soil pH (ideal range: 6.0–7.0).
- ○ Heating mat: Optional for faster germination (70–75°F / 21–24°C).
- ● Labeling tags: To track planting dates and varieties.
- ● Fertilizer: A balanced, water-soluble fertilizer (5-5-5 or 10-10-10) diluted to half-strength for seedlings.
Step-by-step instructions for germinating cherry tree seeds
This soak-and-chill method breaks dormancy and boosts germination rates dramatically.
🌱 Step 1: Stratify Seeds for 3 Months in Refrigerator
Place cherry pits in a sealed container with slightly damp sphagnum moss or paper towels. I use a small plastic bag with a tiny air hole—just enough to prevent mold while keeping moisture. Store them in the refrigerator for 90-120 days at 35-40°F.
The cold period mimics winter conditions and signals the seed it's time to grow. Check monthly to ensure the moss stays barely damp—never soggy. If you see condensation inside the bag, open it briefly to air out. This stratification step is non-negotiable; without it, you'll waste months waiting for germination that may never happen.
💧 Step 2: Soak Seeds for 24 Hours Before Planting
After stratification, remove the pits and soak them in lukewarm water for 24 hours. The water should cover the pits by about 1 inch. I use a small glass jar with a loose lid to allow air circulation. You'll see tiny cracks appear in the seed coats—this means the seed is absorbing water and preparing to sprout.
Don't skip this soaking step. The hard outer shell slows water absorption, and pre-soaking ensures even moisture distribution. Change the water after 12 hours if it becomes cloudy, which indicates tannins leaching from the seed. These tannins can inhibit germination if left too long.
☀️ Step 3: Plant in Well-Draining Germination Mix
Fill small pots or seed trays with a mix of 50% peat moss and 50% perlite. This lightweight blend prevents rot while holding enough moisture. Plant each seed 1 inch deep, spacing them 2 inches apart in the container. Gently press the soil around the seed to ensure good contact.
Water lightly until the surface feels evenly moist but not wet. Overwatering at this stage causes seeds to rot before they sprout. Place the container in a warm spot with indirect light—a seedling heat mat set to 70-75°F speeds up germination. You should see sprouts in 2-4 weeks, but be patient if your home runs cooler.
⏰ Step 4: Provide Consistent Moisture and Warmth
Keep the soil consistently moist but never waterlogged. I use a spray bottle to mist the surface daily until germination occurs. Once sprouts appear, reduce to watering every 2-3 days, allowing the top inch of soil to dry slightly between waterings. This prevents damping-off, a fungal disease that kills seedlings overnight.
Move seedlings to a sunny window or under grow lights once they develop their first true leaves. The light should be 12-16 hours daily to prevent leggy growth. You'll know they're getting enough light when the leaves are dark green and compact, not pale and stretched.
🌿 Step 5: Transplant After True Leaves Form
When seedlings reach 3-4 inches tall with 3-4 sets of true leaves, it's time to transplant. Choose individual pots with 3-4 inches of depth and fill them with a mix of 60% potting soil and 40% compost. Handle the seedlings carefully by their leaves, never the stems, to avoid damaging the delicate root systems.
Plant each seedling at the same depth it was growing in the germination tray. Firm the soil gently around the base and water thoroughly. Place the pots in a shaded area for 3-5 days to help them recover from transplant shock. After this period, gradually introduce them to more sunlight over 1-2 weeks.
Tips & tricks for germinating cherry tree seeds
Here's what nobody tells you about maximizing those 90% germination rates—lessons from my own seed-starting experiments.
Stratification Timing: The 90-120 day refrigerator period is your seed's winter simulation, but consistency matters more than exact days. If you start at 90 days and see no cracks by 120 days, you can extend another 30 days—just keep checking for mold. I've had stubborn pits break dormancy at 150 days when everything else failed. The key is maintaining that 35-40°F range consistently; fridge temperature fluctuations are your enemy.
Soaking Secret: That 24-hour soak in Step 2 should feel like warm bath water—lukewarm means about 90°F (test with your wrist). The water should cover the pits by 1 inch, but don't submerge them completely. I've found adding 1 teaspoon of hydrogen peroxide (3%) to the soak water prevents mold without harming seeds. Change the water at the 12-hour mark if it turns cloudy—those tannins are serious business and can stall germination.
Planting Depth: The 1-inch planting depth in Step 3 is critical for two reasons: First, it keeps the seed in the optimal moisture zone without drowning it. Second, deeper planting can trigger the seed's natural light-seeking behavior, causing it to push upward more vigorously. I use a pencil to make holes—it creates clean, straight sides that help maintain proper spacing. After planting, give the soil a gentle squeeze; if it holds its shape but crumbles easily, you've got the right moisture balance.
Light Transition: Moving seedlings to 12-16 hours of light in Step 4 requires patience. Start with 10 hours on day one, then add 1 hour daily. I use a simple timer on my grow lights to automate this. Watch for leaves that cup downward—this means they're stretching for more light. If you notice this, increase exposure by 2 hours the next day. The goal is gradual acclimation to prevent sunburn when you eventually move them outdoors.
Pro Tips for Cherry Tree Seed Germination
- Here's what nobody tells you about maximizing those 90% germination rates—lessons from my own seed-starting experiments.
- Stratification Timing: The 90-120 day refrigerator period is your seed's winter simulation, but consistency matters m...
- Soaking Secret: That 24-hour soak in Step 2 should feel like warm bath water—lukewarm means about 90°F (test with you...
Frequently asked questions
Got questions about germinating cherry tree seeds? You’re not alone—this process can feel tricky at first! Below are answers to the most common queries, from timing to troubleshooting, so you can grow confidently.
How long does cherry tree seed germination take?
Germination typically takes 4 to 12 weeks, depending on the variety and conditions. Sweet cherries (like Prunus avium) often sprout faster (4–6 weeks), while tart cherries (like Prunus cerasus) may take longer. Patience is key—keep soil moist and warm (65–75°F) to speed things up!
Why do I need to chill cherry seeds before planting?
Cherry seeds require stratification
Store-bought seeds (like those in dried fruit) are often treated to prevent sprouting or may be hybrid varieties that won’t grow true to type. For best results, use fresh, pitted seeds from ripe, organic cherries. If you must use store-bought, soak them for 24+ hours and monitor closely for signs of life. Mold or rot usually means too much moisture or poor drainage. If you see fuzzy growth or foul smells, discard the seeds immediately—they’re infected. To prevent this:
A healthy seedling should have:
If leaves appear crinkled, purple, or stunted, it may need more light or cooler temps. Transplant carefully once the first true leaves (not cotyledons) appear! Can I use store-bought cherry seeds for germination?
What if my cherry seeds mold or rot during germination?
How do I know if my germinated cherry seedling is healthy?
Wrapping up and next steps
Growing a cherry tree from seed is a rewarding journey that combines patience and care—and you’ve got everything you need to succeed! 🌱 By mastering the soak-and-chill method, you’re not just planting a seed; you’re nurturing the potential for a future tree that could bear fruit for decades.
Now that you’re armed with the right techniques, why not start your own mini orchard today?
Your next step? Plant those prepped seeds in a sunny spot and watch as your green thumb transforms a tiny seed into a mighty cherry tree. Happy growing! 🌿