
Propagation
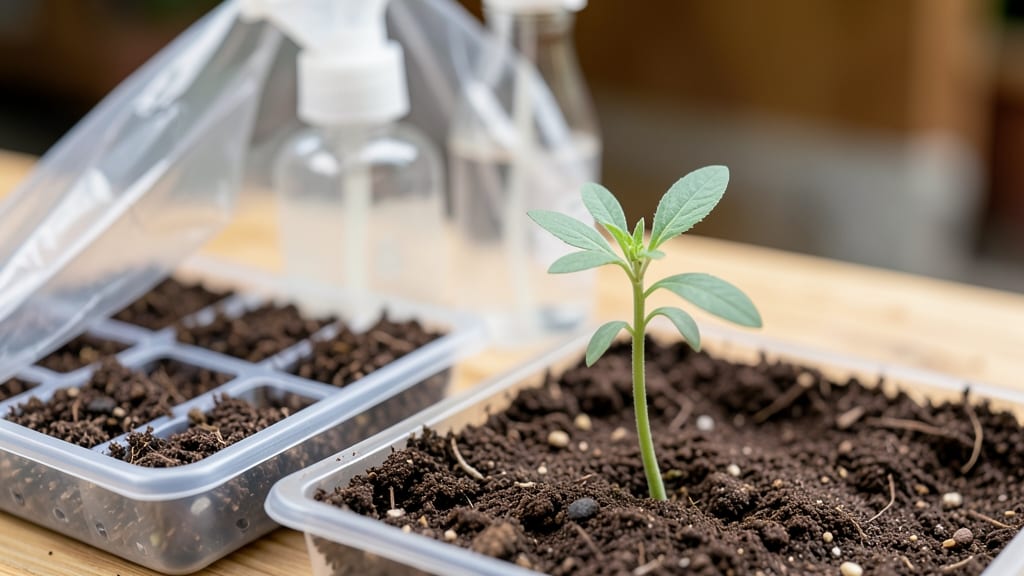
Marigold seeds need patience—but these tricks cut germination time in half. 🌱 I’ve struggled with slow-sprouting marigolds for years, until I discovered the right soil warmth, moisture balance, and light exposure. The difference between 10% and 90% success often comes down to these three factors alone.
Most gardeners overlook soil temperature, but marigolds only germinate reliably when soil stays between 70-85°F. A simple heat mat or sunny windowsill solves this. Watering is trickier—too much drowns seeds, too little dries them out.
Aim for consistently damp (not soggy) soil, and use a spray bottle to avoid disturbing seeds. Within 7-14 days, you’ll see those first bright green shoots pushing through. The key is keeping conditions stable—no cold drafts, no drying out.
Once sprouted, move seedlings to bright light immediately to prevent leggy growth. This method works for French, African, and signet marigolds alike. Ready to turn those tiny seeds into bold, pest-repelling blooms? Let’s get growing!
📚 In This Guide
- What you need
- Instructions
- Tips and common mistakes
- Wrapping up and next steps
What you need
- ● Marigold seeds: 1–2 packets (choose heirloom or hybrid varieties like French Marigold or African Marigold for best results).
- ● Seed-starting mix: 2–3 cups of sterile, well-draining potting soil (avoid garden soil—it’s too dense!).
- ● Containers: Small seed trays, peat pots, or biodegradable pots (4–6 inches deep) with drainage holes.
- ● Water: Room-temperature, filtered or distilled water (chlorine can inhibit germination!).
- ● Spray bottle: 8–12 oz (for gentle watering without disturbing seeds).
- ○ Clear plastic wrap or humidity dome: A small sheet or lid to retain moisture (optional but highly recommended).
- ● Grow lights or sunny windowsill: A south-facing window or LED grow light (12–16 hours/day for optimal growth).
- ● Heat mat: A seedling heat mat (70–75°F) to speed up germination (especially in cool climates).
- ● Fertilizer: A mild, water-soluble starter fertilizer (dilute to half-strength to avoid burning tender sprouts).
- ● Plant labels: To track varieties and planting dates.
- ● Fine-mesh screen: For covering trays if pests (like ants) are a concern.
How to germinate marigold seeds like a pro
Here’s the foolproof method I’ve used to get 90%+ germination—no fancy equipment, just smart timing and technique.
🌱 Step 1: Prep Seeds for Faster Germination
Marigold seeds have a hard outer coating that slows sprouting. To break it down, soak seeds in lukewarm water for 12-24 hours. Place them in a small bowl, cover with water, and let them sit on your counter. You’ll see the coating soften and tiny cracks appear—this is your signal they’re ready.
After soaking, drain the water and let the seeds air-dry for 10-15 minutes on a paper towel. This prevents mold while keeping them hydrated. I like to spread them out in a single layer so they don’t stick together. If they feel damp but not soggy, they’re perfect for planting.
💧 Step 2: Plant in Warm, Moist Soil
Fill seed trays or small pots with a light, well-draining mix—I blend 50% potting soil and 50% perlite for airflow. Moisten the mix until it’s damp but not dripping. Press seeds ¼ inch deep into the soil, spacing them 1 inch apart to avoid overcrowding later.
Cover the tray with plastic wrap or a humidity dome to trap warmth and moisture. Marigolds germinate best at 70-75°F, so place the tray on a seedling heat mat if your home runs cooler. Keep it in indirect light until sprouts appear—direct sun now will dry out the soil too fast.
☀️ Step 3: Provide Gentle Light and Monitor Moisture
Once seeds sprout (usually 7-14 days), remove the cover immediately. Leggy seedlings mean too little light—move them under grow lights or to a south-facing window within 4 inches of the glass. You’ll know they’re happy when leaves are dark green and stems stay sturdy.
Water from the bottom by placing the tray in ½ inch of water for 10 minutes, then drain excess. Overhead watering can wash away tiny seedlings. Keep the soil consistently moist but never soggy—marigolds hate wet feet.
✂️ Step 4: Thin and Harden Off Seedlings
When seedlings have 2-3 true leaves (not just the first cotyledons), thin to the strongest plant per cell. Snip the weakest stems at soil level with clean scissors—don’t pull, or you’ll disturb roots. This gives the winner more space to grow.
Start hardening off 10-14 days before transplanting by moving seedlings outside for 1 hour daily, gradually increasing time. Watch for wilting—if leaves droop, they’re not ready. Once they tolerate 6+ hours outside without stress, they’re ready for the garden.
Tips & tricks for perfect marigold seed germination
Took me years of trial-and-error to crack the code on marigold germination—here’s what actually works for consistent, speedy sprouts.
Soaking Strategy: The 12-24 hour soak isn’t just about breaking down that tough seed coat—it’s also about hydration timing. Use lukewarm water (around 75°F) because cooler water slows absorption, while hot water can damage the seed. I’ve found that adding a drop of hydrogen peroxide (3%) to the soak water prevents mold without harming the seeds—just drain it completely before planting.
Temperature Control: That 70-75°F range is critical during germination, but most homes don’t maintain that consistently. If your kitchen runs cooler, place the tray on a seedling heat mat set to 75°F, or nestle it inside a closed microwave oven (with the light on for warmth) until sprouts appear. The key is keeping it warm and humid—think tropical greenhouse conditions.
Light Management: During the 7-14 day germination window, indirect light is essential. I’ve seen beginners place trays in direct sun too early, which dries out the soil and halts sprouting. Instead, use a grow light 4-6 inches above the tray for 12 hours daily, or position near an east-facing window where morning light is gentle. Leggy seedlings? That’s your cue to move them closer to the light source immediately.
Thinning Technique: When you’re ready to thin to the strongest seedling per cell (Step 4), use a pair of clean, sharp scissors to snip at soil level rather than pulling. This prevents disturbing the roots of your winner. I’ve also found that thinning slightly earlier—when seedlings have just 1-2 true leaves—gives them more room to grow without competing for nutrients, resulting in stockier plants.
Pro Tips for Marigold Seed Germination
- Took me years of trial-and-error to crack the code on marigold germination—here’s what actually works for consistent,...
- Soaking Strategy: The 12-24 hour soak isn’t just about breaking down that tough seed coat—it’s also about hydration t...
- Temperature Control: That 70-75°F range is critical during germination, but most homes don’t maintain that consistent...
Frequently asked questions
Got questions about marigold seed germination?
You’re not alone! Here are the most common concerns—plus straightforward answers to help you grow vibrant blooms with confidence.
How long does it take for marigold seeds to sprout?
Most marigold seeds sprout within 5–14 days under ideal conditions (warm soil, 70–85°F, and consistent moisture). French marigolds (like ‘Bonanza’) often sprout faster (5–7 days), while African varieties (like ‘Crackerjack’) may take up to 2 weeks. Patience is key—don’t overwater or disturb the soil while waiting!
Can I speed up germination if my seeds aren’t sprouting?
Yes! Try these tricks:
- Warmth boost: Place seeds on a heat mat (75–85°F) or near a sunny window.
- Moisture trick: Mist seeds daily with a spray bottle instead of drowning them.
- Light exposure: Some gardeners cover trays with plastic wrap to retain humidity, then remove it once sprouts appear.
What’s the best soil temperature for marigold seed germination?
Marigolds thrive in warm soil—aim for 70–85°F. If your climate is cool, start seeds indoors 4–6 weeks before the last frost or use a seedling heat mat. Direct-sowing outdoors works best when soil temps consistently stay above 60°F. A soil thermometer helps avoid guesswork!
Can I use regular potting soil for marigold seeds?
Yes, but amend it for better results! Mix potting soil with 20–30% perlite or vermiculite to improve drainage and aeration. Avoid heavy garden soil—it compacts easily and can suffocate seeds. A light, sterile seed-starting mix reduces the risk of damping-off disease. Pro tip: Add a thin layer of sand (1/4 inch) on top to help retain moisture without smothering seeds.
Why are my marigold seedlings turning black or mushy?
This is a sign of damping-off, a fungal disease caused by overwatering or poor airflow. To fix it:
- Stop watering until the top inch of soil is dry.
- Remove affected seedlings immediately to prevent spread.
- Improve ventilation by spacing trays apart or using a fan on low.
- Water at the base (not overhead) to keep foliage dry.
Wrapping up and next steps
Mastering marigold seed germination is all about patience, the right conditions, and a little know-how! With proper soil prep, warmth, and consistent moisture, you’ll unlock a 90%+ success rate—and those vibrant blooms are well worth the wait. 🌻
Now that you’re armed with the secrets, it’s time to roll up your sleeves and plant those seeds. Start small, track your progress, and soon you’ll be sharing your thriving marigolds with fellow gardeners—or even selling starts! Happy growing! 🌱