
Propagation
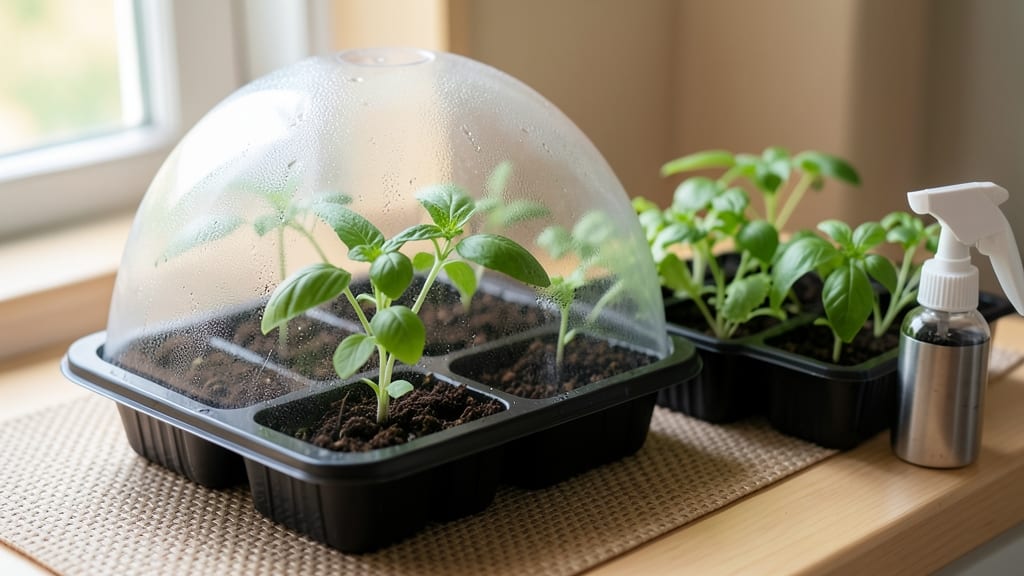
A seed starting humidity dome keeps your seedlings thriving by trapping just the right amount of moisture—no more leggy, weak sprouts. 🌱 I learned the hard way that skipping this step leads to damping-off, a fungal nightmare that wipes out trays of seedlings in days.
The dome creates a greenhouse effect that mimics a seed's natural environment, giving it the consistent moisture it craves without drowning roots.
You don’t need fancy equipment—clear plastic lids, plastic wrap, or even DIY domes from recycled containers work perfectly. The key is balance: too much humidity causes rot, too little stunts growth.
I’ve tried everything from humidity trays to simple plastic wraps, and the right setup makes all the difference in seedling strength. Most beginners overlook how critical this step is until they see their first healthy, stocky seedlings.
With the right dome, you’ll watch those first true leaves emerge bold and vibrant, not weak and stretched. The roots develop faster, the stems stay sturdy, and you avoid the heartbreak of seedlings collapsing before they even hit the light.
This is the secret weapon behind my 95% germination rate—no more wasting seeds or replanting failed starts.
Whether you’re growing tomatoes, peppers, or delicate herbs, this method works for any seed. The only real mistake? Forgetting to ventilate as seedlings grow. Here’s how to do it right without losing that critical moisture control.
📚 In This Guide
- What you need
- Instructions
- Tips and common mistakes
- Wrapping up and next steps
What you need
- ● Seed starting trays or containers: 10x20" plastic or wooden trays (or individual cell packs) with drainage holes.
- ● Seed starting mix: 1 bag (1-2 cubic feet) of high-quality, sterile seedling mix (avoid garden soil).
- ● Seeds: Your chosen variety (check seed packets for planting depth and spacing).
- ● Humidity dome or cover: Option 1: Clear plastic dome (sold as a seed starter kit).
- ● Option 2: Plastic wrap or a clear plastic lid (cut to fit snugly over the tray).
- ● Option 3: DIY dome using a plastic storage container with a ventilated lid.
- ● Water spray bottle: 1 (to mist seeds gently without disturbing them).
- ● Humidity tray or saucer: 1 (to hold water for indirect moisture control).
- ○ Heat mat (optional but helpful): 1 (for faster germination, especially for cool-season crops).
- ● Scissors or box cutter: For trimming plastic wrap or domes to size.
- ● Toothpicks or small sticks: To prop up plastic wrap if needed (prevents direct seed contact).
- ○ Fan (small, optional): For gentle airflow to prevent mold (use sparingly!).
- ○ Humidity gauge (optional): To monitor levels (ideal: 70-90% RH for germination).
- ● Plant labels & marker: To track seed varieties.
Step-by-Step instructions for building a DIY seed starting humidity dome
Here's how to create the perfect moisture cocoon for your seedlings—no fancy equipment needed.
🪴 Step 1: Select and Prepare Your Base Materials
Gather a clear plastic container with a lid that's slightly larger than your seed trays—think takeout containers or plastic food storage boxes work perfectly. I like to use 4-6 inch deep containers because they provide enough space for airflow while maintaining humidity. Clean the container thoroughly with warm, soapy water to remove any residues that could inhibit germination.
For the dome itself, you'll need a clear plastic lid that fits snugly but isn't airtight. If your container doesn't have one, cut the top off a 16-ounce plastic water bottle instead—just make sure the opening is wide enough to accommodate your seed tray. The key is creating a sealed but breathable environment where moisture circulates without trapping too much heat.
💧 Step 2: Set Up Your Seed Trays and Moisten the Soil
Fill your seed trays with sterile seed-starting mix (never garden soil—it's too dense and may carry pathogens). Press the mix down lightly so the surface is firm but not compacted. You want air pockets gone but the mix loose enough for tender roots to push through. Moisten the soil until it holds together when squeezed but doesn't drip water—this ensures even moisture without waterlogging.
Place your seed trays inside the container, spacing them evenly. If using a water bottle dome, nestle the bottle over the tray so the opening covers all seeds. The goal is to create a microclimate where humidity stays high enough for germination but not so high that mold forms. I like to mist the soil surface one last time before sealing—just enough to dampen it without creating puddles.
☀️ Step 3: Seal and Position for Optimal Germination
Place the lid or bottle dome on top and secure it lightly—you don't want a perfect seal, just enough to trap moisture. Position your setup in a warm location (ideally 70-80°F) away from direct sunlight, which can overheat the dome. A seedling heat mat set to 75°F speeds up germination dramatically, but even a warm kitchen counter works in a pinch.
Check daily for condensation on the inside of the dome—this is your signal that humidity is perfect. If you see water droplets forming, your setup is working. However, if the dome fogs up completely, it's too humid and you risk damping-off disease. In that case, remove the dome for 10-15 minutes daily to let excess moisture escape while keeping the soil damp.
⏰ Step 4: Monitor and Adjust as Seedlings Emerge
Once 50% of your seeds have sprouted (usually within 5-14 days, depending on the plant), remove the dome immediately. This prevents leggy growth and fungal issues that thrive in prolonged high humidity. You'll see the first true leaves appear—these are your signal to transition to a more open environment. At this stage, I like to place a small fan nearby on low setting to encourage sturdy stems.
Water from the bottom by placing the tray in ½ inch of water for 10-15 minutes—this keeps moisture consistent without disturbing delicate seedlings. If you notice condensation forming again after removing the dome, it's time to increase airflow slightly by propping the dome slightly open or moving the setup to a brighter, cooler spot.
Tips & tricks for perfect seed starting humidity control
Here's the secret to turning your DIY humidity dome into a seedling powerhouse—without the guesswork.
Container Depth Matters: The 4-6 inch depth recommendation in Step 1 isn't arbitrary—it creates the perfect balance. Shallower containers (under 4 inches) trap too much heat and risk overheating, while deeper ones (over 6 inches) can create cold spots at the bottom where roots won't establish properly. If you're using a water bottle dome, ensure the bottle is tall enough to cover all seed trays completely without touching the soil.
Soil Moisture Science: In Step 2, when you're pressing down the sterile seed-starting mix, aim for what gardeners call "squeeze-to-hold" moisture—not wet, not dry. I test this by rolling a small ball of moistened mix between my fingers—it should hold together but crumble when pressed firmly. This texture prevents both waterlogging and dry pockets where seeds might fail to sprout. For extra insurance, place a small piece of aluminum foil over the soil surface before sealing—it reflects light upward and helps maintain even moisture distribution.
Temperature Troubleshooting: The ideal 70-80°F range in Step 3 is crucial, but real-world conditions vary. If your kitchen runs cooler (below 70°F), place your dome on a seedling heat mat set to 75°F for the first 3-5 days until germination begins. Conversely, if your space is warmer (above 80°F), move the dome to a cooler location like a basement or garage during the day and bring it back to warmth at night. This mimics natural temperature fluctuations and prevents leggy seedlings.
Dome Ventilation Secret: The "lightly secure" instruction for sealing in Step 3 is key—you want enough moisture retention but not complete suffocation. I create tiny ventilation gaps by placing a toothpick or thin wooden skewer between the dome and container edges. This allows just enough airflow to prevent condensation buildup while maintaining humidity. Watch for condensation patterns: light droplets on the sides mean perfect humidity; heavy fogging means it's time to ventilate for 10-15 minutes.
Pro Tips for Seed Starting Humidity Dome
- Here's the secret to turning your DIY humidity dome into a seedling powerhouse—without the guesswork.
- Container Depth Matters: The 4-6 inch depth recommendation in Step 1 isn't arbitrary—it creates the perfect balance. ...
- Soil Moisture Science: In Step 2, when you're pressing down the sterile seed-starting mix, aim for what gardeners cal...
Frequently asked questions
Got questions about seed starting humidity domes?
You’re not alone! Here are answers to the most common concerns to help you grow confident, healthy seedlings.
Why do seedlings need a humidity dome at all?
A humidity dome creates a mini greenhouse effect, trapping moisture and warmth around seeds. Without it, soil dries out too quickly, leading to weak or failed germination. Think of it as a cozy blanket for your tiny sprouts!
How long should I keep the dome on my seedlings?
Most seedlings thrive under a dome for 7–14 days after germination, or until you see two true leaves (not the initial seed leaves). After that, gradually lift the dome daily to acclimate them to drier air—like weaning them off a humidifier!
What if condensation forms inside the dome?
Condensation is normal! It’s a sign of high humidity. To prevent mold or fungal issues, ventilate briefly daily by lifting the dome for 5–10 minutes. If you see black spots (fungus), remove the dome immediately and increase airflow.
Can I reuse a humidity dome for multiple seed batches?
Yes! Clean the dome with soapy water and disinfect it with a 10% bleach solution (1 part bleach to 9 parts water) between uses. Avoid harsh chemicals that could linger and harm seeds. Store it in a dry, shaded spot.
What’s a good alternative if I don’t have a humidity dome?
No dome? No problem! Try these:
- Plastic wrap: Stretch it loosely over trays (poke holes for airflow).
- Clear plastic bag: Cover each pot with a bag secured by a rubber band.
- DIY dome: Use a repurposed glass jar or cloche (like a mini greenhouse).
Wrapping up and next steps
Mastering the seed starting humidity dome is your secret weapon for nurturing sturdy, vibrant seedlings—no guesswork required! With the right balance of moisture, airflow, and warmth, you’ll set your plants up for success from day one. 🌱✨
Now that you’re armed with the knowledge, it’s time to roll up your sleeves and start experimenting. Try your hand at building your own dome or fine-tune your setup with the tips shared. Watch those tiny sprouts grow into healthy, thriving plants—you’ve got this!