
Lawn
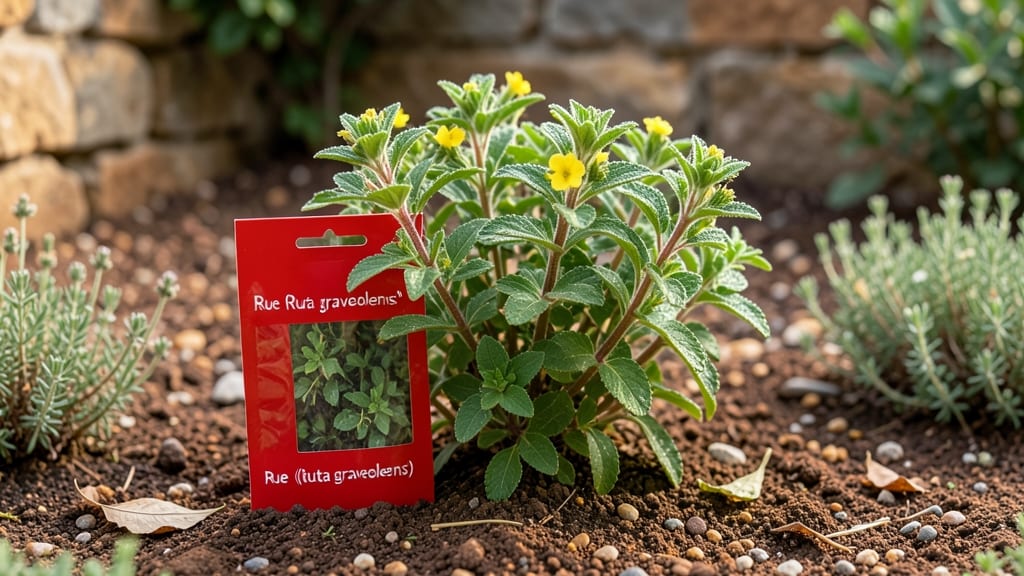
Reading a seed packet isn’t just about planting dates—it’s your gardening cheat sheet. 🌱 That tiny label holds the secrets to whether your seeds will thrive or flop, from how deep to drop them to when they’ll finally bloom.
I’ve seen beginners ignore this info and end up with spindly seedlings or no harvest at all—don’t let that be you.
The first thing to spot is days to maturity, which tells you when to expect flowers or fruit. Pair that with your last frost date to plan your schedule, and check the hardiness zone to know if the plant can handle your climate.
Then there’s planting depth (usually marked with an arrow) and spacing—crowding seeds leads to competition, while leaving too much room wastes space.
You’ll also find sunlight needs (full sun vs. partial shade) and soil preferences—some seeds need rich soil, others thrive in poor conditions. Germination time tells you when to expect sprouts, so you know if you’re watering correctly. Ignore any of this, and you’re basically planting in the dark.
Pro tip: Bookmark this guide next to your seed packets—it’s the difference between a garden that works and one that leaves you scratching your head. Once you master these details, you’ll grow like a pro, even with the trickiest seeds.
📚 In This Guide
- What you need
- Instructions
- Tips and common mistakes
- Wrapping up and next steps
What you need
- ● Seed packet(s) – The star of the show! Ensure they’re clean, dry, and free of tears or damage.
- ● Magnifying glass or reading glasses – Tiny print? No problem! A magnifier (or even a phone app with zoom) helps read fine details like spacing or depth.
- ● Notepad and pen – Jot down key info like planting dates, sunlight needs, or soil prep tips to avoid forgetting later.
- ● Ruler or measuring tape – For precise spacing (inches or centimeters matter!). A 12-inch ruler works for most seeds.
- ● Calendar or planting guide – Cross-reference your seed packet’s recommendations with your local frost dates (check the USDA Plant Hardiness Zone Map for your area).
- ○ Gloves (optional but handy) – Protect your hands from dirt, thorns, or prickly seeds (think sunflower or okra!).
- ● Seed starting tray or biodegradable pots – For indoor seedlings before transplanting (great for tomatoes or peppers).
- ● Soil moisture meter – Ensures your seeds get the right dampness (overwatering is a seed’s worst enemy!).
- ● Plant labels or markers – Avoid mix-ups in your garden by labeling varieties (e.g., ‘Early Girl’ tomatoes).
- ● Garden journal or app – Track planting dates, growth stages, and notes (like “needs trellis” for vining plants).
- ● Sunlight meter or app – Verify your garden’s light conditions (e.g., full sun = 6+ hours/day).
- ● Your USDA Hardiness Zone – Affects planting times (find it here).
- ● Soil type – Sandy? Clay-heavy? Amend as needed (seed packets often suggest “loamy soil”).
- ● Last frost date – Critical for cool-season vs. warm-season seeds (e.g., spinach vs. beans).
- ● Pest risks – Some seeds (like cucumbers) may warn about squash bugs or deer.
How to decode seed packets for perfect planting Timing
Here’s the system I use to translate seed packets into foolproof planting schedules—no guesswork, just results.
📅 Step 1: Identify the Planting Zone and Date Ranges
Every seed packet lists a USDA Hardiness Zone range—this tells you where the plant thrives year-round. For example, if your zone is 6-7 but the packet says zones 8-10, that plant won’t survive winter in your area. Cross-reference with your local frost dates: most packets provide last frost dates (e.g., "plant after last frost") or days to maturity (e.g., "60 days to harvest").
I always check my county’s average last frost date (usually March-April in most regions) and count backward from the maturity date. For instance, if basil takes 45 days to harvest and your last frost is April 15, you’ll need to start seeds by February 20 to enjoy fresh basil by summer. Pro tip: Write the target planting window on the packet with a marker—don’t rely on memory.
📏 Step 2: Understand Depth, Spacing, and Light Requirements
Seed depth is critical—planting too deep delays germination, while planting too shallow risks drying out. Packets specify depth in inches (e.g., "¼ inch deep"), so use a ruler or your finger as a guide (a standard fingernail is about ⅛ inch). Spacing matters too: crowding seeds leads to weak, competitive seedlings, while over-spreading wastes space. For example, tomatoes need 18-24 inches apart at maturity, but you’ll start them 2-3 inches apart in seed trays before transplanting.
Light requirements are often overlooked. Most vegetables need full sun (6+ hours daily), but some (like lettuce) tolerate partial shade (3-4 hours). If your packet says "direct sunlight," don’t skimp—leggy seedlings are a sign of insufficient light. I keep a small grow light handy for indoor starts, especially in cloudy early spring.
⏳ Step 3: Calculate Germination Time and Adjust for Conditions
Germination time varies wildly—some seeds (like beans) sprout in 3-5 days, while others (like parsley) take 14-21 days. Packets list this under "days to germinate," but real-world factors like soil temperature and moisture can speed up or delay sprouting. For example, tomatoes germinate fastest in 75-85°F soil, while peas prefer 60-70°F. If your basement is chilly, use a seedling heat mat to mimic ideal conditions.
Here’s the thing—don’t water the seeds until you see consistent moisture in the soil. Overwatering right after planting can drown seeds before they’ve had a chance to absorb moisture. Instead, mist the soil lightly until it’s damp but not soggy, then cover the tray with plastic wrap to retain humidity. Check daily and remove the wrap once sprouts appear.
🌱 Step 4: Plan for Transplanting and Successive Plantings
Some packets suggest direct sowing (planting seeds straight into the garden), while others recommend starting indoors (e.g., "transplant after last frost"). If you’re transplanting, calculate a 4-6 week indoor growing period before the last frost—this ensures seedlings are sturdy enough to handle outdoor conditions. For example, if your last frost is May 10, start tomatoes indoors by March 20 to transplant by early May.
Don’t forget about successive plantings—many vegetables (like lettuce or radishes) bolt (go to seed) quickly in heat. Packets often suggest planting every 2 weeks for a continuous harvest. Mark your calendar now: if your first planting of radishes takes 30 days to mature, and your last frost is April 15, schedule your next batch 2 weeks later to enjoy fresh radishes all summer.
⚠️ Step 5: Watch for Special Instructions and Avoid Common Pitfalls
Some seeds need stratification (a cold period to break dormancy), while others require scarification (scratching the seed coat). Packets will specify these steps—ignore them at your peril. For example, lupine seeds need 3 months of cold stratification, while tomato seeds benefit from a warm, moist soak for 24 hours before planting. Skipping these steps can mean no germination or poor growth.
Watch out for damping-off disease—a fungal issue that turns seedlings to mush overnight. It’s often caused by overwatering or poor air circulation. To prevent it, avoid watering from above (use a tray with pebbles and water instead), and space seedlings at least 1 inch apart for airflow. If you see black stems at the soil line, act fast: remove affected seedlings and reduce watering immediately.
Tips & tricks for decoding seed packets like a seasoned gardener
These insights will help you decode seed packets with confidence and avoid the common pitfalls that trip up even experienced gardeners.
Zone Confusion: If you're unsure about your USDA Hardiness Zone, use the USDA Plant Hardiness Zone Map available online to pinpoint your exact location. Many garden centers also have zone maps—bring your seed packet and ask for verification. Remember, a zone mismatch can mean the difference between thriving plants and wasted effort. I always double-check this before buying seeds, especially for heat-loving plants like peppers or tomatoes.
Germination Timing: The 3-4 hours of light requirement mentioned for seedlings isn't just about sunlight—it's about photosynthesis kickstarting growth. Place your seed trays near a south-facing window or under a grow light to ensure consistent light exposure. For seeds with longer germination times (like parsley's 14-21 days), mark the planting date on the tray with a permanent marker so you don't lose track.
Soil Temperature Secrets: The ideal 75-85°F soil temperature range for tomatoes is harder to achieve than it sounds. If you're starting seeds indoors in early spring, consider using a seedling heat mat set to 70°F—this mimics outdoor conditions and speeds up germination. For outdoor planting, use a soil thermometer to verify temperatures before sowing. I've learned this the hard way after waiting weeks for seeds that never sprouted because the soil was too cold.
Transplanting Strategy: When following the 4-6 week indoor growing period before transplanting, harden off seedlings gradually by moving them outdoors for increasing durations each day. Start with just 30 minutes in partial shade, then gradually increase exposure. This acclimation period prevents transplant shock, which can stunt growth or even kill young plants. I always begin hardening off two weeks before the planned transplant date.
Pro Tips for Read A Seed Packet
- These insights will help you decode seed packets with confidence and avoid the common pitfalls that trip up even expe...
- Zone Confusion: If you're unsure about your USDA Hardiness Zone, use the USDA Plant Hardiness Zone Map available onli...
- Germination Timing: The 3-4 hours of light requirement mentioned for seedlings isn't just about sunlight—it's about p...
Frequently asked questions
Got questions about reading seed packets?
You’re not alone! Here are answers to the most common ones to help you grow with confidence.
What if my seed packet doesn’t have a planting date?
If the packet lacks a date, check the days to maturity and your frost dates (find them via the USDA Plant Hardiness Zone Map). For cool-season grasses (like fescue), plant in early fall; for warm-season (like Bermuda), wait until soil temps hit 60°F+. When in doubt, plant before the last frost for spring or after the first frost for fall.
Can I plant seeds too early or too late?
Yes! Planting too early (e.g., warm-season seeds in cold soil) can stunt growth or invite pests. Planting too late (e.g., cool-season seeds in summer heat) may cause poor germination. Use a soil thermometer ($10–$15) to verify temps: 50–60°F for cool-season, 65–75°F for warm-season. Pro tip: Check your local extension office for hyper-local advice!
What if my packet says “direct sow” but I want to start indoors?
Some seeds (like tomatoes or peppers) thrive indoors first, but lawn seeds rarely do—most need direct contact with soil for germination. If your packet says “direct sow,” stick to it! For non-lawn seeds, adjust spacing (e.g., sow thicker indoors, then thin seedlings). Exception: Herbs like basil or flowers like marigolds can start indoors 4–6 weeks before the last frost.
How do I handle leftover seeds after planting?
Store unused seeds in a cool, dry place (like a sealed jar in the fridge) for 1–2 years. Label them with the variety and date! For long-term storage (3+ years), use silica gel packets or a vacuum-sealed bag. Note: Older seeds may germinate slower—test a few in damp paper towels before replanting.
Why did my seeds fail to sprout even after following the packet?
Common culprits:
- Old seeds (test germination rate first).
- Poor soil contact (press seeds lightly into soil).
- Temperature/moisture issues (keep soil consistently damp, not soggy).
- Depth mistakes (too deep = no light; too shallow = drying out).
Wrapping up and next steps
Reading a seed packet might seem overwhelming at first, but once you master the key details—like planting dates, depth, and spacing—you’ll unlock the secret to a thriving garden! 🌱 With these skills, you’re ready to grow confidently and turn your green space into a lush paradise. Next up? Grab those packets, head outside, and start planting—your future harvest (or dream lawn) is waiting!