
Propagation
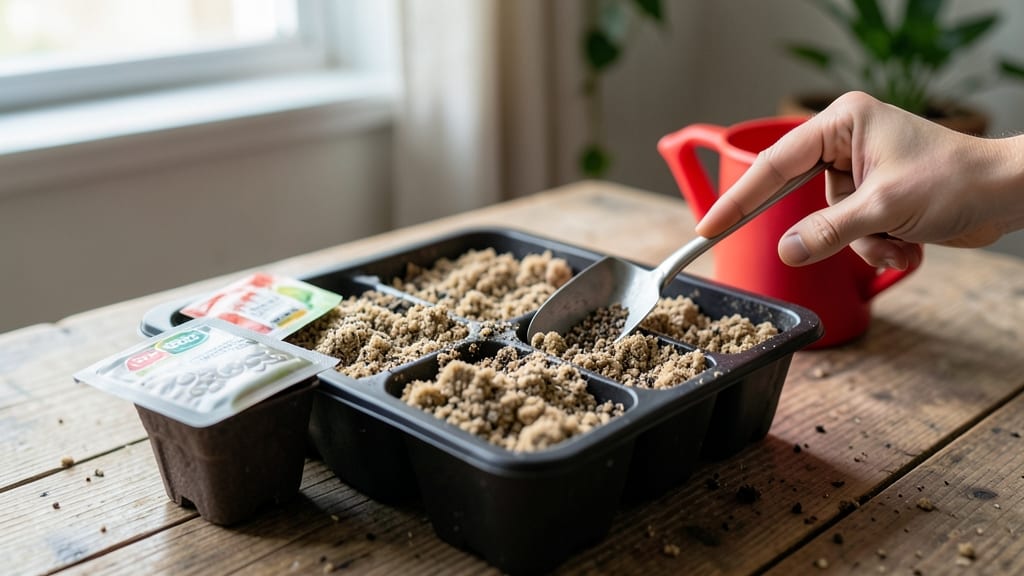
The Sun Gro Seed Starting Mix is the secret weapon behind my fastest, strongest sprouts every season—no more weak, leggy seedlings. 🌱 This specialized blend holds moisture just right while preventing the dreaded damping-off that wipes out trays of seedlings before they even stretch toward the light.
Unlike regular potting soil, this mix is sterile, lightweight, and packed with perlite for perfect drainage. I start my tomatoes and peppers in it, and within 7-10 days, those first true leaves appear—bold and vibrant, not the sad little sprouts you get with cheap mixes.
The key is keeping it damp (not soggy) and using clear plastic domes to trap humidity until germination.
Once your seedlings hit that second set of leaves, you’ll notice the difference: thick stems that don’t snap when you transplant, and roots eager to explore new soil.
No more losing half your tray to mold or overwatering—this mix does the hard work of balancing moisture and aeration so you don’t have to stress.
Works for veggies, herbs, and flowers alike, and scales from tiny egg cartons to deep trays. The only rule? Avoid overcrowding—give each seed its own space to grow into a powerhouse plant. Ready to upgrade your seed-starting game?
📚 In This Guide
- What you need
- Instructions
- Tips and common mistakes
- Wrapping up and next steps
What you need
- ● Sun Gro Seed Starting Mix – 5-10 lbs (2.3-4.5 kg), depending on your seedling tray size (e.g., 1020 trays, 72-cell packs, or 288-cell flats).
- ● Seedling trays or containers – With drainage holes (plastic, biodegradable, or peat pots).
- ● Seeds – High-quality, fresh seeds of your choice (check planting depth requirements per variety).
- ● Watering can or spray bottle – With a fine mist setting to avoid disturbing seeds.
- ○ Heat mat (optional but recommended) – For seeds needing warmth (e.g., 70–85°F for tropical plants).
- ● Grow lights or sunny windowsill – 12–16 hours of light daily for optimal growth.
- ● Humidity dome or plastic wrap – To retain moisture while seeds germinate.
- ● Gloves – To keep hands clean and protect from soil-borne pathogens.
- ● Small hand trowel or scoop – For evenly distributing soil.
- ● pH testing kit – To ensure your mix is 5.8–6.2 (Sun Gro is pre-balanced, but testing never hurts!).
- ○ Fertilizer (optional) – A low-dose, water-soluble seed starter fertilizer (e.g., 5-10-5) after true leaves appear.
- ● Labeling tags & marker – To track seed varieties and planting dates.
- ● Fine mesh or screen – For covering trays if pests (like fungus gnats) are a concern.
How to use Sun Gro seed starting mix for reliable germination
This lightweight mix is engineered for speed and strength—here’s how to leverage its precision for your seedlings.
🌱 Step 1: Sterilize and Prep Your Containers
Start with clean containers—sterilize them by soaking in a 1:10 bleach-to-water solution for 10 minutes, then rinse thoroughly. Sun Gro’s sterile formula means you’re eliminating two potential failure points at once: contaminated soil and dirty pots. I like to use 4-inch square cells because they give roots room to establish without overcrowding.
Fill each cell ¾ full with the Sun Gro mix, pressing down gently to remove air pockets. The mix should feel like a damp sponge—not bone-dry, not soggy. Tap the tray on the counter once or twice to settle it evenly. Here’s the thing—if you pack it too tightly, seedlings will struggle to push through, but if it’s too loose, they’ll dry out before germination.
💧 Step 2: Moisten the Mix Before Sowing
Water the mix lightly with a spray bottle until it’s evenly moist but not dripping. Sun Gro’s peat-perlite-vermiculite blend holds moisture well, but you still need to pre-wet it to trigger germination. I aim for the consistency of a wrung-out sponge—press your finger in; if it holds shape but doesn’t ooze, you’re good.
Let the mix sit for 10 minutes to absorb water fully. This step is critical because dry seeds won’t germinate, and over-saturated mix can suffocate them. If you’re sowing 4 trays at once, work in batches to keep the mix from drying out while you finish.
☀️ Step 3: Sow Seeds at the Correct Depth
Refer to your seed packet for depth—most fine seeds (like lettuce or basil) need ¼ inch of coverage, while larger seeds (like beans) go ½ inch deep. Sun Gro’s fine texture lets you sow precisely without burying too deeply. I use a seed-sowing mat to keep seeds evenly spaced; just press them into the mix so they make firm contact with the soil.
Cover seeds with a thin layer of additional mix—just enough to obscure them. Gently pat the surface to ensure good seed-to-soil contact. Here’s where Sun Gro shines: its low density means seeds won’t sink deeper than intended, which can delay germination. Once sown, place the tray in a warm, dark spot (like a seedling heat mat set to 75°F) until sprouts appear.
⏰ Step 4: Maintain Ideal Moisture and Light
After germination (usually 5-10 days), move seedlings to bright, indirect light for 24 hours, then gradually introduce 14-16 hours of light daily. Sun Gro’s fast-draining formula means you’ll need to water every 2-3 days—check by sticking your finger ½ inch deep; if it’s dry, water until moisture reaches that depth. Avoid wetting the leaves to prevent disease.
Watch for first true leaves (the second set after the initial cotyledons)—this is your cue to thin seedlings if overcrowded. Sun Gro’s sterile, nutrient-rich profile means you won’t need fertilizer for 4-6 weeks, but if seedlings look pale, a diluted fish emulsion can give them a boost.
Tips & tricks for perfect seed starting with Sun Gro mix
Sun Gro's precision formula changes the game for seed germination—here's how to maximize its potential for rapid, vigorous sprouts.
Germination Temperature: The 75°F heat mat recommendation isn't arbitrary—it's the sweet spot for most seeds to break dormancy. If your home is cooler, place the tray on top of your fridge (not inside) for consistent warmth. For tropical seeds like peppers, you can gently increase to 80°F, but never exceed 85°F or you risk damping off.
Sowing Precision: In Step 3, when covering seeds with the thin layer of mix, use a fine-mesh strainer to sift the Sun Gro—this creates an even, ultra-light coverage that won't suffocate tiny seedlings. For extra precision with fine seeds, I sprinkle a pinch of vermiculite over the seeds before adding mix; it helps maintain moisture while keeping seeds visible.
Light Transition Strategy: That 24-hour bright, indirect light period after germination is crucial for preventing leggy seedlings. Place your tray near an east-facing window or under a simple LED grow light (no fancy setup needed). After 24 hours, gradually increase light exposure by moving the tray closer to the light source over 2-3 days—this mimics natural sunrise conditions and strengthens stems.
Troubleshooting Damping Off: If you notice seedlings collapsing at the soil line (a sign of damping off), immediately remove affected plants and increase airflow. Sun Gro's fast-draining formula helps prevent this, but overcrowded trays or excessive moisture can trigger it. After removing infected seedlings, let the remaining mix dry out completely for 24 hours before watering again—this breaks the fungal cycle.
Pro Tips for Sun Gro Seed Starting Mix
- Sun Gro's precision formula changes the game for seed germination—here's how to maximize its potential for rapid, vig...
- Germination Temperature: The 75°F heat mat recommendation isn't arbitrary—it's the sweet spot for most seeds to break...
- Sowing Precision: In Step 3, when covering seeds with the thin layer of mix, use a fine-mesh strainer to sift the Sun...
Frequently asked questions
Got questions about using Sun Gro Seed Starting Mix? You’re not alone! Here are answers to the most common ones to help you grow confidently.
What’s the best time to start seeds in Sun Gro mix?
The ideal time depends on your plants, but a general rule is to start seeds 6–8 weeks before the last frost date for cool-season crops (like lettuce or peas) and 4–6 weeks before transplanting for warm-season plants (tomatoes, peppers). Sun Gro’s lightweight mix keeps seeds happy while they germinate, so timing is key—check your local frost calendar!
Can I reuse Sun Gro Seed Starting Mix?
Not recommended! After one use, the mix breaks down and may harbor fungi or pests. For sustainability, compost the spent mix or save it for amending garden soil. Fresh mix ensures optimal drainage and sterilization for your next batch of seeds.
What’s a good alternative if I can’t find Sun Gro?
Look for sterilized, peat-based seed-starting mixes with perlite or vermiculite (like FoxFarm Seedling Mix or Black Gold Seedling Mix). Avoid garden soil—it’s too dense and can compact, stunting root growth. DIY blends (50% peat moss + 50% perlite) work in a pinch!
My seeds aren’t germinating—what’s wrong?
Check these first: moisture (keep mix damp, not soggy), temperature (most seeds need 65–75°F), and light (place trays in a sunny spot or under grow lights). If seeds stay dry or cold, they’ll stall. For stubborn seeds, try a warm water soak (24 hours) before planting.
Do I need to fertilize Sun Gro mix right away?
Nope! Sun Gro is sterile and fertilizer-free to prevent seed burn. Wait until seedlings sprout their first true leaves (not the initial seed leaves) before adding a dilute, water-soluble fertilizer (like ½-strength fish emulsion). Over-fertilizing early can harm delicate roots.
Wrapping up and next steps
Starting your seeds with Sun Gro Seed Starting Mix sets you up for success—fast germination, robust seedlings, and a thriving garden ahead! 🌱 This lightweight, nutrient-rich blend is your secret weapon for precision growth, whether you're a seasoned gardener or just beginning your green thumb journey.
Now that you’re equipped with the right mix and knowledge, it’s time to get growing. Grab your trays, fill them with confidence, and watch your seeds transform into strong, vibrant plants. Happy planting—your future harvest is waiting! 🌿✨