
Lawn
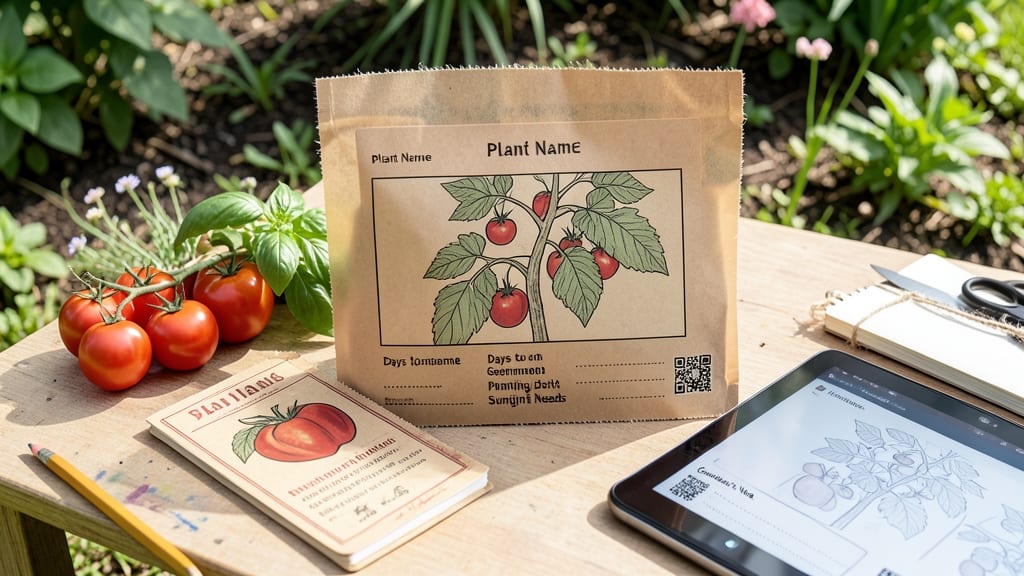
Custom seed envelope templates turned my chaotic seed collection into a system that actually works. 🌱 Before this, I'd mislabel packets, forget varieties, and waste seeds I couldn't identify—until I found the perfect template that fits my needs exactly.
The beauty of these templates is their flexibility: you can track everything from harvest date to germination notes, plus add your own custom fields like "best companion plants" or "disease resistance."
I print mine on waterproof paper and store them right with the seeds, so I never lose track of what I've saved.
What this system gives you is peace of mind—no more guessing which packet contains your prized heirloom tomatoes or which one might be a dud. You'll see your seed collection grow organized, your garden planning become effortless, and your saved seeds perform exactly as expected year after year.
Works for any home gardener, from beginners saving their first tomatoes to seasoned seed savers expanding their collections. Here's how to make it work for your space and needs!
📚 In This Guide
- What you need
- Instructions
- Tips and common mistakes
- Wrapping up and next steps
What you need
- ● Plain seed envelopes: 50–100 (size: 4" x 9" or A6, depending on preference)
- ● Cardstock or thick paper: 1 sheet (8.5" x 11" or A4) for the template design
- ● Printable seed envelope template: Digital file (download from free sources like blank">Etsy or blank">Canva)
- ● Printer: Inkjet or laser (for crisp printing)
- ● Scissors or paper cutter: For clean cuts
- ● Ruler: (12" or 30cm) for precise measurements
- ● Pencil or fine-tip marker: For tracing designs
- ○ Adhesive (optional but helpful): Glue stick or double-sided tape for securing labels
- ● Washi tape or decorative borders: For a polished look
- ● Stamps or embossing tools: To add texture or branding
- ● Clear laminator sheets: For waterproofing (great for outdoor storage!)
- ● Color printer: To add vibrant designs or photos
- ● Seed-saving labels: Pre-made tags for extra organization
How to create a custom seed envelope template for organized seed saving
Here’s how I design my seed labels—simple, clear, and foolproof for any seed-saving system.
📝 Step 1: Gather Your Labeling Supplies
You’ll need a few basic items: a permanent marker or fine-tip pen, a ruler for precision, and either plain kraft paper envelopes or seed-saving labels if you prefer pre-made ones. I like kraft paper because it’s sturdy and blends seamlessly with seed packets. Grab a pencil first—you might want to sketch out your design before committing to ink.
If you’re using plain envelopes, measure the front panel to plan your layout. Most standard envelopes have about 3-4 inches of vertical space—enough for all the key details without crowding. Leave a ½-inch margin at the top and bottom to avoid smudging when you seal them later.
📌 Step 2: Design the Label Layout
Start with the basics: variety name (bold and clear), year harvested, and location grown. I also add a brief note like “Heirloom” or “Hybrid” if relevant—this helps me spot traits quickly later. Use a ruler to create neat, straight lines for alignment; uneven writing makes labels hard to read when you’re rummaging through your stash in a hurry.
For extra organization, I include a small icon or symbol (like a sun for sun-lovers or a water droplet for moisture-sensitive seeds) in one corner. This visual cue saves seconds when sorting later. Keep the design simple—your handwriting should be the star, not the frills.
✏️ Step 3: Write Legibly and Test Dry
Before committing to permanent ink, write your label in pencil to check readability and spacing. Press lightly so the marks fade easily if you need to adjust. I like to write the variety name first in all caps—it’s the most critical info. Then add the year in smaller print below it, followed by any notes in a tight column to the right.
If you’re using a fine-tip pen, test it on scrap paper first. Some pens bleed through kraft paper, and you don’t want your labels looking like a Rorschach test. A black or dark blue pen works best—it won’t fade over time like lighter colors.
📂 Step 4: Seal and Store for Long-Term Use
Once your labels are dry, fold the envelope and seal it carefully. I use a wax seal or clear packing tape to keep moisture out—seed packets can last years if stored properly, but dampness ruins everything. Store them in a cool, dark place (like a sealed container in your pantry) to prevent light from degrading the paper over time.
Here’s the thing—I always include a small “test batch” of seeds in one envelope from each variety. This way, if I’m unsure about germination rates later, I can quickly check without digging through the whole packet. It’s a tiny habit that saves major headaches.
🔄 Step 5: Update and Rotate Your System
At the start of each growing season, review your labels and add any new notes—like whether the seeds performed well or if they needed special conditions. I also rotate my storage containers seasonally to keep older seeds in front. This ensures you’re not accidentally planting last year’s batch of questionable viability.
If you’re saving seeds from multiple gardens or climates, consider color-coding your envelopes by location. A red dot for my urban garden, blue for the rural plot—it’s a visual shortcut that makes inventory checks a breeze. The key is consistency; once you settle on a system, stick with it.
Tips & tricks for perfect seed envelope labels
These little details make all the difference between a chaotic seed collection and a perfectly organized system.
Precision Matters: When measuring your envelope space in Step 1, use a ruler to mark that ½-inch margin at the top and bottom—this prevents smudging when you seal them later. I’ve ruined too many labels by skipping this step and ending up with ink bleeding onto the fold. Trust me, it’s worth the extra 30 seconds now to save frustration later.
Visual Organization: In Step 2, that small icon or symbol in the corner isn’t just decoration—it’s a game-changer for visual sorting. I use a sun symbol for heat-loving plants and a water droplet for moisture-sensitive varieties. This quick glance system saves me minutes every time I’m inventorying seeds. The key is keeping it simple: one symbol per category maximum.
Pencil First: Before committing to permanent ink in Step 3, sketch your label in pencil. This lets you adjust spacing and test readability without wasting materials. I’ve learned the hard way that once you’ve written "Heirloom Tomato" in permanent marker only to realize it doesn’t fit—don’t make my mistake! Press lightly so pencil marks fade easily if you need to reposition anything.
Storage Wisdom: For Step 4, I’ve found that clear packing tape works better than wax seals for long-term storage. Wax can melt in hot pantries, while clear tape creates a better moisture barrier. Store your labeled envelopes in airtight containers with silica gel packets to absorb any moisture. I keep mine in a dedicated seed-saving box in my pantry, organized by plant family.
Pro Tips for Seed Envelope Template
- These little details make all the difference between a chaotic seed collection and a perfectly organized system.
- Precision Matters: When measuring your envelope space in Step 1, use a ruler to mark that ½-inch margin at the top and bottom—this prevents smudging when you seal them later.
- Visual Organization: In Step 2, that small icon or symbol in the corner isn’t just decoration—it’s a game-changer for visual sorting.
Frequently asked questions
Got questions about seed envelope templates? You’re not alone!
Here are answers to the most common concerns—from timing to troubleshooting—so you can save seeds like a pro.
When is the best time to label seeds with a template?
Label seeds immediately after harvesting—before moisture or temperature changes alter germination rates. If storing long-term, use a template to note the harvest date, variety, and location. Pro tip: Add a “best by” date (usually 1–2 years for most seeds) to avoid surprises!
Can I create a seed envelope template without a printer?
Handwrite labels on plain paper or cardstock, then tape them to envelopes. For a polished look, use a fine-tip marker or stencils. Need durability? Laminate handwritten labels or use waterproof ink. DIY templates work just as well—just keep details clear and legible.
What info should I include on my seed envelope template?
At minimum, add:
- Variety name (e.g., “Heirloom Tomato ‘Brandywine’”)
- Harvest date (critical for viability)
- Location (garden bed or container)
- Germination notes (e.g., “needs stratification”)
- Quantity (if splitting seeds)
How do I troubleshoot faded or unreadable labels?
Faded labels? Try:
- Reapply details with a pencil (less prone to fading than ink).
- Use a UV-resistant marker for long-term storage.
- Store envelopes in a cool, dark place (like a sealed jar) to slow degradation.
- Photograph labels digitally as a backup!
Are there free seed envelope templates online?
Yes! Check out these free resources:
- Seed Savers Exchange (printable PDFs)
- Etsy (search “free seed packet template”)
- Canva (editable designs)
Wrapping up and next steps
Creating your own seed envelope template is a game-changer for any gardener—it’s simple, practical, and saves you time (and headaches!) during planting seasons. Whether you’re a beginner or a seasoned pro, customizing labels ensures your seeds stay organized, fresh, and ready for action. 🌱
Now that you’ve got the tools and tips, it’s time to put that template to work! Start small—label just one batch of seeds this season, and watch how much easier your gardening becomes. Happy planting! 🌿