
Propagation
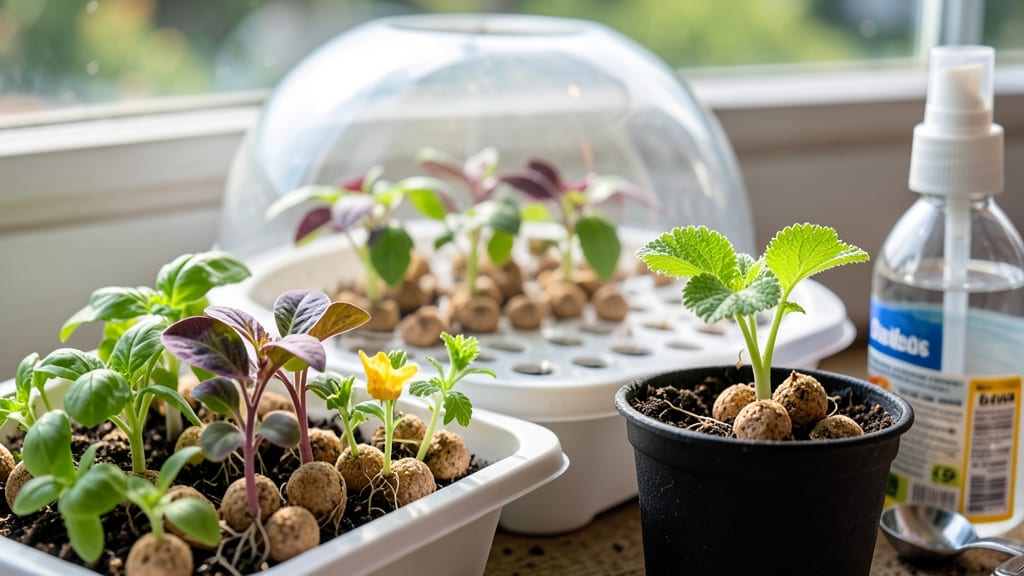
My Jiffy seed starting kit transformed my seedling struggles into a foolproof system—no more damp paper towels or fussy trays. These compressed peat pellets expand into perfect little pots, holding moisture just right while keeping roots aerated.
Within 60 days, you'll watch tiny sprouts turn into sturdy transplants ready for the garden, all without the mess of traditional seed-starting methods.
Here's the beauty: no special equipment needed. Just soak the pellets, pop seeds in, and tuck them under a grow light or sunny windowsill. The kit's portability means you can move them easily—whether balancing on a kitchen counter or setting up a temporary greenhouse on the patio.
I've started everything from tomatoes to herbs this way, and the success rate is shockingly high.
You'll notice seedlings emerge faster and stronger than ever before, thanks to the ideal growing conditions these pellets create. The biggest payoff? Getting a 4-6 week head start on the growing season, which means earlier harvests and more time enjoying fresh produce.
Plus, the pellets break down cleanly when transplanting, so no root disturbance.
Fair warning: overwatering is the only real pitfall—just let the pellets dry slightly between waterings. If mold appears, unpot the seedlings and let them air out for a day.
With these simple adjustments, you'll be growing like a pro, even if your black thumb has failed before. Ready to try it?
📚 In This Guide
- What you need
- Instructions
- Tips and common mistakes
- Wrapping up and next steps
What you need
- ● Jiffy Seed Starting Kit: Includes 7-10 peat pellets (check the package for exact count).
- ● Seeds: Choose fast-growing varieties like basil, lettuce, or marigolds (check seed packet for days to germination).
- ● Seedling tray or flat: A shallow tray with drainage holes (or repurpose a plastic container with holes drilled in the bottom).
- ● Grow lights or sunny windowsill: 6-8 hours of light daily (grow lights are ideal for consistent results).
- ● Watering can or spray bottle: For gentle hydration—avoid overwatering!
- ○ Potting soil or seed-starting mix: Lightweight and sterile (optional if using Jiffy pellets alone).
- ● Scissors or knife: To open Jiffy pellets if needed.
- ● Labels and markers: To track seed types and planting dates.
- ● Humidity dome or plastic wrap: Creates a mini greenhouse to retain moisture.
- ● Heat mat: Speeds up germination for slower seeds (e.g., peppers or tomatoes).
- ● Fertilizer (diluted): A balanced liquid fertilizer (5-5-5 or 10-10-10) for faster growth after sprouting.
- ● Tweezers: For delicate seed placement.
- ● Garden journal: To log progress and tips!
How to use a Jiffy seed starting kit for reliable germination
Here’s how I’ve mastered stress-free seed starting with Jiffy pellets—no special tools or guesswork required.
Soak the Jiffy Pellets to Activate Growth
Place each Jiffy pellet in a shallow tray or individual container and cover them completely with room-temperature water for 10-15 minutes. You’ll know they’re ready when they’ve expanded to about 3-4 times their original size and feel firm but still slightly spongy. The goal is full hydration without waterlogging—if they stay rock-hard after soaking, let them sit another 5 minutes.
Drain any excess water through the tray’s drainage holes. Over-soaking can drown the pellets, while under-soaking leaves them too dense for roots to penetrate. I like to tap the tray gently on the counter to redistribute moisture evenly—this prevents dry spots where seeds might fail to sprout.
Plant Seeds at the Correct Depth and Spacing
Gently press each Jiffy pellet into a seed-starting tray or individual cell pack, making sure the drainage holes align. For most seeds, plant 1-2 seeds per pellet at a depth of twice the seed’s diameter—this ensures they have enough energy to reach the surface without rotting. For example, tomato seeds (about 1/4-inch diameter) go 1/2-inch deep, while tiny basil seeds need only 1/8-inch coverage.
Use a toothpick or pencil to create a small hole if the pellet feels too firm. Label each pellet with the seed type and date—once germination starts, identical-looking sprouts become indistinguishable. I’ve lost entire trays of seedlings to mislabeling, so this step saves headaches later.
Provide Ideal Moisture and Warmth for Germination
Cover the tray with a clear plastic dome or wrap it in plastic wrap to create a humidity tent. Place it in a warm spot (70-75°F)—a seedling heat mat works wonders, but a sunny windowsill or top of the fridge (not inside!) also works. Check daily for condensation on the dome; if it’s foggy, the humidity is perfect. Wipe it off gently to prevent mold.
Germination typically takes 5-14 days, depending on the seed type. Water lightly from the bottom of the tray—never from above—to avoid displacing seeds or creating soggy conditions. Once 50% of seeds have sprouted, remove the dome immediately to prevent damping-off, a fungal disease that collapses seedlings overnight.
Transition to Light and Air Circulation
Move the tray to a bright, indirect light source (like a south-facing window) or under grow lights (14-16 hours/day). Seedlings need light within 24 hours of sprouting to prevent leggy, weak growth. If you’re using grow lights, position them 2-3 inches above the tallest seedling and adjust as they grow. You’ll see strong, stocky seedlings with dark green leaves—a sign they’re thriving.
After 7-10 days, when seedlings show their first true leaves (not the initial cotyledons), thin to the strongest plant per pellet. Snip the weaker one at the base with clean scissors—don’t pull, or you’ll disturb the roots of the remaining seedling. This step ensures your plants have enough nutrients and space to grow.
Harden Off and Prepare for Transplanting
Two weeks before your last frost date, begin hardening off seedlings by placing them outside in a shaded, sheltered spot for 1-2 hours the first day. Gradually increase exposure over 7-10 days, ending with a full day in direct sun. This acclimates them to wind, temperature fluctuations, and sunlight intensity—skipping this step often leads to shocked, wilting plants.
By day 60, your seedlings should be 3-4 inches tall with 4-6 true leaves, ready for transplanting into the garden or larger containers. Water deeply the day before moving them to reduce transplant shock. If roots are circling the Jiffy pellet, gently tease them apart before planting—this encourages outward root growth for stronger establishment.
Tips & tricks for perfect Jiffy seed starting success
Mastering these details transforms your Jiffy pellets from a simple tool into a foolproof seed-starting system. Here's what I've learned after years of trial and error.
Soaking Perfection: The 10-15 minute soak time is your foundation—this is when the pellets absorb the most water. I've found that using a spray bottle to mist the pellets before soaking helps prevent clumping. After draining, place the tray on a wire rack instead of a flat surface to allow air circulation underneath, which prevents mold growth during germination. This small adjustment keeps your pellets at the ideal firm-but-slightly-spongy texture for days.
Seed Depth Science: Twice the seed's diameter might sound technical, but it's actually simple to visualize. For most seeds, this means about ¼-inch deep. If you're planting multiple seed types, I recommend using a small ruler or even a toothpick marked with measurements to create consistent planting holes. This precision prevents some seeds from being buried too deep (and failing to sprout) while others get planted too shallow (and drying out).
Germination Environment Secrets: The 70-75°F warmth requirement is non-negotiable for most seeds, but here's what I've discovered about maintaining it: Place your seed tray on top of a refrigerator (not inside) for consistent warmth without overheating. For extra reliability, I use a small clip-on thermometer on the tray to monitor temperature—fluctuations outside this range can delay germination by days. The humidity dome should feel like a greenhouse; if condensation runs down the sides, you're creating the perfect environment.
Light Transition Strategy: That critical 24-hour window after sprouting is when seedlings are most vulnerable to legginess. I've found that using a simple LED desk lamp on a timer (set to 14-16 hours) works better than natural light alone, especially in cloudy conditions. Position the light so it's just touching the tallest seedlings—this prevents them from stretching toward the light source. After 7-10 days when you thin seedlings, use those removed plants as compost or snacks for your worm bin—nothing goes to waste in my system.
Pro Tips for Jiffy Seed Starting Kit
- Mastering these details transforms your Jiffy pellets from a simple tool into a foolproof seed-starting system. Here'...
- Soaking Perfection: The 10-15 minute soak time is your foundation—this is when the pellets absorb the most water. I'v...
- Seed Depth Science: Twice the seed's diameter might sound technical, but it's actually simple to visualize. For most ...
Frequently asked questions
Got questions about using a Jiffy Seed Starting Kit? You’re not alone! Here are answers to the most common concerns—so you can dive into stress-free germination with confidence.
How long does it take for seeds to germinate in a Jiffy peat pellet?
Germination time varies by seed type, but most veggies and herbs sprout within 7–14 days under ideal conditions (warmth, moisture, and light). Check your seed packet for specifics—some fast growers (like radishes) may appear in 3–5 days, while others (like tomatoes) take 1–2 weeks. Patience is key!
Do I need to water the Jiffy pellets before planting seeds?
Soak the dry pellets in water for 10–15 minutes until fully expanded (they’ll double in size). After planting, keep the soil consistently moist (not soggy) by misting or using a spray bottle. Overwatering can suffocate seeds, so aim for damp, not drenched.
Can I start seeds in Jiffy pellets indoors year-round, or is there a best time?
You can start seeds indoors anytime, but timing depends on your climate and last frost date. For cool-season crops (like lettuce or spinach), start 6–8 weeks before frost. Warm-season plants (tomatoes, peppers) need to go out 2–3 weeks after frost. Use grow lights if natural light is limited—pellets thrive with 12–16 hours of light daily.
What if my seeds don’t germinate? How can I troubleshoot?
First, check for fresh seeds (old seeds may fail). Ensure pellets are moist but not waterlogged and kept in a warm spot (70–80°F). Lack of light? Move them closer to a window or under grow lights. If seeds still refuse to sprout, try pressing them lightly into the soil (some need darkness to germinate). If all else fails, test a few seeds in damp paper towels to see if they’re viable.
Are Jiffy pellets eco-friendly? Can I reuse or compost them?
Yes! Jiffy pellets are made from 100% peat, a renewable resource, and are biodegradable. After use, let them dry completely, then crumble and compost them (they break down into nutrient-rich soil). For reuse, soak dried pellets again and replant—though they work best fresh for germination. Eco-friendly gardening at its finest!
Wrapping up and next steps
Starting seeds with a Jiffy Seed Starting Kit is your ticket to a thriving garden—no stress, no fuss! 🌱 Whether you're a beginner or a seasoned gardener, these kits make germination effortless, ensuring strong, healthy plants in just 60 days.
With everything you need in one compact package, you’ll save time and boost your success rate.
Now that you’re armed with the how-to, it’s time to get growing! 🌿 Grab your kit, pick your favorite seeds, and watch your garden dreams take root. Ready to plant? Start today and enjoy the rewards of homegrown freshness all season long!