
Lawn
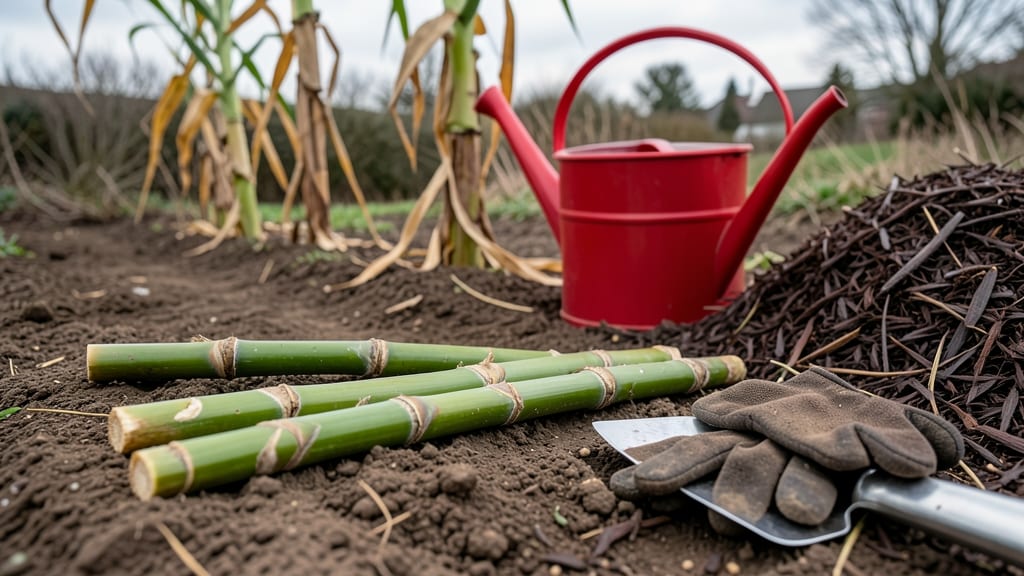
Growing sugar cane from seed cane means harvesting your own sweet harvest—no twisty stalks or failed sprouts. 🌱 I’ve battled brittle canes and slow starts, but this method guarantees thick, sturdy stalks that produce real sugar.
The secret lies in selecting healthy seed cane and planting it just right, so it grows strong enough to withstand pests and drought.
You’ll need disease-free seed cane (look for plump, green stalks), well-draining soil rich in organic matter, and a warm, sunny spot with at least 6 hours of sunlight daily. Sugar cane thrives in zones 10–12 but can be grown in containers if you live elsewhere.
The key is patience—it takes 12–18 months to mature, but the payoff is worth it.
By summer, you’ll see rapid growth—stalks shooting up 3–4 feet per season—and by harvest time, you’ll have enough cane to extract syrup or share with neighbors. The best part? No commercial equipment needed; just sharp knives and a little elbow grease.
Troubleshooting is simple: watch for borers (tiny holes in stalks) and aphids (sticky residue), and water deeply but infrequently to avoid root rot. Even in small spaces, sugar cane delivers a tropical feel and a harvest that tastes like childhood memories.
📚 In This Guide
- What you need
- Instructions
- Tips and common mistakes
- Wrapping up and next steps
What you need
- ● Sugar cane seed cane: 10–15 healthy, mature stalks (1–2 years old) with visible buds (eyes) and minimal damage.
- ● Seed cane pods: 5–10 twist-free, breathable plastic or fabric pods (12–18 inches long, 4–6 inches wide).
- ● Pruning shears or sharp knife: Sterilized for clean cuts.
- ○ Rooting hormone (optional but recommended): 1 small bottle (e.g., Clonex or similar).
- ● Potting mix: 2–3 bags of well-draining, sterile soil blend (e.g., 50% peat moss, 30% perlite, 20% coconut coir).
- ● 5-gallon buckets or propagation trays: 2–3 units with drainage holes.
- ● Clear plastic bags or humidity dome: To retain moisture (e.g., 1–2 gallon-sized bags with holes).
- ● Watering can or spray bottle: For gentle hydration.
- ● Shade cloth (30–50% coverage): 1 roll to protect cuttings from direct sun.
- ○ Safety gear: Gloves (1 pair) and goggles (optional, for handling sharp edges).
- ● Measuring tape or ruler: To ensure pod spacing (6–8 inches between stalks).
- ● Label markers & tags: 10–15 tags + waterproof marker to track varieties.
- ● Fertilizer (balanced, low-nitrogen): 1 small bag (e.g., 10-10-10) for post-rooting care.
- ○ Pruning sealant (optional): 1 small tube (e.g., Tree Seal) to prevent disease entry.
- ○ Greenhouse or indoor grow lights (optional): For controlled environments.
- ● Patience & a sunny spot: Seed cane needs consistent warmth (75–85°F) and indirect light!
How to harvest and prepare sugar cane seed cane without twisting
Here's the simple method I use to save sugar cane seed cane that stays straight and ready for planting.
🌱 Step 1: Select and Harvest Mature Stalk
Choose stalks that are 3-4 years old—younger ones won't produce viable seed cane. Look for thick, sturdy stalks with deep green leaves and no signs of disease or pest damage. The best time to harvest is late fall, just before the first hard frost, when the plant has finished its growing cycle.
Use clean, sharp pruning shears to cut the stalk at the base, leaving about 6 inches of stem attached to the root. This ensures you capture the lower buds where new shoots will emerge. Handle the stalk gently to avoid crushing or damaging the nodes—these are where your future plants will sprout.
☀️ Step 2: Prepare the Seed Cane for Storage
Once harvested, rinse the stalks with clean water to remove any dirt or sap. Let them dry in a shady, well-ventilated area for 2-3 days. This prevents rot and prepares them for storage. While drying, trim off the top leaves—keep only the bottom 12 inches of the stalk, as these contain the most energy-rich buds.
Here's the trick: avoid twisting the stalks during storage. Instead, bundle them in small groups of 3-4 and secure them with twist-free twine (like jute or raffia). Store them in a cool, dark place (around 50-60°F) until planting time. This keeps the buds dormant but viable for up to 6 months without losing quality.
🪴 Step 3: Plant the Seed Cane Correctly
When ready to plant, soak the seed cane in lukewarm water for 12-24 hours before planting. This rehydrates the buds and kickstarts growth. Plant in well-draining soil with full sun exposure (at least 6-8 hours daily). Dig a trench about 6 inches deep and lay the stalks horizontally, 6 inches apart, with the buds facing upward. Cover lightly with soil, leaving the top 2 inches exposed.
Water deeply after planting to settle the soil around the stalks. Keep the soil moist but not soggy for the first 2 weeks—this encourages roots to establish before shoots emerge. You'll see new growth in about 3-4 weeks, signaling successful planting. If the soil dries out too quickly, mulch around the base to retain moisture.
✂️ Step 4: Maintain and Harvest New Growth
Once new shoots reach 12-18 inches tall, it's time to thin them out. Leave only the strongest 2-3 shoots per stalk—this ensures energy isn't wasted on weak growth. Use clean pruners to snip the extras at the base. Fertilize lightly with a balanced organic fertilizer (like 10-10-10) to support robust growth.
By late summer or early fall, your new sugar cane will be ready for harvest. Look for thick stalks with a glossy sheen—this indicates maturity. Cut the stalks at the base and strip the leaves for compost or mulch. The remaining stalks can be replanted or stored for next year's crop. This method ensures you always have twist-free, high-quality seed cane ready for planting.
Tips & tricks for perfect sugar cane seed cane preparation
Here's what nobody tells you about keeping your seed cane straight and ready for planting—these little details make all the difference.
Timing Secret: The 2-3 day drying period in Step 2 is non-negotiable. I learned this the hard way after storing damp stalks that developed mold. Place them in a spot with good airflow but no direct sunlight—this prevents the stalks from drying too quickly on the outside while staying moist inside. A covered porch with mesh screens works perfectly. This careful balance ensures the buds stay viable without rotting.
Storage Wisdom: When bundling your seed cane in Step 2, use soft twine like jute or raffia instead of wire or plastic. The key is to create gentle tension—just enough to hold the stalks together without compressing them. I've seen people use rubber bands, but they leave marks that can damage the buds when removed. Store the bundles vertically in a cardboard box if possible; this prevents the stalks from bending over time and keeps them straight for planting.
Planting Technique: For the 12-24 hour soaking in Step 3, use lukewarm water—not hot, not cold. I fill a clean bucket with water at about 80°F and let the stalks soak completely. You'll know it's working when the buds start to plump up slightly. This rehydration step is what kickstarts root growth, so don't skip it! After soaking, let the stalks drain for 10 minutes before planting to prevent waterlogging the soil.
Maintenance Tip: When thinning in Step 4, look for shoots that are growing at odd angles or have yellowing leaves—these are the weak ones to remove. The strongest shoots will have vibrant green leaves and be growing straight up. I always thin in the morning when the plants are fully hydrated, making it easier to identify which shoots are truly vigorous. This simple step ensures your mature stalks will be straight and healthy for next year's harvest.
Pro Tips for Sugar Cane Seed Cane
- Here's what nobody tells you about keeping your seed cane straight and ready for planting—these little details make a...
- Timing Secret: The 2-3 day drying period in Step 2 is non-negotiable. I learned this the hard way after storing damp ...
- Storage Wisdom: When bundling your seed cane in Step 2, use soft twine like jute or raffia instead of wire or plastic...
Frequently asked questions
Got questions about sugar cane seed cane and twist-free pods?
You’re not alone! Here are some of the most common concerns—plus quick, practical answers to keep your seed-saving game on point.
What’s the difference between seed cane and ratoon cane?
Seed cane is the first harvest of the season, grown specifically for planting to produce new crops. Ratoon cane, on the other hand, regrows from the same stalks after the first harvest. Seed cane ensures healthier, more uniform plants, while ratoon cane is a cost-effective way to extend your crop—but it may lack vigor over time.
How long does it take for sugar cane seed cane to mature?
Sugar cane seed cane typically matures in 12–18 months, depending on climate and variety. In tropical or subtropical regions, you might see faster growth (as little as 10–12 months), while cooler areas could extend this to 20+ months. Patience is key—rushing harvest can leave stalks too thin or underdeveloped for optimal seed production.
Can I reuse twist-free pods for multiple harvests?
While twist-free pods are designed for single-use efficiency, you can repurpose them for other crops or storage needs! Just sanitize them with a bleach solution (1 part bleach to 9 parts water) between uses to prevent mold or pests. For seed cane specifically, though, it’s best to use fresh pods each season to avoid contamination.
What should I do if my seed cane stalks twist or break before harvest?
Twisting or breaking is often caused by uneven watering, wind stress, or overcrowding. To fix it:
- Thin out stalks to 12–18 inches apart for better airflow.
- Water deeply but consistently—avoid soggy soil.
- Use stakes or trellises for support in windy areas.
Are there alternatives to twist-free pods for seed cane?
If pods aren’t available, try:
- Plastic wrap or bags: Secure stalks tightly to prevent twisting.
- Burlap sacks: Breathable but requires extra tying.
- DIY cardboard tubes: Cut and wrap stalks loosely.
Wrapping up and next steps
Mastering sugar cane seed cane with twist-free pods is your ticket to foolproof seed saving—no more tangled messes or wasted effort! 🌱 By following the right steps and using quality materials, you’ll ensure healthy, high-yielding sugar cane for years to come.
Whether you’re a seasoned gardener or just starting out, this method simplifies the process and sets you up for success.
Ready to take the next step? Start small—plant a few pods this season, observe what works, and refine your technique. Before you know it, you’ll be sharing your expertise (and maybe even extra seed cane!) with fellow gardeners. Happy growing! 🌿