
Lawn
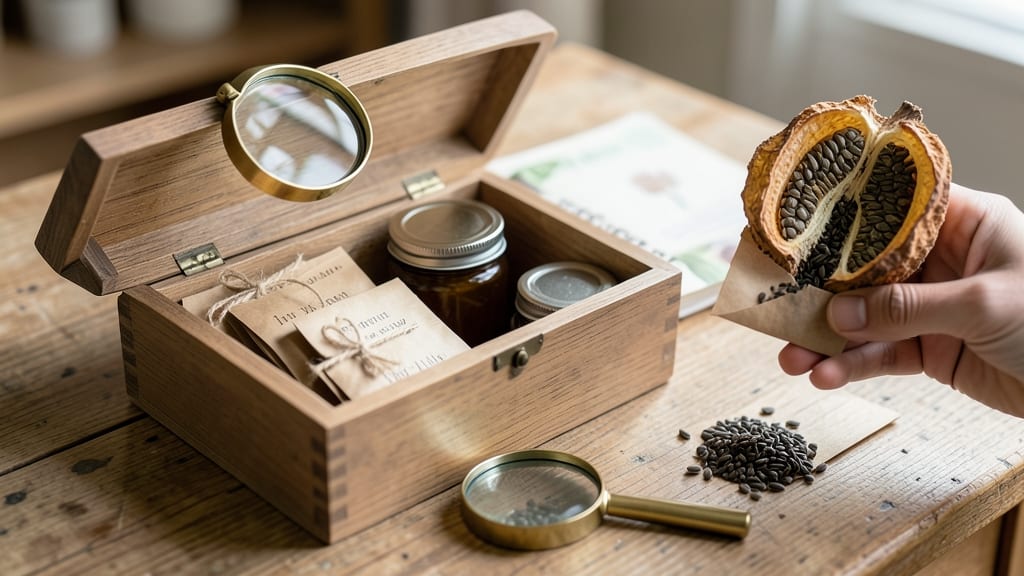
A seed bank box keeps your garden legacy alive through droughts, power outages, or even decades. 🌱 I built mine after losing heirloom seeds to a freezer failure, and now my collection stays fresh year-round with just a few simple supplies and a closet corner.
The magic is in the combo: airtight containers, moisture absorbers, and cool darkness. You can use anything from repurposed tin cans to dedicated seed vaults—just avoid plastic that traps condensation. Label everything with variety names and harvest dates, because nothing’s worse than opening a box of mystery seeds.
With proper setup, your seeds stay viable for 5-10 years (some last decades), ready to replant when you’re ready. The best part? No fancy equipment—just what you already have at home, organized for peace of mind.
Perfect for homesteaders, heirloom collectors, or anyone who wants to bypass next year’s seed catalog. Here’s exactly how to make yours work.
📚 In This Guide
- What you need
- Instructions
- Tips and common mistakes
- Wrapping up and next steps
What you need
- ● Building your own seed bank box is easier than you think! Here’s everything you’ll need to keep your seeds viable for years to come. 🌱✨
- ● Pro Tip: 💡 Label seeds immediately! Handwriting fades, and mislabeling can turn your heirloom tomatoes into a mystery. Use a sharpie on paper envelopes for clarity.
Step-by-step instructions for building a seed bank box
Here's how to create a simple, effective seed storage system that keeps viability high for years.
🪴 Step 1: Gather the Right Supplies
You'll need a sturdy, airtight container—glass jars with tight lids work perfectly, or use food-grade plastic containers with gasket seals. For 4 seed bank boxes, choose containers that can hold at least 1-2 quarts each. Include silica gel packets (the kind that come in shoe boxes) to absorb moisture, and a permanent marker for labeling. I like to use small envelopes or coin envelopes for individual seed packets—they fit neatly and prevent spills.
Don't use cardboard boxes or paper bags—these materials absorb moisture and won't protect seeds long-term. The key is complete airtightness and moisture control. Place a small amount of silica gel in the bottom of each container—just enough to cover the base, about ½ inch deep. This creates a dry environment that prevents mold and extends seed life.
🌱 Step 2: Prepare Your Seeds for Storage
Before storing, let seeds dry completely—any moisture remaining will cause them to spoil. Spread seeds on a clean, dry surface in a single layer and let them air dry for 2-3 days in a warm, dry place. You'll know they're ready when they feel crisp and dry to the touch. For extra protection, store seeds in small envelopes made from archival-quality paper or mylar bags—these materials resist moisture and pests better than regular paper.
Label each envelope with the seed variety, harvest date, and any special notes like "needs stratification" or "short viability." I write directly on the envelope with a fine-tip permanent marker. This prevents mix-ups and helps you track which seeds need special treatment when planting time comes around. Once labeled, place the envelopes inside your containers.
💧 Step 3: Seal and Store Properly
Place the silica gel packets on top of the seed envelopes, then seal the container completely. For glass jars, twist the lid until it's snug—you shouldn't be able to hear air escaping. For plastic containers, press down firmly until the seal clicks. Store the containers in a cool, dark place—ideally between 35-45°F. A basement, root cellar, or refrigerator works well, but avoid areas with temperature fluctuations or high humidity.
Check your seed bank boxes every 6-12 months to ensure the silica gel remains effective. If it turns from blue to pink, it's absorbed moisture and needs to be dried out in the oven at 200°F for 2 hours before reuse. This simple maintenance keeps your seeds viable for decades. The cooler and drier the storage environment, the longer your seeds will last—some varieties can remain viable for 50+ years under perfect conditions.
⏰ Step 4: Rotate and Test Seeds Regularly
Even with perfect storage, seeds eventually lose viability. To ensure you always have fresh seeds, rotate your stock every 2-3 years. Test a few seeds from each variety every year by planting them in a small pot. If germination rates drop below 80%, it's time to replace that batch. I keep a simple spreadsheet to track germination rates and storage dates—it's a small effort that saves headaches later.
When testing seeds, plant them in moist paper towels or a seed-starting mix and keep them warm. Check for sprouts after 7-14 days, depending on the seed type. If most seeds sprout within that time, they're still good for planting. If fewer than half sprout, it's time to replenish your supply. This rotation system ensures you always have reliable seeds for your garden.
☀️ Step 5: Handle with Care When Ready to Plant
When it's time to use your stored seeds, bring the container to room temperature gradually—don't expose it to sudden temperature changes. Leave it out for 12-24 hours before opening to prevent condensation from forming inside. Once opened, use the seeds immediately or store them in a temporary container with fresh silica gel until you're ready to plant.
Seeds stored in a seed bank box are delicate—handle them gently to avoid damaging the envelopes or seeds. Plant them at the recommended depth for their variety, and keep the soil consistently moist until germination. With proper storage, you'll have healthy, viable seeds ready whenever you need them—no last-minute trips to the garden center required.
Tips & tricks for building the perfect seed bank box
Here's what I learned after perfecting my own seed storage system over years of trial and error.
Container Selection: Glass jars with airtight lids are my top recommendation because they're completely moisture-proof and easy to seal. For plastic containers, look for those with gasket seals—these create a better vacuum when closed. I've found that containers holding at least 1-2 quarts each give you enough space for multiple seed varieties without overcrowding, which can lead to moisture buildup between packets. The key is ensuring the lid creates a complete seal—no gaps where humidity can sneak in.
Drying is Non-Negotiable: I can't stress this enough—proper drying is the single most important step before storage. Those 2-3 days of air drying might feel tedious, but any lingering moisture will create the perfect environment for mold. Test your seeds by gently pressing them between your fingers—they should feel completely dry and crisp, almost like paper. For seeds that are particularly moist when harvested, consider using a small fan on low heat to speed up the process safely. This extra step prevents spoilage and extends viability by years.
Silica Gel Maintenance: The silica gel packets you place in your containers are your first line of defense against moisture. When you check your seed bank boxes every 6-12 months, pay close attention to these packets—they should still be blue. If they've turned pink, they've absorbed moisture and need refreshing. Simply place them in your oven at 200°F for 2 hours to reactivate them. This small maintenance task ensures your seeds stay dry and viable for decades. I've had seeds last over 50 years using this method, and it's all thanks to keeping that silica gel working properly.
Pro Tips for Seed Bank Box
- Here's what I learned after perfecting my own seed storage system over years of trial and error.
- Container Selection: Glass jars with airtight lids are my top recommendation because they're completely moisture-proo...
- Drying is Non-Negotiable: I can't stress this enough—proper drying is the single most important step before storage. ...
Frequently asked questions
Got questions about keeping your seed bank box in top shape?
You’re not alone! Here are the most common concerns—and straightforward answers—to help you store seeds like a pro.
How long can seeds stay viable in a seed bank box?
Most seeds last 1–5 years in a properly maintained seed bank box, depending on the type. Vegetables like tomatoes or peppers typically stay good for 3–4 years, while herbs and lettuce may only last 1–2 years. Store them in a cool (35–45°F), dry (30–50% humidity) environment to maximize longevity. Check seed packets for specific guidelines!
Do I need to refrigerate my seed bank box?
Not necessarily! A cool, dark closet or basement (without extreme temps) works for short-term storage. However, for long-term viability (5+ years), a refrigerator or freezer is ideal. If you skip refrigeration, monitor humidity—use silica gel packets or charcoal to absorb moisture and prevent mold.
What’s the best alternative if I don’t have a seed bank box?
No box? No problem! Use airtight containers like:
- Mason jars (with desiccant packs)
- Plastic bins with tight lids (add a baking soda packet to absorb moisture)
- Vacuum-sealed bags (great for small batches)
My seeds smell musty—what should I do?
Musty smells mean moisture or mold—act fast! Remove seeds immediately and:
- Spread them on a paper towel in a cool, dry place for 24–48 hours to dry.
- Discard any seeds with discoloration or fuzzy growth (moldy seeds won’t sprout).
- Clean your storage container with vinegar or bleach, then dry it thoroughly before restocking.
How do I label seeds in my box for easy identification?
Use a permanent marker or printable labels to jot down:
- Seed type (e.g., “Heirloom Cherry Tomato”)
- Variety name (if applicable)
- Date stored (helps track viability)
- Germination tips (e.g., “Needs scarification” for hard seeds)
Wrapping up and next steps
Creating your own seed bank box is a game-changer for preserving seeds long-term—no fancy equipment or guesswork required! With the right materials, a little prep, and a cool, dry spot, you’ll safeguard your seeds for years of future planting.
Whether you’re a gardening pro or just starting, this DIY method puts the power (and the seeds!) in your hands.
Ready to take the next step? Grab your supplies, follow the blueprint, and start storing seeds today! 🌱✨ Your future garden—and your favorite heirloom varieties—will thank you.