
Lawn
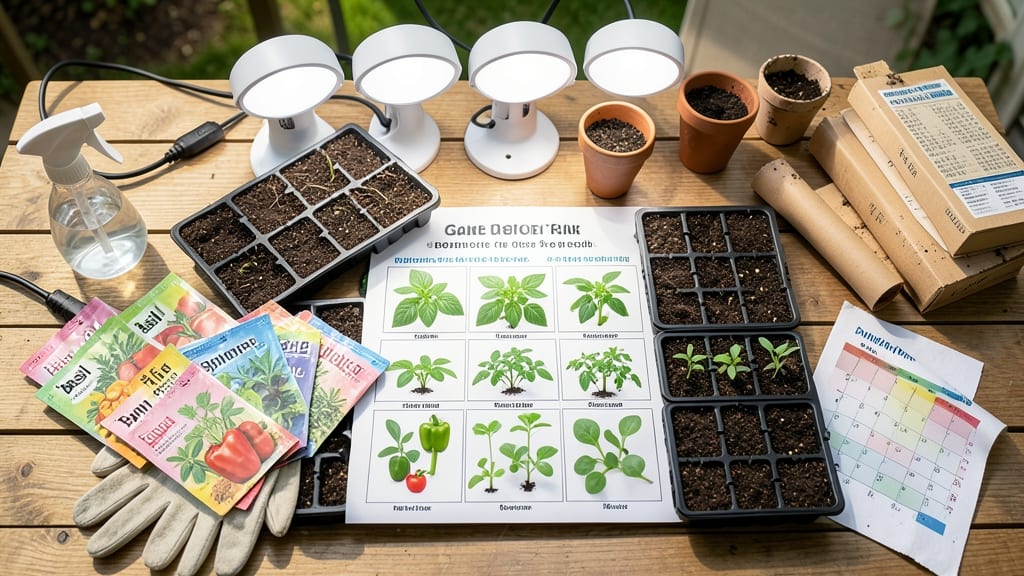
Starting seeds indoors without the guesswork is what this month-by-month chart delivers. 🌱 I've spent years timing plantings wrong—some sprouted too early, others too late—and this system finally puts an end to the chaos.
Instead of memorizing rules, you'll see exactly when to plant each seed type, what supplies to gather, and how to keep seedlings strong from day one.
The chart covers everything from cold-hardy greens to heat-loving tomatoes, with clear columns for planting dates, container sizes, and light needs. You'll never again wonder if your peppers are ready for transplant or if your lettuce will bolt before summer arrives.
Each entry includes troubleshooting tips for common problems like damping-off or leggy seedlings, so you're prepared for anything.
What you'll get is a foolproof schedule that matches your last frost date, ensuring seedlings are ready when the soil warms up. The care instructions are simple enough for beginners but detailed enough for experienced growers—no more overwatering or under-lighting mistakes.
By following this, you'll have stocky, healthy plants that outperform store-bought transplants every time.
Whether you're working with a sunny windowsill or a grow light setup, this chart adapts to your space. The key is consistency: stick to the timeline, and you'll harvest fresh greens, tomatoes, and peppers that taste like they came from a professional garden.
Here's how to make it work for your growing season!
📚 In This Guide
- What you need
- Instructions
- Tips and common mistakes
- Wrapping up and next steps
What you need
- ● Seeds: Choose fast-growing varieties like basil, lettuce, or radishes for beginners. Aim for 1–2 packets (50–100 seeds total) to start.
- ● Seed-starting trays or pots: 2–4 (4–6" deep) with drainage holes. Opt for biodegradable pots for easy transplanting.
- ● Seed-starting mix: 1–2 bags (sterile, peat-based mix—avoid garden soil!).
- ● Grow lights or sunny windowsill: A full-spectrum LED grow light (12–16 hrs/day) or a south-facing window with 6+ hours of sunlight.
- ● Spray bottle: 1 (for gentle watering).
- ● Humidity dome or plastic wrap: 1 (to retain moisture during germination).
- ○ Heat mat (optional): 1 (for seeds needing warmth, like peppers or tomatoes).
- ● Space: A dedicated area (e.g., kitchen counter, shelf) near a light source.
- ● Time: 10–30 mins/day for planting, watering, and monitoring.
- ● Patience: Germination times vary (e.g., 3–14 days for most veggies).
- ● Cleanliness: Sterilize tools/trays with 10% bleach solution to prevent mold.
Step-by-step guide to using an indoor seed planting timeline
Here's how to align your indoor seed starting with the perfect germination schedule.
📅 Step 1: Determine Your Last Frost Date
First, find your local last frost date—this is your anchor point for all timing. I always check my county's agricultural extension service website for precise dates, as they account for microclimates in your area. Write it down and mark it on your calendar with a bright marker. This date tells you when your seedlings will be ready to move outdoors.
For example, if your last frost is May 15th, you'll need to have hardy crops like broccoli and cabbage ready to transplant by then. Count backward from that date to determine when each variety should germinate. Most seedlings need 6-8 weeks indoors before transplanting, but some fast growers like radishes only need 3-4 weeks.
⏰ Step 2: Work Backward from Transplant Date
Now that you know your last frost date, subtract the number of weeks each plant needs indoors to calculate when to start seeds. I keep a simple spreadsheet with each variety's indoor growth time, germination time, and ideal transplant age. For instance, tomatoes need 6-8 weeks indoors, so if your last frost is May 15th, you'd start them around March 1st.
Here's the key: germination time varies wildly by plant. Fast germinators like lettuce sprout in 3-7 days, while slowpokes like parsley can take 2-3 weeks. Add the germination time to your starting date to know when to expect those first sprouts. I always add a buffer of 1-2 weeks before my ideal transplant date—seedlings grow at different rates, and you don't want to rush them outdoors.
🌱 Step 3: Create Your Month-by-Month Planting Schedule
Break your timeline into monthly segments to visualize when to start each variety. I use a large wall calendar and color-code each plant type. For example, January-February might be for slow-starting plants like peppers and eggplants, while March focuses on tomatoes and broccoli. Fast growers like radishes and lettuce go in April, just a few weeks before transplanting.
Pay attention to light availability too. If you're using a grow light, note when your power bill spikes—starting too many seeds at once can strain your setup. I stagger my plantings so I'm not running lights 24/7 during peak germination months. Also, consider your space: if you only have a small windowsill, prioritize high-value crops or those that can handle being transplanted earlier.
📝 Step 4: Adjust for Your Specific Conditions
Your indoor environment matters just as much as the calendar. Note your home's average temperatures, especially in rooms where you'll grow seedlings. Most seeds germinate best between 65-75°F, but some like peas prefer cooler 50-60°F. If your basement runs cool, you might need a heat mat for warm-season crops. I keep a small thermometer near my seedling trays to monitor conditions.
Light is another critical factor. If your windows don't get enough sunlight, you'll need to supplement with grow lights. I test my light setup by holding a piece of paper under the light—if you can't read it comfortably, your seedlings won't get enough intensity. Adjust your schedule if you know your light setup will be limited during certain months. For example, I avoid starting long-season crops in December when daylight is shortest.
✂️ Step 5: Plan for Successive Plantings
Most vegetables benefit from successive plantings to extend your harvest. Use your timeline to schedule these strategically. For example, after your first planting of lettuce in early spring, plan to sow another batch in late spring for a fall harvest. I mark these on my calendar too, often using a different color for each planting wave.
This is where your harvest dates come into play. If you know you'll be on vacation in July, schedule fast-growing crops like bush beans to mature before you leave. Or if you want a continuous supply of herbs, stagger your basil plantings every 2-3 weeks. The goal is to have something ready to harvest at all times, rather than one big transplanting event followed by a lull in production.
Tips & tricks for perfect indoor seed planting timing
These insider tricks will help you navigate the nuances of indoor seed germination like a seasoned pro.
Local Climate Matters: Your last frost date isn't just a number—it's the foundation of your entire schedule. I recommend verifying it through your local agricultural extension service rather than relying on generic online calculators. Microclimates can shift frost dates by 1-2 weeks, so this precision matters. For example, if your neighbor's yard gets frost later, don't use their dates for your windowsill garden.
The 6-8 Week Rule: While most seedlings need 6-8 weeks indoors before transplanting, don't treat this as a rigid timeline. Leafy greens like spinach can handle 4-5 weeks while tomatoes absolutely need the full 8 weeks. I keep a reference chart next to my seed starting area showing each variety's ideal indoor window—this prevents overcrowding and ensures proper hardening off.
Light Intensity Test: Before committing to your schedule, test your light setup using the "paper test." Hold a piece of white paper under your grow light—if you can't comfortably read it, your seedlings won't get sufficient intensity. This simple check prevents the heartbreak of leggy, weak seedlings. I found my standard LED bulb wasn't cutting it and upgraded to a full-spectrum T5 grow light that made all the difference.
Temperature Buffer Zone: While most seeds germinate best between 65-75°F, I've learned to add a 5°F buffer when planning. If your kitchen runs warm, start seeds slightly earlier. For cool basements, consider a seedling heat mat (70-75°F) to maintain optimal conditions. I keep a small thermometer near my seed trays and adjust my schedule based on real-time readings rather than assumed room temperatures.
Pro Tips for Indoor Seed Planting Chart
- These insider tricks will help you navigate the nuances of indoor seed germination like a seasoned pro.
- Local Climate Matters: Your last frost date isn't just a number—it's the foundation of your entire schedule. I recomm...
- The 6-8 Week Rule: While most seedlings need 6-8 weeks indoors before transplanting, don't treat this as a rigid time...
Frequently asked questions
Got questions about indoor seed planting? You’re not alone! Here are answers to the most common concerns—so you can grow with confidence, even when space is tight.
What’s the best time of year to start indoor seed planting?
Timing depends on your seeds! Fast-growing greens (like lettuce or radishes) can start anytime indoors. For slower plants (tomatoes, peppers), begin 6–8 weeks before your last frost date—check your local frost calendar. Pro tip: Use grow lights if natural light is weak in winter.
How long do seeds usually take to germinate indoors?
Germination time varies wildly! Leafy greens sprout in 3–10 days, while herbs (like basil) take 7–21 days. Check your seed packet for specifics—some need warmth (70–80°F) or moisture to wake up. Use a heating mat if your space is chilly.
Can I use regular potting soil for indoor seed starting?
Not ideal! Opt for a lightweight, sterile seed-starting mix (like coconut coir or peat-based blends) to prevent damping-off disease. Mix in perlite or vermiculite (20%) for drainage. Skip garden soil—it’s too dense and may harbor pests.
My seeds aren’t sprouting—what’s wrong?
Don’t panic! Common culprits:
- Too cold/dark: Move to a warmer spot (70°F+) and use a grow light.
- Over/under-watering: Keep soil moist but not soggy—mist lightly daily.
- Old seeds: Test viability by soaking in water (floaters = dead).
If all else fails, try a fresh batch—some seeds just need a little patience!
Are there budget-friendly alternatives to fancy seed-starting kits?
Use:
- Egg cartons or toilet paper rolls as biodegradable pots.
- Clear plastic domes (from takeout containers) for humidity.
- Repurposed trays (like muffin tins) with drainage holes.
Bonus: Save seed packets from store-bought herbs (like cilantro or dill) for free starts!
Wrapping up and next steps
Indoor seed planting is a rewarding way to grow fresh, homegrown produce—no matter the season! With this month-by-month indoor seed planting chart, you’ve got a clear roadmap to success. Whether you’re a beginner or a seasoned gardener, start small, stay consistent, and watch your green thumb flourish! 🌱
Ready to take the next step? Pick 2-3 easy seeds (like herbs or leafy greens) and grab your supplies—your indoor garden adventure begins now!