
Lawn
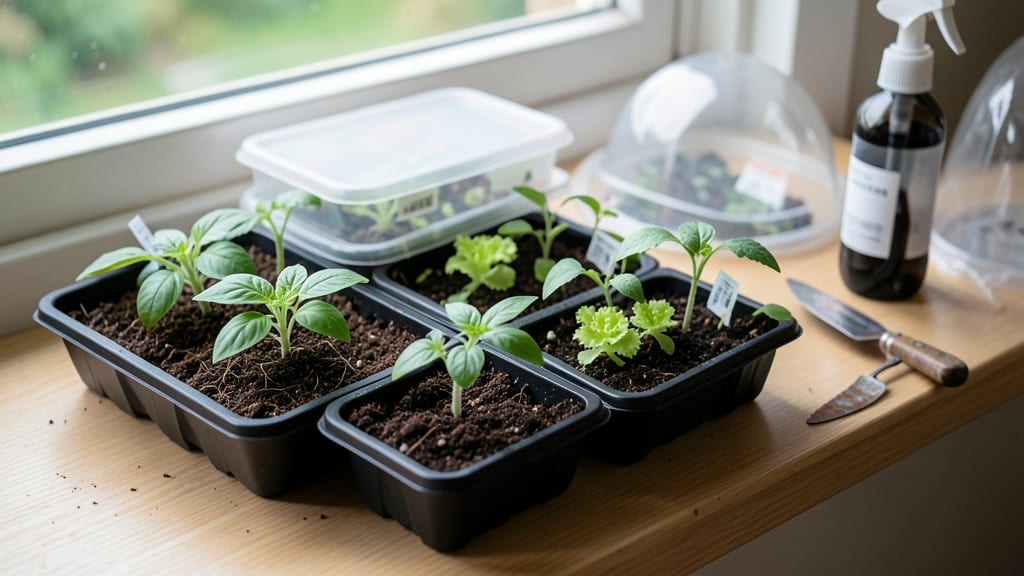
Seed trays with lids create the perfect greenhouse effect right on your countertop. 🌱 The right cover keeps soil moist, blocks pests, and speeds up germination—no more peeking seedlings or crusty soil surfaces.
My first batch of basil sprouted in just 3 days with a simple plastic lid, while my neighbor’s uncovered trays took twice as long. You don’t need fancy supplies: clear plastic lids from takeout containers work, or repurpose old baking sheets with foil.
Just poke tiny holes for airflow—¼-inch is perfect—and watch your seeds stay cozy. The key is balance: too tight, and condensation drowns roots; too loose, and moisture escapes. Once sprouts peek through, leave lids on during the day but crack them open at night for airflow.
Within 1-2 weeks, you’ll see sturdy seedlings ready to transition. The payoff? Stronger plants that outpace store-bought seedlings by weeks. Works for any seed type—veggies, herbs, or flowers—indoors or under grow lights. Here’s how to make it foolproof.
📚 In This Guide
- What you need
- Instructions
- Tips and common mistakes
- Wrapping up and next steps
What you need
- ● Seed trays: Standard 1020 or 520 trays (common sizes). Quantity: 1 or more, depending on your needs.
- ● Clear plastic sheeting: 4–6 mil thickness (e.g., UV-resistant greenhouse plastic). Size: Large enough to cover trays with 1–2" overhang on all sides.
- ● Double-sided tape or adhesive clips: For securing lids without damaging trays. Quantity: 4–6 clips or a 1-inch-wide roll of tape.
- ● Scissors or a utility knife: For cutting plastic to size.
- ● Ruler or measuring tape: To ensure precise cuts.
- ○ Hole punch: To create ventilation holes (if needed). Optional for humidity control.
- ○ Clear acrylic sheets: Thicker than plastic (1/8"–1/4") for durability. Optional for reusable lids.
- ○ Bungee cords or elastic bands: For adjustable, twist-free tension. Optional for larger trays.
- ● Spray bottle: For misting trays before sealing (keeps moisture balanced!).
- ● Marking pen: To trace tray dimensions onto plastic.
How to use lids for seed trays to maintain perfect moisture
Here’s how to keep your seedlings thriving with the right humidity—no guesswork, just consistent results.
🌱 Step 1: Select the Right Lid for Your Seed Tray
Not all lids work the same. Look for clear plastic domes with a snug fit—no gaps where moisture escapes. I prefer twist-lock lids because they stay sealed even when you accidentally bump the tray. If your lid has ventilation holes, use it only for seeds that need airflow (like lettuce). For most vegetables and flowers, a solid, clear lid keeps humidity high enough for germination.
Check the lid for cloudiness or scratches—these reduce light penetration and can trap too much heat. A slightly foggy interior is normal after watering, but condensation should clear within a few hours. If it stays cloudy for days, your lid is trapping too much moisture and risking mold.
💧 Step 2: Water Before Sealing to Avoid Overhead Moisture
Water the seed tray just before placing the lid on. Use a spray bottle or gentle watering can to moisten the soil evenly—no soggy spots, no dry patches. Overwatering here leads to waterlogged seeds, while underwatering means the lid won’t create enough humidity. You’ll know it’s right when the soil looks damp but not dripping, like a wrung-out sponge.
Here’s the thing—I never water from above after sealing. The lid creates a microclimate, and overhead watering can wash seeds away or bury them too deep. Instead, water from the bottom by placing the tray in ½ inch of water for 10 minutes, then drain excess. This keeps the soil consistently moist without disturbing the seeds.
☀️ Step 3: Position the Tray Under Indirect Light
Place your sealed tray in a warm, bright spot—but not direct sunlight. A south-facing windowsill works, but if the lid fogs up and stays that way, move it back 6 inches. Too much heat under the lid can cook your seeds. You’ll see condensation form on the inside of the lid within 24 hours—this is normal and ensures high humidity.
If your seeds need bottom heat (like tomatoes or peppers), place the tray on a seedling heat mat set to 75-85°F. The lid traps the warmth, speeding up germination. Without heat, germination might take twice as long. Watch for the first sprouts in 5-10 days—when they appear, remove the lid immediately to prevent damping-off.
⏰ Step 4: Monitor and Adjust Humidity Daily
Check the tray once daily for signs of over-moisture. If the soil looks glistening or moldy, prop the lid open slightly with a toothpick to let excess humidity escape. You’ll also notice condensation—this is good, but if the lid stays foggy for more than 48 hours, your seeds are getting too much moisture. A quick wipe with a dry cloth keeps light from being blocked.
Real talk: Don’t skip this step. I’ve lost entire seed trays to mold because I forgot to check. The moment you see white fuzzy spots or seedlings collapsing, lift the lid and let the soil dry out slightly. Healthy seedlings have sturdy stems and bright green leaves—not yellow or mushy ones.
🌿 Step 5: Transition Out of the Lid When Seedlings Are Ready
Once 50% of seeds have sprouted and the first true leaves appear, remove the lid completely. This hardens off the seedlings and prevents them from getting leggy (stretched and weak). If you’re in a dry climate, leave the lid off but cover the tray with a humidity tent (another clear lid propped up) for 3-5 days to ease the transition.
You’ll see the difference immediately—seedlings grow stockier and more compact without the lid. After a week, they’re ready for direct light (14-16 hours daily) and can be thinned or transplanted. The key is gradual adjustment: if you remove the lid too soon, seedlings dry out; if you wait too long, they’ll be too dependent on high humidity.
Tips & tricks for perfect seed tray humidity control
Here's what nobody tells you about keeping those tiny sprouts happy—these tricks save seeds and sanity.
Lid Selection Matters: If your seed tray came with a flimsy plastic cover, upgrade to a twist-lock dome lid—they create a tighter seal that prevents moisture loss. I learned this the hard way after watching condensation pool only to evaporate within hours. For seeds needing airflow (like leafy greens), use a lid with small ventilation holes, but for most vegetables, a solid lid maintains that perfect 90% humidity needed for germination. Check for scratches too—those tiny marks can trap excess heat and cook your seeds.
Watering Technique: The 10-minute bottom-watering method in Step 2 is a game-changer. Fill a shallow tray with ½ inch of water, place your seed tray inside, and let it soak up moisture from below. This prevents surface watering that can wash seeds away or create uneven moisture zones. I always drain any excess after 10 minutes—waterlogged seeds rot faster than you can say "damping-off." Pro tip: Use room-temperature water to avoid shocking the soil.
Light Balance: That 24-hour condensation check isn't just about humidity—it's your temperature gauge too. If condensation stays foggy beyond 48 hours, your seeds are overheating. Move the tray 6 inches back from direct light or prop the lid open slightly with a toothpick. For heat-loving seeds like peppers, place the tray on a seedling heat mat set to 75-85°F—the lid traps that warmth perfectly. Without heat, germination can take twice as long, so don't skip this step if you're impatient like me.
Transition Strategy: When you see 50% sprouts with true leaves, it's time to remove the lid completely—but don't do it all at once. In dry climates, I use a humidity tent (another lid propped up) for 3-5 days to ease seedlings into lower humidity. This gradual adjustment prevents shock that can stunt growth or cause wilting. Watch for sturdy stems and bright green leaves—those are your signs of happy, healthy seedlings ready for their next adventure.
Pro Tips for Lids For Seed Trays
- Here's what nobody tells you about keeping those tiny sprouts happy—these tricks save seeds and sanity.
- Lid Selection Matters: If your seed tray came with a flimsy plastic cover, upgrade to a twist-lock dome lid—they crea...
- Watering Technique: The 10-minute bottom-watering method in Step 2 is a game-changer. Fill a shallow tray with ½ inch...
Frequently asked questions
Got questions about using lids for seed trays? You’re in the right place! Here are some of the most common queries—and their straightforward answers—to help you grow with confidence.
What’s the best material for seed tray lids to prevent mold or rot?
Opt for clear plastic lids (like those made from polypropylene) or breathable fabric covers. Plastic keeps humidity high but needs daily checks for condensation. Fabric lids allow slight airflow while still retaining moisture—just avoid heavy materials that trap too much dampness.
How long should I leave the lid on after planting seeds?
Keep the lid on until seeds germinate (usually 7–14 days, depending on the plant). Once sprouts appear, remove the lid for 10–15 minutes daily to harden seedlings. Overwatering after germination can drown tender roots—so balance is key!
Can I reuse plastic lids from store-bought containers as seed tray covers?
Yes! Clean, food-grade plastic lids (like yogurt or deli containers) work in a pinch. Just poke a few tiny holes with a needle to prevent suffocation. For long-term use, though, dedicated seed tray lids with secure seals (like snap-on or clip designs) are more reliable.
Why are my seedlings wilting even with the lid on—what’s going wrong?
Wilting under lids usually means overheating or poor airflow. Check for:
- Condensation buildup (lift the lid to air out for 30+ minutes).
- Seeds planted too deep (they need light to germinate).
- Soil too dry (mist lightly with water, then reseal).
Do seed tray lids work in cold climates or greenhouses?
In cold climates, lids create a mini greenhouse effect to speed germination. In greenhouses, use lids only overnight or during cooler days—excess heat can scorch seedlings. Pro tip: Monitor temps—ideal germination range is 65–75°F (18–24°C).
Wrapping up and next steps
Choosing the right lids for seed trays is a game-changer for your gardening success—keeping moisture locked in, seeds safe, and growth on track without the hassle of twisting lids.
Whether you’re a seasoned green thumb or just starting, these twist-free covers simplify the process and help you nurture healthier seedlings with ease. 🌱
Now that you’re equipped with the best tips and answers, it’s time to put your knowledge into action! Grab your seed trays, pick the perfect lids, and watch your garden thrive. Happy planting! 🌿