
Flowers
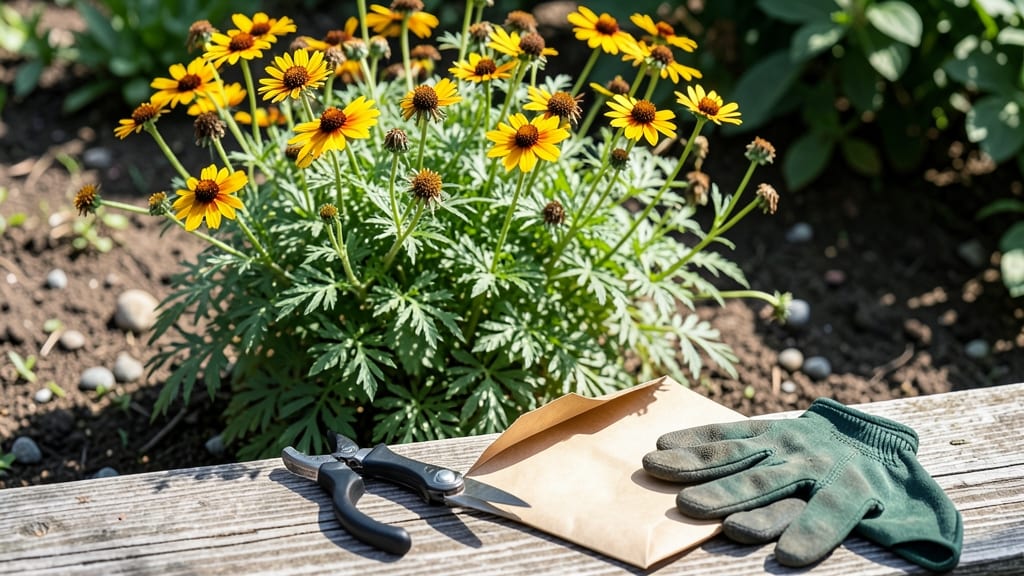
Sowing whorled tickseed seeds gives you a 60-day head start on a perennial that thrives where others fail. ✨ I’ve grown these tough little seeds through three winters—even in my Zone 5 garden—and they’ve never let me down.
Their secret? Cold resistance that lets you plant early, plus a germination rate that beats most annuals.
You’ll need just four things: a sunny spot, well-draining soil, patience, and a spray bottle. The seeds are tiny, so don’t bury them—just press them into the top layer of damp soil.
Water lightly to keep them moist (not soggy), and they’ll sprout within 2-4 weeks, even if temperatures dip into the 40s.
By day 60, you’ll have vibrant green rosettes ready to spread into those signature whorled blooms. These plants handle drought like a pro, repel deer, and return year after year—once established, they’re basically maintenance-free. The yellow daisies last from summer through frost, and hummingbirds can’t resist them.
Perfect for wildflower meadows, pollinator gardens, or even container edges. Here’s how to get them growing strong—no fuss, just results. Let’s get those seeds in the ground!
📚 In This Guide
- What you need
- Instructions
- Tips and common mistakes
- Wrapping up and next steps
What you need
- ● Whorled tickseed seeds: 1 packet (approximately 50–100 seeds, depending on the brand). Look for organic or non-GMO options for the best results.
- ● Seed-starting trays or biodegradable pots: 1–2 trays (with cells at least 2–3 inches deep) or 50+ small pots.
- ● High-quality seed-starting mix: 1 bag (sterile, well-draining potting mix formulated for seeds). Avoid garden soil—it can harbor diseases!
- ○ Grow lights or a sunny windowsill: A full-spectrum LED grow light (optional but recommended for consistent growth) or a south-facing window with 6+ hours of sunlight daily.
- ● Misting bottle or spray nozzle: 1 (for gentle watering to avoid disturbing seeds).
- ● Clear plastic dome or plastic wrap: 1 (to create a humidity tent and retain moisture during germination).
- ● Plant labels and a pencil: 10+ labels and a pencil (to track planting dates and varieties).
- ● Fine-tip tweezers: 1 pair (for delicate seed placement).
- ○ Heat mat (optional): 1 (set to 65–75°F to speed up germination in cooler climates).
- ● Fertilizer (balanced, water-soluble): 1 small bottle (e.g., 5-5-5 or 10-10-10, diluted to half-strength for seedlings).
- ○ Fungicide (optional): 1 bottle (e.g., Mycorrhizal inoculant or neem oil to prevent damping-off disease).
- ○ Hardening-off tray (optional): 1 (for acclimating seedlings to outdoor conditions before transplanting).
- ● Outdoor garden space or larger pots: Prepared beds or containers (12+ inches deep) for transplanting once seedlings are sturdy.
How to germinate whorled tickseed seeds successfully
Tickseed thrives in tough conditions—here’s how to coax those hardy seeds into sprouts reliably.
🌱 Step 1: Prepare the Seedbed for Cold Tolerance
Whorled tickseed (Coreopsis verticillata) seeds germinate best in cool conditions, so start them outdoors in early spring or late fall when soil temperatures hover around 45-55°F. Choose a sunny, well-drained spot—this plant despises soggy roots. If sowing in containers, use 2-3 inch deep pots filled with a mix of 50% potting soil and 50% coarse sand to improve drainage.
Scatter seeds ¼ inch deep—they’re tiny, so don’t bury them deeper or they’ll struggle to emerge. Space them 6-8 inches apart if planting directly in the ground, or sow 3-4 seeds per pot if starting in containers. Lightly press them into the soil with your fingers, then water gently with a fine mist to avoid displacing them.
💧 Step 2: Maintain Moisture Without Overwatering
Keep the soil consistently moist but never soggy—tickseed seeds rot quickly in waterlogged conditions. Water only when the top inch of soil feels dry to the touch, using a spray bottle or drip irrigation to avoid disturbing the seeds. A clear plastic dome or row cover helps retain moisture and warmth during germination, but remove it once sprouts appear to prevent fungal issues.
Real talk: Overwatering is the #1 killer of tickseed seedlings. If the soil stays damp for more than 48 hours, seeds will suffocate. Test moisture by poking your finger in—if it comes out clean, hold off on watering.
☀️ Step 3: Provide Bright, Indirect Light for Strong Sprouts
Whorled tickseed seeds need bright, indirect light to germinate—direct sun can overheat the soil and inhibit sprouting. If starting indoors, place trays near a south-facing window or under grow lights positioned 4-6 inches above the seedlings. Outdoor sowings should be in partial shade until seedlings develop their first true leaves (the second set after the initial cotyledons).
You’ll see the first sprouts in 7-14 days under ideal conditions. Once they emerge, gradually increase sunlight exposure over 3-5 days to harden them off. Leggy seedlings mean insufficient light—adjust immediately to prevent weak stems.
⏰ Step 4: Thin Seedlings for Optimal Growth
When seedlings reach 2 inches tall (about 4-6 weeks after sowing), thin them to 1 plant per pot or 8-12 inches apart in the garden. Use sharp scissors to snip unwanted seedlings at soil level—pulling risks disturbing roots of remaining plants. The strongest seedling (deepest green, most upright) should stay; the rest can be transplanted elsewhere or composted.
Thinning might seem cruel, but crowded tickseed plants compete for nutrients and light, leading to stunted growth. After thinning, water deeply to help roots establish in the newly open space.
🌿 Step 5: Transition to Full Sun and Regular Care
Once seedlings have 4-5 true leaves, they’re ready for full sun (6+ hours daily). Mature whorled tickseed thrives in hot, dry conditions, so reduce watering to once weekly once established—unless your area experiences a heatwave over 90°F, then water lightly every 2-3 days. Mulch with 1-2 inches of straw to retain moisture and suppress weeds.
Here’s the thing—tickseed’s cold resistance means it often self-seeds. If you want to control spread, deadhead spent blooms by snipping stems ½ inch above the lowest leaf set before seeds mature. The plant will reward you with nonstop blooms from early summer to frost if given proper spacing and light.
Tips & tricks for perfect whorled tickseed germination
These hard-won insights will help you turn those stubborn tickseed seeds into thriving plants—without the trial and error.
Soil Temperature Matters: The 45-55°F soil temperature range in Step 1 is non-negotiable for germination. Use a soil thermometer to verify conditions—especially if your spring arrives late. Cold frames or black plastic mulch can help warm soil faster if needed. I've seen seeds fail to sprout when soil temps hovered just 5°F above the upper limit.
Lighting Strategy: For indoor starts, position your trays under grow lights on a 14-hour daylight cycle to mimic spring conditions. The 4-6 inch distance mentioned for grow lights is ideal—any closer and you'll risk overheating the soil. I use a simple timer to automate this; it eliminates guesswork and ensures consistent results.
Thinning Technique: When you reach Step 4 and seedlings hit 2 inches, don't rush the thinning process. The 4-6 week window gives you time to assess which plants are truly strongest. I've found that the first seedlings to emerge aren't always the healthiest—wait until you see consistent growth patterns before making your final cuts.
Moisture Management: The 48-hour dampness limit in Step 2 is critical, but don't let that scare you into underwatering. Use a moisture meter to check soil conditions—aim for that "slightly damp" feel between waterings. I've had success with self-watering trays that maintain perfect moisture without the risk of overwatering.
Pro Tips for Whorled Tickseed Seeds
- These hard-won insights will help you turn those stubborn tickseed seeds into thriving plants—without the trial and e...
- Soil Temperature Matters: The 45-55°F soil temperature range in Step 1 is non-negotiable for germination. Use a soil ...
- Lighting Strategy: For indoor starts, position your trays under grow lights on a 14-hour daylight cycle to mimic spri...
Frequently asked questions
about whorled tickseed (Coreopsis verticillata) seeds—especially when it comes to cold-resistant germination—can help you avoid common pitfalls. Here are answers to the most pressing questions!How cold can whorled tickseed seeds handle before planting?
Whorled tickseed seeds are tough! They can tolerate light frosts and temperatures down to 25–30°F (-4 to -1°C) when dry. However, once planted, they prefer soil temps of 60–70°F (15–21°C) for best germination. For early spring planting, consider a cold frame or row cover to protect seedlings.
Why aren’t my whorled tickseed seeds sprouting in 60 days?
If germination takes longer than expected, check these factors:
- Moisture: Keep soil consistently damp (not soggy) but avoid overwatering.
- Light: These seeds need sunlight to germinate—don’t bury them too deep (max ¼ inch).
- Temperature: If soil is below 50°F (10°C), germination slows dramatically.
- Seed viability: Store seeds in a cool, dry place—old seeds may lose vigor.
If still no luck, try stratifying seeds (mixing with damp sand and refrigerating for 2–4 weeks) to mimic winter conditions.
Can I direct-sow whorled tickseed in fall for spring blooms?
Yes! Fall sowing is a great strategy—just plant seeds 6–8 weeks before your first frost (e.g., late September in Zone 5). The cold period helps break dormancy, and seedlings emerge early spring. Mulch lightly with straw to protect from harsh winters. Pro tip: Mark rows with flags to avoid disturbing them in spring!
Are there alternatives to whorled tickseed for cold climates?
If you love the perennial, drought-tolerant vibe of whorled tickseed, try these cold-hardy alternatives:
- Black-eyed Susan (Rudbeckia hirta) – Thrives in zones 3–9, similar care.
- Purple Coneflower (Echinacea purpurea) – Native, pollinator-friendly, and cold-resistant.
- Sedum (Stonecrop, e.g., Sedum ‘Autumn Joy’) – Drought-tolerant and blooms late summer.
All three handle Zone 3–4 winters with minimal fuss!
What’s the best way to prevent whorled tickseed from spreading too much?
Whorled tickseed is not invasive but can self-seed. To control spread:
- Deadhead spent blooms before they form seed heads.
- Divide clumps every 3–4 years to maintain vigor.
- Plant in containers if space is limited (they thrive in pots!).
Bonus: The seeds are bird-friendly—leave some for wildlife if you’re okay with occasional volunteers!
Wrapping up and next steps
Whorled tickseed seeds prove that resilience and beauty can grow even in cooler climates! With just a few simple steps—like choosing the right soil, timing your sowing, and providing consistent care—you can enjoy vibrant blooms in as little as 60 days.
Whether you're a seasoned gardener or just starting, these hardy seeds are a fantastic way to add color and life to your outdoor space.
Ready to give it a try? Grab your seeds, prep your garden, and watch your whorled tickseed thrive! 🌱✨