
Lawn
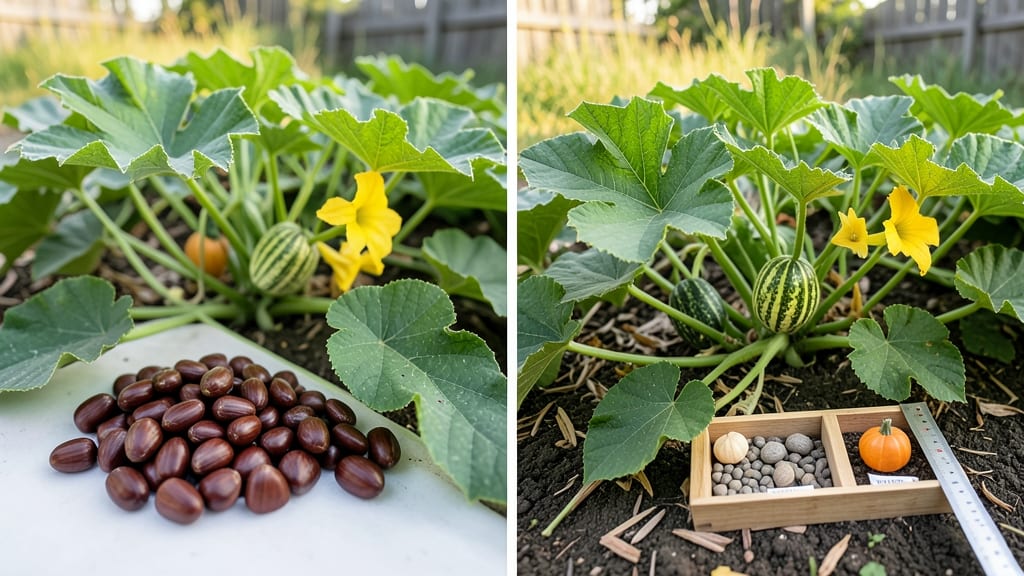
Squash seed identification saves you from planting the wrong variety—and ending up with inedible fruit. 🌱 I’ve spent years sorting through seed packets, and the differences between zucchini, butternut, and pumpkin seeds are easier to spot than you’d think once you know what to look for. Start with shape: zucchini seeds are flat and oval, while butternut seeds are more rounded and slightly ribbed. Color matters too—zucchini seeds are usually a pale tan, butternut seeds have a warm beige hue, and pumpkin seeds are often darker with a glossy finish. Size also helps: butternut seeds are the largest, followed by pumpkin, then zucchini. Mislabeled seeds happen, so always cross-check with the packet or a trusted seed guide. A quick internet search with a photo can confirm what you’re planting. Once you master this, you’ll never second-guess your seed choices again. For beginners, keep a small notebook with seed traits and photos to compare. It’s the fastest way to build confidence—and avoid the heartbreak of planting the wrong thing.
📚 In This Guide
- What you need
- Instructions
- Tips and common mistakes
- Wrapping up and next steps
What you need
- ● Fresh or dried squash seeds: Collect seeds from squash varieties you suspect may be edible or inedible (e.g., summer squash, winter squash, or pumpkins). Aim for at least 5-10 seeds per type for reliable testing.
- ● Magnifying glass or handheld loupe: A 10x magnification tool helps examine seed details like ridges, color, and shape up close.
- ● Ruler or caliper: For measuring seed size (most edible squash seeds range from 0.25–0.75 inches in length).
- ● White or light-colored tray or plate: A 9x12-inch surface works well for arranging seeds side by side.
- ● Reference guide or printed images: Download or print a squash seed identification chart (like the one in this article!) for quick comparisons.
- ● Notebook and pen: To log observations like color, texture, and seed coat thickness.
- ● Seed germination kit: If you plan to test viability, a small humidity-controlled container speeds up sprouting.
- ● Digital microscope or smartphone adapter: For high-res photos of seed structures (e.g., hilum shape).
- ● Toxic plant database access: Apps like iNaturalist or PlantNet can cross-reference unknown seeds.
- ● Gloves (nitrile or latex): Recommended if handling wild or unknown seeds to avoid skin irritation.
How to identify squash seeds: edible vs inedible varieties
Here's how I tell good seeds from bad—and how to save your own for next year.
🌱 Step 1: Examine Seed Shape and Size
Edible squash seeds are typically flat, oval, and ½ to ¾ inch long, with a smooth or slightly ridged surface. I look for a uniform shape—if seeds are irregular or misshapen, they might be from hybrid varieties that won’t grow true. Store-bought seeds often have a slightly curved, almond-like shape, while heirloom seeds are usually more rounded.
Inedible seeds (like those from ornamental gourds) are often rounder, larger, or have deep grooves. I once saved seeds from a decorative pumpkin, only to grow a vine full of useless fruit. Always check the seed packet—if it says "ornamental," toss those seeds immediately.
🌿 Step 2: Check for Damage or Discoloration
Healthy squash seeds have a matte, creamy-white to tan color. If seeds are dark brown, black, or have mold spots, they’re likely spoiled. I test seed viability by floating them in water—good seeds sink, while bad ones float. Discard any seeds with cracks, holes, or a musty smell, as they won’t sprout.
Watch for pale or translucent seeds, too—these are often old or stored improperly. I keep my seeds in a cool, dry place (like a sealed jar in the fridge) to prevent moisture damage. If seeds feel sticky or clump together, they’ve absorbed too much humidity and should be discarded.
☀️ Step 3: Identify Seed Coat Texture
Edible squash seeds usually have a smooth or lightly textured coat. Some heirloom varieties have a slightly waxy sheen, while others are dull. I run my thumb over a seed—if it feels rough or bumpy, it might be from a wild or hybrid squash. Ornamental gourd seeds often have deep ridges or a hard, glossy shell.
Press the seed between your fingers—good seeds give a little but don’t crumble. If it feels powdery or breaks easily, it’s past its prime. I also check for tiny holes or insect damage, which means pests got to them during storage. Always save seeds from healthy, fully mature squash—young or diseased fruit won’t produce viable seeds.
⏰ Step 4: Verify Seed Source and Variety
If you’re unsure, cross-reference with a seed-saving guide or the original plant’s characteristics. I keep a notebook where I jot down the squash type, color, and seed traits when I harvest. For example, butternut squash seeds are small and flat, while acorn squash seeds are slightly larger and more rounded.
Never save seeds from hybrid squash (marked "F1" on packets)—they won’t grow true to type. Stick to open-pollinated or heirloom varieties for reliable seeds. I also avoid seeds from cross-pollinated squash (like zucchini near pumpkins), as they’ll produce mixed results. When in doubt, buy fresh seeds from a reputable supplier.
✂️ Step 5: Test a Few Seeds for Germination
To confirm viability, plant 3-4 seeds in a small pot with moist potting mix. Keep them in a warm, sunny spot (around 70-80°F) and check for sprouts in 7-14 days. If none germinate, try another batch—or buy new seeds. I’ve had seeds last 3-5 years if stored properly, but germination drops after 2 years.
If seeds sprout but the seedlings look weak or deformed, they’re likely from a hybrid or diseased plant. Healthy seedlings should have strong stems, deep green leaves, and no yellowing. If you see blackened stems or stunted growth, discard those seeds and start fresh. This final test gives me peace of mind before committing to a full garden.
Tips & tricks for perfect squash seed identification
Here's what nobody tells you about separating good seeds from bad—these tricks save you from wasting next year's garden.
Seed Shape and Size: When comparing seeds in Step 1, use a ruler to measure the ½ to ¾ inch range for edible varieties. I keep a small magnifying glass handy to check for those subtle ridges that distinguish heirloom seeds. Store-bought seeds often have a distinctive almond shape—this is your first clue they're safe to save. Remember, ornamental gourd seeds are usually rounder and larger, so if your seeds look like marbles, they're likely inedible.
Texture Test: In Step 3, the texture test is your secret weapon. Run your thumb across the seed's surface—good seeds should feel smooth or just slightly ridged. If you feel deep grooves or a hard, glossy shell, those seeds are from ornamental varieties. I also do a quick "squeeze test" by pressing between my fingers; seeds should give slightly but not crumble. This tells me if they're still fresh enough to plant.
Viability Check: The water float test in Step 2 is foolproof for catching bad seeds. Fill a bowl with water and drop in a handful of seeds—any that float are likely spoiled or non-viable. I've saved countless batches by doing this simple test before planting. For extra accuracy, I use a clear glass so I can see the seeds clearly. This step alone prevents me from wasting seeds that won't grow.
Storage Wisdom: To keep your seeds viable for years, store them in a cool, dry place like a sealed jar in the fridge. I label each jar with the squash type and harvest date. Remember, seeds lose viability after about 2 years, so this method helps you determine if your seeds are still good. For long-term storage, you can also place seeds in a sealed container with a silica gel packet to absorb moisture.
Pro Tips for Squash Seed Identification
- Here's what nobody tells you about separating good seeds from bad—these tricks save you from wasting next year's garden.
- Seed Shape and Size: When comparing seeds in Step 1, use a ruler to measure the ½ to ¾ inch range for edible varieties.
- Texture Test: In Step 3, the texture test is your secret weapon.
Frequently asked questions
Got questions about squash seed identification? You’re not alone—even experienced gardeners sometimes need a little help distinguishing edible from inedible varieties. Here are some of the most common questions (and answers!) to clear up the confusion:
How can I tell if a squash seed is edible just by looking at it?
Edible squash seeds (like those from butternut, acorn, or pumpkin) are typically flat, oval, and white, cream, or light green. Inedible seeds (from ornamental or toxic varieties) may be round, glossy, or brightly colored (red, black, or iridescent). Always cross-reference with your plant’s label or a trusted guide!
When is the best time to harvest squash seeds for planting?
Harvest seeds when the squash is fully mature and the skin turns hard. For most varieties, this is 8–12 weeks after flowering. Scoop out the seeds, rinse them, and let them dry in a warm, shaded spot for 2–3 days. Store in a cool, dry place for up to 5 years!
What should I do if I accidentally plant seeds from a wild or unknown squash?
If you’re unsure about the variety, do not eat the fruit or seeds. Instead, research the plant’s characteristics (leaf shape, vine structure, or seed color) and compare them to known edible/inedible squash. When in doubt, consult a local extension office or toxicology expert for peace of mind.
Can I save seeds from store-bought squash for next year’s garden?
Generally, yes—but with caution. Store-bought squash seeds may be from hybrid varieties, which can produce inconsistent or inferior fruit. If you’re set on saving seeds, choose heirloom or open-pollinated squash (like ‘Sugar Pie’ or ‘Waltham Butternut’) and ensure no cross-pollination with wild or ornamental squash nearby.
How do I identify toxic squash seeds (like those from Cucurbita foetidissima)?
Toxic squash seeds (e.g., from C. foetidissima, also called “stinking gourd”) often have dark, mottled, or irregularly shaped seeds and grow on vines with lobed leaves and bitter fruit. If you spot these traits, avoid ingestion—some varieties contain cucurbitacins, which can cause severe stomach upset or worse.
Wrapping up and next steps
Mastering squash seed identification is your first step toward confidently foraging—or safely avoiding—these garden gems! 🌱 Whether you're a gardener, a curious explorer, or just eager to avoid a stomachache, knowing the difference between edible and toxic seeds (and plants) is a game-changer. Now that you’ve got the visual cues and key tips down, it’s time to put them into action!
Your next logical step? Start small:
- Grab a magnifying glass and a field guide (or your phone!) for a hands-on identification session.
- Share your newfound knowledge with fellow gardeners or local foraging groups.
- Experiment with growing your own squash—safely!—and track your progress.