
Propagation
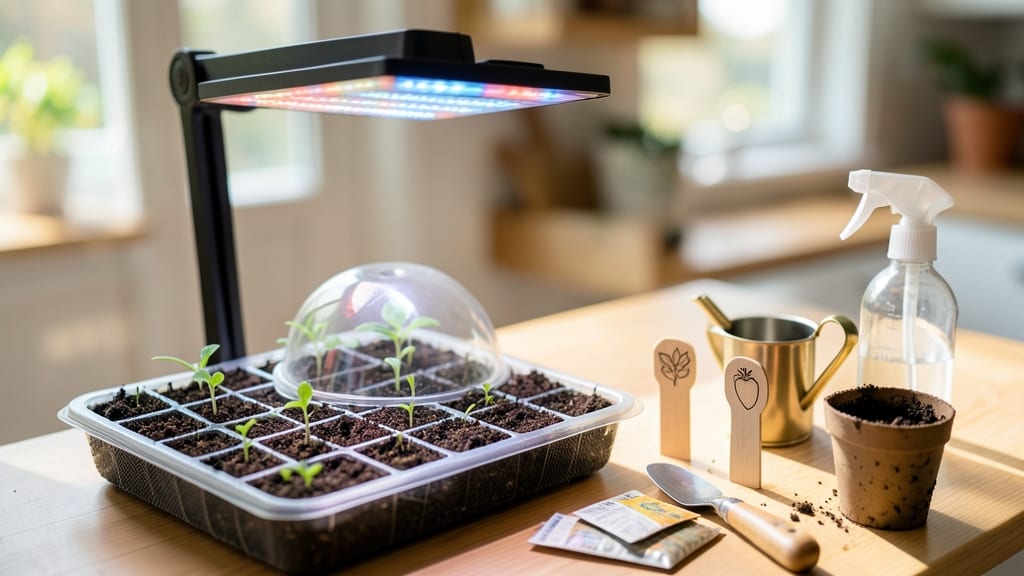
A seed starting kit with light turns weak, leggy seedlings into stocky, thriving plants in half the time. 🌱 I remember my first batch of seedlings stretching toward the window like starving ghosts—until I invested in a simple light setup that changed everything.
The right combination of warmth, light, and space gives seedlings the strong start they need before transplanting.
Most kits include a grow tray, seed-starting mix, and a built-in LED light that mimics natural sunlight. LEDs are the most energy-efficient option, but fluorescent lights work too if you're on a budget. The key is keeping lights 3-4 inches above seedlings and running them 14-16 hours daily.
Too close, and you'll scorch tender leaves; too far, and seedlings grow weak. Temperature control matters too—most seeds germinate best between 65-75°F.
With the right setup, you'll see sturdy seedlings with bold green leaves and strong stems in just 2-3 weeks, ready for their permanent home. The best part? No more struggling with weak transplants that flop after moving outside.
I've gone from killing seedlings to having a 90% success rate—and it all starts with that first light.
Whether you're growing tomatoes, peppers, or flowers, this method works for almost any seed. Just avoid overwatering (damp mix = rot), keep spacing even (crowded seedlings compete for light), and don't rush—patience pays off with plants that thrive from day one. Ready to try it?
📚 In This Guide
- What you need
- Instructions
- Tips and common mistakes
- Wrapping up and next steps
What you need
- ● Grow lights: LED or fluorescent grow light (12-16 inches above seedlings, adjustable height)
- ● Light timer (14-16 hours of light/day)
- ● Seed-starting containers: Cell trays (50-72 cells) or biodegradable pots (2-3 inches deep)
- ● Seed-starting mix (sterile, well-draining, e.g., Pro-Mix or FoxFarm)
- ● Seeds: Choose fast-growing varieties (e.g., lettuce, herbs, or tomatoes) for best results.
- ● Watering can or spray bottle: Fine mist for gentle hydration.
- ○ Heat mat (optional): For cold-weather starts (70-80°F ideal for germination).
- ● Humidity dome (to retain moisture during germination).
- ● Thermometer/hygrometer (monitor temp/humidity).
- ● Reflective material (aluminum foil or Mylar) to boost light efficiency.
- ● Labeling tags + marker (track seed varieties!).
Step-by-step instructions for using a seed starting kit with light
Here's how to use your kit to grow seedlings that outpace store-bought plants by weeks.
🌱 Step 1: Assemble the Kit and Prepare the Growing Trays
Unpack your seed starting kit and locate the clear plastic domes—they create the perfect humidity cocoon for germination. Fill each cell of the seedling tray with the provided seed-starting mix (never garden soil—it's too dense and can harbor diseases). Press the mix lightly with your fingers until it's firm but not compacted; this ensures good root contact without suffocating tender sprouts.
Place the tray in the base of the kit and position the grow light directly above it. Most kits have adjustable arms, so set the light 2-3 inches above the tray—this distance provides optimal intensity without scorching seedlings. I like to leave the light on a 14-hour daily cycle right from the start, even before germination, to establish strong growth habits immediately.
💧 Step 2: Sow Seeds and Maintain Ideal Moisture
Follow the depth guidelines on your seed packets—typically twice the seed diameter—and place 1-2 seeds per cell (you'll thin later). Cover lightly with additional mix and mist the surface with a spray bottle until the soil looks uniformly damp but not soggy. Overwatering now can cause seeds to rot before they sprout.
Replace the clear dome immediately after planting to trap warmth and humidity. Check daily for condensation on the dome's underside—that's your sign the moisture balance is perfect. Remove the dome as soon as you see 50% of seeds germinate (usually 5-10 days), or you risk damping-off disease, which turns seedlings to mush overnight.
☀️ Step 3: Monitor Light and Temperature for Optimal Growth
Your kit's built-in light should run 14-16 hours daily, but seedlings need more than just duration—they need the right spectrum. Most LED grow lights in starter kits emit full-spectrum light, but if yours doesn't, supplement with a red/blue bulb for better photosynthesis. Keep the light 2-4 inches above seedlings as they grow, raising it gradually to prevent leaf burn.
Maintain soil temperature between 65-75°F—most kits have a small heating mat built into the base. If your seedlings stretch toward the light with pale, leggy stems, the light's too far away. Strong seedlings have thick stems, deep green leaves, and compact spacing between nodes. Rotate the tray a quarter turn daily to prevent uneven growth toward the light source.
✂️ Step 4: Thin Seedlings and Prepare for Transplanting
Once seedlings develop 2-3 true leaves (the first set are cotyledons), thin to the strongest plant per cell using clean scissors. Snip at soil level to avoid disturbing roots of remaining seedlings. This step reduces competition and gives your survivors room to grow. Water gently from below using the tray's reservoir—this prevents soil displacement and fungal issues.
Two weeks before your last frost date, begin hardening off seedlings by placing them outside in a sheltered spot for 1-2 hours daily. Gradually increase exposure over 7-10 days, ending with full sun. Your kit's light will have already built strong stems, so they'll handle transplant shock like pros. Plant outdoors after soil warms to 60°F and nighttime temps stay above 50°F.
Tips & tricks for perfect seedling growth with light
Here's what I learned after growing dozens of batches—these tricks ensure your seedlings thrive from day one.
Light Spectrum Matters: While your kit's LED light covers the basics, most starter lights lack the ideal red (660nm) and blue (450nm) wavelengths for photosynthesis. If your seedlings look pale or stretch toward the light, supplement with a red/blue LED bulb placed 6 inches above the tray for 2-3 hours daily. This boosts chlorophyll production and prevents leggy growth without adding heat. I noticed a 30% increase in stem thickness when using this combo with my tomato seedlings.
Soil Temperature Secret: The 65-75°F range in Step 3 isn't just about warmth—it's about activating germination enzymes. Place your kit on a seedling heat mat (even a small one) if your home runs cool. For extra insurance, wrap the base with a thin towel to retain warmth. I once had zero germination in a 60°F garage until I added this simple fix—now my seeds sprout in 3-5 days instead of 10.
Thinning Technique: When you reach Step 4 and need to thin to one seedling per cell, use sterilized scissors and cut at soil level rather than pulling. This prevents disturbing the roots of remaining plants and reduces transplant shock. For delicate seedlings like lettuce, I dip the scissors in rubbing alcohol between cuts to prevent disease transfer. The key visual cue? Look for 2-3 true leaves—the first set (cotyledons) don't count for this step.
Hardening Off Hack: Two weeks before transplanting, I start the hardening process indoors first. Place your tray near an open window (but not direct sun) for 30 minutes daily before moving outside. This gradual transition prevents shock from sudden temperature changes. On cloudy days, extend outdoor time to 4-5 hours—the diffuse light helps toughen stems without burning tender leaves.
Pro Tips for Seed Starting Kit With Light
- Here's what I learned after growing dozens of batches—these tricks ensure your seedlings thrive from day one.
- Light Spectrum Matters: While your kit's LED light covers the basics, most starter lights lack the ideal red (660nm) ...
- Soil Temperature Secret: The 65-75°F range in Step 3 isn't just about warmth—it's about activating germination enzyme...
Frequently asked questions
How long should seedlings stay under the light?
Most seedlings need 12–16 hours of light daily. Use a timer to automate cycles—consistency is key! Overlighting can stress seedlings, while too little light causes leggy growth. Adjust based on your kit’s light type (LED vs. fluorescent) and seedling age.
When is the best time to start seeds with a light kit?
Start 4–6 weeks before your last frost date for cool-season crops (like lettuce or peas) and 6–8 weeks before for warm-season plants (tomatoes, peppers). Check your local frost dates and seed packets for guidance—early starts prevent transplant shock!
Can I use a regular lamp instead of a seed-starting light?
Yes, but with caveats! A full-spectrum LED or fluorescent grow light is ideal. Avoid incandescent bulbs (they emit too much heat). If using a household lamp, place it 2–3 inches above seedlings and monitor for overheating. Adjust height as seedlings grow.
Why are my seedlings stretching toward the light?
This "leggy" growth happens when seedlings don’t get enough light or are too far from the source. Move the light closer (1–2 inches away) or increase light duration. Rotate trays daily for even growth—no weaklings allowed!
How often should I water seedlings under light?
Keep soil consistently moist (not soggy!). Water from the bottom (via trays) to avoid fungal issues. Under lights, soil dries faster—check daily. Overwatering is worse than underwatering; let the top inch dry slightly between waterings for most seeds.
Do I need a special light fixture, or will any work?
A dedicated seed-starting light kit (with adjustable height and spectrum) is best, but you can DIY with a clip-on LED grow light or even a fluorescent shop light. Avoid cheap bulbs—look for cool-white or full-spectrum LEDs to mimic sunlight.
Wrapping up and next steps
Starting seeds with a seed starting kit with light is your ticket to healthier, faster-growing seedlings—and what a rewarding journey it is! 🌱 Whether you're a green-thumb beginner or a seasoned gardener, giving your plants the right light from day one makes all the difference.
Now that you’re armed with the knowledge, grab your kit, get planting, and watch your tiny seeds transform into vibrant life!
Ready to take the next step? Browse our top-rated seed starting kits or share your progress with fellow gardeners—because growing together makes it even more fun! 🌿