
Propagation
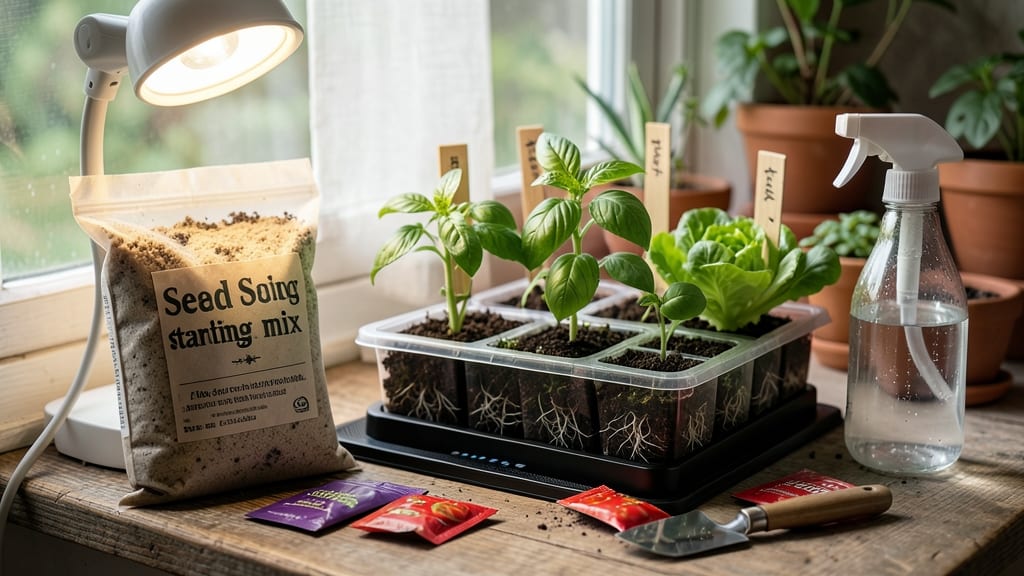
Seed starting for beginners turns tiny specks into lush plants that’ll feed you all summer. 🌱 I’ve watched my first seedlings emerge after just 7 days—no green thumb required, just patience and the right setup. The key is matching seeds to timing, containers to size, and light to their needs, every step designed to avoid the frustration of leggy, weak sprouts.
You’ll need three simple supplies: seed-starting mix (not garden soil), small containers (even recycled egg cartons work), and a warm spot with bright light. Timing is everything—most veggies start 6-8 weeks before your last frost, while herbs like basil can go anytime.
The trick is keeping soil moist (not soggy) and giving seedlings 12-16 hours of light daily—a sunny windowsill or grow light does the trick.
By week 3, you’ll see bold green leaves instead of fragile sprouts, and those first true leaves mean it’s time to thin or transplant. The biggest mistake? Overwatering or letting soil dry out—both stunt growth.
But once you’ve got this rhythm, you’ll be harvesting homegrown tomatoes, peppers, and herbs months before store-bought plants even hit the shelves.
This method works for any climate or space, from a sunny kitchen to a basement setup. The only rule? Start small—master a few easy seeds like lettuce or marigolds before tackling tomatoes. Next up: troubleshooting wilting or mold, and when to move seedlings outside. Ready to grow?
📚 In This Guide
- What you need
- Instructions
- Tips and common mistakes
- Wrapping up and next steps
What you need
- ● Seeds: Choose heirloom, organic, or non-GMO seeds for best results. Start with easy varieties like basil, marigolds, or cherry tomatoes.
- ● Seed trays or containers: 1-2 trays with drainage holes (6-12 packs work well) or recycled containers like egg cartons or plastic cups.
- ● Seed starting mix: A lightweight, sterile soilless mix (avoid garden soil—it’s too dense!). Aim for 1-2 bags (5-10 quarts).
- ● Grow lights or sunny windowsill: A full-spectrum LED grow light (12-16 hours/day) or a south-facing window with consistent light.
- ● Watering can or spray bottle: A fine-mist sprayer keeps seeds moist without disturbing them.
- ● Labels & markers: Small labels or popsicle sticks to track seed types and planting dates.
- ○ Humidity dome or plastic wrap: Optional but helpful for retaining moisture (a clear plastic bag works in a pinch!).
- ● Heating mat: Speeds up germination for slow starters like peppers or lettuce.
- ● Fertilizer: A diluted balanced liquid fertilizer (5-5-5 or similar) to nourish seedlings after sprouting.
- ● Scissors or knife: For trimming plastic containers or making drainage holes.
- ● Tweezers: For delicate seed placement (great for tiny seeds like carrots).
- ● Thermometer: To monitor soil temperature (ideal range: 65–75°F for most seeds).
Step-by-Step instructions for seed starting for beginners
Here's how I teach absolute beginners to start seeds without stress or failure.
🌱 Step 1: Gather Your Essential Supplies
You only need five core items: seed-starting trays (with clear lids or humidity domes), sterile seed-starting mix (not garden soil), seeds (choose fast-growing varieties like lettuce or radishes for practice), spray bottle (for gentle watering), and grow lights or a sunny windowsill. I always sanitize my trays with a 10% bleach solution before use—this prevents damping-off disease that kills seedlings overnight.
Skip the fancy tools. A butter knife works perfectly for pressing seeds into soil, and a pencil helps make small planting holes. The key is keeping everything clean—dirty trays or reused soil harbor fungus that will rot your seedlings before they sprout. If you don't have a spray bottle, use a clean, empty water bottle with holes poked in the cap.
💧 Step 2: Prepare Trays and Plant Seeds Correctly
Fill your trays with seed-starting mix up to ½ inch below the rim. Press the mix down gently so it's firm but not compacted—you want it to hold moisture without becoming soggy. Moisten the mix until it feels like a damp sponge (squeeze a handful; water should bead up but not drip).
Read your seed packet for depth—most small seeds need ¼ inch coverage, while larger seeds like beans go 1 inch deep. I like to use the eraser end of a pencil to make planting holes. Place 1-2 seeds per cell (you'll thin later), cover lightly, and label the tray with the seed type and date. Don't overcrowd—seedlings need space to grow strong.
☀️ Step 3: Create Ideal Germination Conditions
Cover trays with their lids or plastic wrap to trap heat and moisture. Seeds need warmth (70-80°F) to germinate—place trays on a seedling heat mat if possible, or on top of your fridge. Check moisture daily with your finger: the top ¼ inch of soil should feel damp but not wet. Mist lightly if needed, but avoid soaking the soil.
Germination times vary—radishes sprout in 3-5 days, while tomatoes take 7-14 days. The instant you see sprouts, remove the lid immediately. Trapped moisture after germination causes fungal diseases that rot stems at the soil line. Place trays under grow lights 12-16 hours daily (or a south-facing window) to prevent leggy seedlings.
🌿 Step 4: Care for Seedlings Until Transplanting
Once seedlings have 2-3 true leaves (the first leaves that look like the mature plant, not the initial seed leaves), it's time to thin. Use scissors to snip weak seedlings at soil level—don't pull, or you'll disturb the roots of remaining plants. Keep the strongest seedling per cell, leaving ½ inch of space around its stem.
Water from the bottom now: place trays in a shallow tray of water for 10-15 minutes, then drain. This encourages deep root growth. Harden off seedlings 1 week before transplanting by moving them outside for 1 hour daily, gradually increasing time. Watch for wilting or yellowing—these are signs they're not ready for outdoor conditions yet.
Tips & tricks for perfect seed starting
Here's what nobody tells you about avoiding the most common seed-starting disasters.
Sanitization Secret: That 10% bleach solution in Step 1 isn't just about cleanliness—it's your first line of defense against damping-off disease, which can wipe out your seedlings overnight. After bleaching, rinse trays thoroughly with water to remove any bleach residue that could harm your plants. I also recommend using a separate spray bottle for watering after sanitization to avoid cross-contamination.
The Temperature Factor: While the instructions mention 70-80°F for germination, here's the thing: most household thermostats maintain 68-72°F. If your home runs cooler, place your seedling heat mat directly under the trays rather than on top of your fridge. Pro tip: Use a small thermometer to monitor soil temperature—seeds need consistent warmth at the soil level, not just ambient air temperature.
Lighting Strategy: Those 12-16 hours of grow light exposure are critical, but placement matters just as much. Position lights just 2-3 inches above seedlings to prevent stretching. I've seen seedlings grow 6 inches tall in a week when lights were too far away! If using a south-facing window, rotate trays daily so all sides get equal light exposure—this prevents seedlings from leaning toward the light source.
Thinning Technique: When you reach the 2-3 true leaves stage in Step 4, here's what I learned the hard way: Don't use your fingers to pull seedlings—always use clean scissors. The roots of your remaining seedlings will thank you. I also recommend thinning on a cloudy day or in low light conditions; seedlings handle stress better when they're not competing for sunlight immediately after thinning.
Pro Tips for Seed Starting For Beginners
- Here's what nobody tells you about avoiding the most common seed-starting disasters.
- Sanitization Secret: That 10% bleach solution in Step 1 isn't just about cleanliness—it's your first line of defense ...
- The Temperature Factor: While the instructions mention 70-80°F for germination, here's the thing: most household ther...
Frequently asked questions
Got questions? You’re not alone—seed starting can feel like rocket science at first! Here are answers to the most common queries to help you grow with confidence.
What’s the best time to start seeds indoors?
Timing depends on your last frost date (check local averages) and plant type. Most veggies (like tomatoes or peppers) need 6–8 weeks before transplanting. Leafy greens or herbs can go in 4–6 weeks earlier. Use a seed-starting calculator to avoid rushing!
Do I need grow lights, or can I use a sunny windowsill?
Sunny windowsills work for short-term starts (like herbs or lettuce), but most seedlings need 12–16 hours of light daily. Grow lights (LED or fluorescent) prevent leggy, weak plants. South-facing windows get the most light, but cloudy days or winter weakens natural light—supplement if possible!
How often should I water my seedlings?
Keep soil consistently moist (not soggy!) by watering when the top inch feels dry. Bottom-watering (placing trays in shallow water) prevents fungal diseases. Avoid overhead watering—it spreads mold. Pro tip: Use a spray bottle for tiny seeds or mist gently to avoid disturbing them.
What do I do if my seedlings look sick or die?
Common issues include damping-off (fungal rot at the stem base), overwatering, or poor light. Fix it by:
- Improving airflow with a small fan (gentle breeze helps!).
- Using sterile soil and clean tools.
- Thinning crowded seedlings to reduce competition.
If all else fails, try again—even experienced gardeners lose a batch!
Can I start seeds in egg cartons or other household items?
Egg cartons, toilet paper rolls, or yogurt cups work as temporary seed starters. Just poke drainage holes and use them until seedlings have 2–3 true leaves. For long-term growth, transplant to biodegradable pots or soil blocks to avoid root disturbance.
Wrapping up and next steps
Starting seeds may feel like a big leap, but with the right tools and a little patience, you’ll be watching tiny sprouts transform into thriving plants in no time! 🌱 The key is consistency—whether it’s keeping your trays warm, providing enough light, or gently handling those delicate seedlings.
Every gardener starts somewhere, and your first batch of seedlings is just the beginning of a rewarding journey.
Ready to take the next step? Experiment with different plants, try your hand at transplanting, or even share your newfound skills with a friend. Your green thumb is closer than you think—just grab those seeds and get growing!