
Propagation
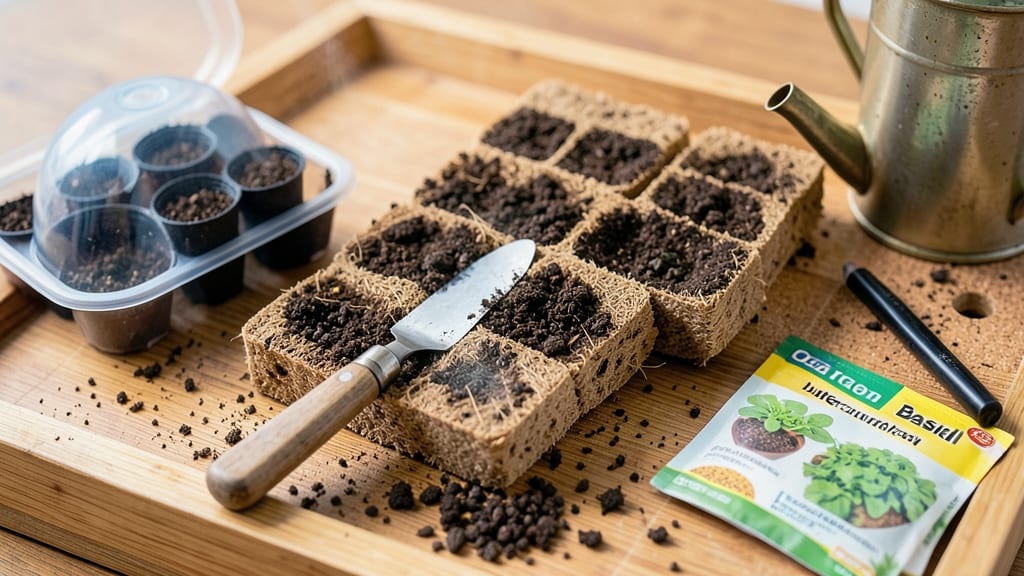
Your seedlings will grow roots twice as strong with this air-porous soil block mix. 🌱 I spent years struggling with weak, tangled roots in traditional seed-starting mixes until I discovered how simple soil blocks could transform my seedlings—no more root-bound messes, just sturdy plants ready for transplanting.
The secret lies in the mix: 60% coco coir, 30% perlite, and 10% compost, all blended to create a crumbly, airy texture that mimics natural soil.
This isn’t your average seed-starting potting mix—it’s designed to encourage deep root growth while keeping moisture balanced, so you won’t drown delicate sprouts or watch them dry out in a week.
By the time your seedlings are ready to harden off, they’ll have stronger stems and longer roots, making the transplant shock disappear. The blocks break down naturally in the soil, so you’re not adding plastic or synthetic materials—just pure, organic growth potential.
Perfect for organic gardeners, small-space growers, or anyone tired of seedlings that flop when moved outside. Here’s exactly how to mix it, use it, and keep your seeds thriving from day one.
📚 In This Guide
- What you need
- Instructions
- Tips and common mistakes
- Wrapping up and next steps
What you need
- ● Coco coir (or peat moss): 60% of the mix (e.g., 3 cups for a 5-cup batch). Tip: Use composted coco coir to avoid mold.
- ● Perlite: 20% (1 cup). Why? Adds air pockets for root growth.
- ● Vermiculite: 20% (1 cup). Bonus: Retains moisture while keeping roots aerated.
- ● Worm castings or compost: 5-10% (½–1 cup). Pro tip: Boosts nutrients without compacting the mix.
- ○ Lime (optional but helpful): 1 tsp per 5 cups. Use: Balances pH (especially for coco coir).
- ● Large mixing container (e.g., 5-gallon bucket with a lid). Why? Prevents dust and keeps ingredients contained.
- ● Measuring cups/spoons (for precision). Pro tip: Use a digital scale for accuracy if possible.
- ● Gloves & mask (to avoid dust inhalation).
- ● Soil block maker (or DIY molds). Note: Adjust block size based on seed type (e.g., smaller for lettuce, larger for tomatoes).
- ○ pH testing kit (optional but recommended). Goal: Aim for 6.0–7.0 pH.
- ● Mycorrhizal fungi: 1 tsp. Boosts: Root colonization for stronger seedlings.
- ● Biochar: 1 tbsp. Perks: Improves water retention and microbial activity.
- ● Seaweed extract: 1 tsp. Why? Adds trace minerals and growth hormones.
How to make the perfect soil block mix for seed starting
This airy, crumbly mix gives seedlings the strong start they need—no compaction, no root binding.
🌱 Step 1: Gather the Right Base Materials
For 400 soil blocks, you’ll need 20 pounds of coco coir (the fluffy, fibrous coconut husk) and 10 pounds of perlite. The coco coir provides structure and moisture retention, while the perlite creates those crucial air pockets that prevent roots from circling. I sift the coco coir first—removing any large chunks ensures an even texture for your blocks.
Mix these dry ingredients in a large wheelbarrow or clean bucket. Use your hands to break up any remaining clumps, but don’t overwork it—you want a loose, almost powdery consistency. Think of it like fluffing up a pillow: just enough to create space, not so much that it falls apart when you handle it.
💧 Step 2: Hydrate Gradually for Ideal Moisture
Add water slowly—about 1 gallon at a time—while stirring with a garden fork. You’re aiming for a mix that feels like a damp sponge: when you squeeze a handful, a few drops should form, but it shouldn’t drip or leave wet spots. Too much water now means soggy blocks later, which can suffocate roots.
Here’s the trick: let the mix sit for 10 minutes after each addition. Walk away and check—if it still feels dry, add another splash. The goal is uniform moisture without turning it into mud. If you’re unsure, under-moisten slightly. You can always add more water later, but you can’t take it out once it’s in.
✂️ Step 3: Test and Refine the Texture
Grab a handful of the mix and roll it between your palms. It should hold together when pressed but still crumble easily. If it sticks to your hands or forms a tight ball, add ½ cup perlite and mix again. If it falls apart completely, sprinkle in ¼ cup coco coir and rehydrate slightly.
Press a small portion into a block mold to test. When you lift it, the edges should stay intact but still show the airy crumbly texture inside. This is your signal that the mix is ready. If blocks crumble when you try to handle them, they need more moisture. If they feel dense, add another ¼ cup perlite and redistribute evenly.
🪴 Step 4: Fill Molds and Let Them Dry
Pack the mix firmly into your soil block maker, pressing down just enough to fill the mold completely. The blocks should feel solid but not compressed—think of packing a snowball without squeezing out all the air. Once filled, let them sit for 1-2 hours until they’re dry enough to handle but still slightly damp to the touch.
Store finished blocks in a sealed container or plastic bag until use. They’ll keep for up to 2 weeks if stored in a cool, dry place. Before planting, mist them lightly with water—this ensures they’re ready to absorb moisture from the seed’s first roots without shock. Over time, you’ll develop a feel for the perfect texture, but don’t stress if your first batch isn’t flawless. Even slight variations still work better than store-bought mixes.
Tips & tricks for perfect soil block mix
Between us, the secret to foolproof soil blocks lies in the details—especially when it comes to texture and timing. Here's what nobody tells you about making this mix work like a dream.
Texture is Everything: In Step 1, when mixing your 20 pounds of coco coir and 10 pounds of perlite, resist the urge to overwork the ingredients. The goal is that "loose, almost powdery" consistency mentioned in the instructions—think of it like aerating cake batter. If you pack it too tightly, you'll end up with dense blocks that suffocate roots. I learned this the hard way after making blocks that crumbled when I tried to handle them. The solution? Use your hands to gently break up clumps while keeping the mix fluffy, almost like you're fluffing pillow feathers.
Moisture Balance Matters: During Step 2, the 10-minute waiting period after each gallon of water is added isn't just arbitrary—it's critical. This pause allows the mix to absorb evenly without creating pockets of excess moisture. Here's my trick: after adding water and mixing, press your palm into the mix. If it springs back with just a few damp spots, you're golden. If it leaves a wet imprint, add another splash—but only after that 10-minute rest. Too much water now means soggy blocks later, and nobody wants waterlogged seedlings.
Visual Cues for Perfect Blocks: In Step 3, when testing your mix in the block mold, look for these visual signals: the edges should hold together when lifted, but the interior should still show that airy, crumbly texture. This is your confirmation that the mix has the right balance of cohesion and aeration. If your test blocks crumble completely, you need more moisture (about ¼ cup water, mixed in). If they feel dense and compacted, add another ¼ cup perlite and redistribute. The perfect block should feel like a firm but not rock-hard snowball—just enough structure to hold its shape while still allowing roots to penetrate easily.
Drying Strategy: The 1-2 hour drying time in Step 4 is where many people rush and end up with blocks that either fall apart or stay too damp. Here's what I do: after filling the molds, I place them on a wire rack in a well-ventilated area. This allows air to circulate around all sides, preventing uneven drying. Check by gently pressing a block—it should hold its shape but still feel slightly damp to the touch. If you're in a humid environment, you might need the full 2 hours; in dry conditions, 45 minutes could suffice. The key is finding that balance where blocks are firm enough to handle but still ready to absorb moisture when you plant.
Pro Tips for Seed Starting Mix For Soil Blocks
- Between us, the secret to foolproof soil blocks lies in the details—especially when it comes to texture and timing. H...
- Texture is Everything: In Step 1, when mixing your 20 pounds of coco coir and 10 pounds of perlite, resist the urge t...
- Moisture Balance Matters: During Step 2, the 10-minute waiting period after each gallon of water is added isn't just ...
Frequently asked questions
Got questions about seed starting mix for soil blocks?
You’re not alone! Here are answers to the most common concerns—from beginners to seasoned gardeners—to help you get the best start for your seedlings.
What’s the best ratio of materials for a DIY soil block mix?
A balanced mix typically uses 50% coconut coir, 25% perlite or vermiculite, and 25% compost or worm castings. Adjust perlite (for drainage) or coir (for moisture retention) based on your climate. For example, add more perlite in humid areas to prevent mold.
How long does homemade soil block mix last before it degrades?
Store-bought mixes last 6–12 months if kept dry, but DIY blends degrade faster—3–6 months is ideal. Test freshness by squeezing a handful: if it crumbles easily, it’s time to remix. Freeze-dried mixes revive best if exposed to moisture.
Can I reuse soil block mix for multiple seed batches?
No—reuse risks disease, pests, or nutrient depletion. Each batch should be fresh for optimal germination. However, you can compost spent blocks (after sterilizing at 180°F for 30 mins) to reuse nutrients in future mixes.
Why do my soil blocks crack or crumble when drying?
Cracking often means uneven moisture or too much perlite. To fix it:
- Add 1–2 tbsp clay or bentonite per batch for cohesion.
- Ensure humidity stays 60–70% during drying.
- Press blocks gently but firmly—overcompression weakens structure.
What’s a quick alternative if I don’t have coir or perlite?
Use peat moss + sand (50/50) as a backup, but it drains faster. For a zero-waste option, blend shredded newspaper + garden soil (sterilized) with a pinch of lime to balance pH. Just monitor moisture closely!
Wrapping up and next steps
Starting seeds in soil blocks with the right mix—like airy, nutrient-rich loam—sets your plants up for success with stronger roots, better growth, and fewer transplant shocks. 🌱 Whether you’re a seasoned gardener or just beginning, this method simplifies propagation while giving seedlings the perfect foundation.
Now that you’ve got the know-how, grab your supplies and start blocking! Try your first batch this week and watch those tiny seeds transform into thriving plants.