
Lawn
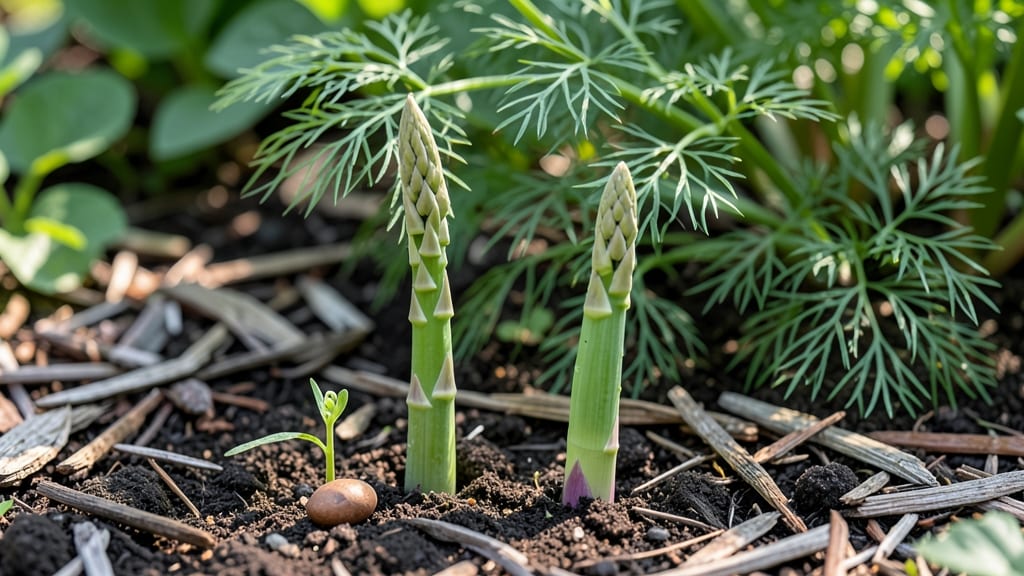
Growing asparagus through the seed stages of growing asparagus takes patience, but the payoff is worth it—thick, spearlike shoots emerging year after year for decades. 🌱 The process starts with tiny seeds that take 6-12 months just to form a harvestable crown, but once established, your plants will reward you for years.
I’ve seen firsthand how a single season of proper care transforms fragile seedlings into a garden staple that outlasts most other vegetables.
The first stage is germination, where seeds need consistent moisture and warmth to break through the soil—think of it like coaxing a tiny green promise from the earth.
After sprouting, the real work begins: nurturing those delicate shoots through their first 2-3 years of growth, when they build energy underground instead of producing spears. The soil must stay loose, rich, and free of weeds, because asparagus crowns are sensitive to competition.
By year three, you’ll finally see those coveted spears pushing through the soil, signaling the start of your harvest window. Each spear should be cut when it’s 6-8 inches tall but before it unfurls its ferny top—this ensures the plant keeps producing.
The key is balance: harvest too much too soon, and you’ll weaken the crown; let it go too long, and the spears become woody and tough.
Common challenges pop up at every stage—seed rot from overwatering, crown rot from poor drainage, or spears that never emerge—but with the right prep and care, you’ll avoid most of them. The secret lies in the soil: asparagus thrives in well-draining, slightly alkaline earth with plenty of organic matter.
Once you’ve got that foundation, the rest is just time, attention, and a little bit of luck.
📚 In This Guide
- What you need
- Instructions
- Tips and common mistakes
- Wrapping up and next steps
What you need
- ● Asparagus seeds: Choose cold-hardy varieties like 'Mary Washington' or 'Purple Passion'. Buy 20-50 seeds (they’re pricey, so start small!).
- ● Seed-starting mix: A sterile, well-draining blend (e.g., 50% peat moss, 30% perlite, 20% vermiculite). Need 10-15 lbs for seed trays.
- ● Seed trays or pots: 2-3 inch deep with drainage holes. Use 12-24 cell trays or 4-inch pots for 1-2 seeds each.
- ● Grow lights or sunny windowsill: Asparagus seeds need 6-8 hours of light daily. A LED grow light (12-15 watts per square foot) works best.
- ● Plastic wrap or humidity dome: To retain moisture while seeds germinate.
- ● Spray bottle: For gentle watering (avoid over-saturating seeds!).
- ● Small hand trowel: For transplanting seedlings later.
- ● pH test kit: Asparagus thrives in soil pH 6.5-7.5. Test your mix before planting!
- ○ Thermometer (optional): Monitor soil temps—seeds need 70-80°F to germinate.
- ● Patience: Asparagus seeds take 2-4 weeks to germinate and 2-3 years to harvest!
- ○ Cold stratification (optional but helpful): Chill seeds in the fridge for 2-4 weeks before planting to mimic winter.
- ● Sunny spot (future garden bed): Asparagus needs full sun (6+ hours/day) once transplanted.
- ● Well-draining soil: Amend garden soil with compost and sand if clay-heavy.
Step-by-Step guide to understanding asparagus seed stages
Asparagus grows from crowns, not seeds—but knowing its developmental stages helps plan for a thriving harvest.
🌱 Step 1: Crown Planting and Early Root Establishment
Start with 1-year-old asparagus crowns planted in early spring, about 2-3 weeks before your last frost date. Dig trenches 12-18 inches deep and 12-15 inches apart—this gives roots room to spread. Place crowns horizontally in the trench, with buds facing up, and cover with 3-4 inches of soil. Water deeply to settle the soil around the roots.
During the first year, focus on root development rather than harvest. You’ll see new shoots emerge in 4-6 weeks, but resist the urge to cut them—these early spears are weak and need energy to build a strong root system. Instead, let them grow into ferns, which photosynthesize and store nutrients for future harvests.
☀️ Step 2: First Year Growth and Fern Development
Asparagus enters its vegetative stage in the first year, where all energy goes into root and fern growth. By mid-summer, you’ll see 3-5 foot tall ferns with feathery foliage. This is your plant’s way of preparing for next year’s harvest. Water 1-2 inches per week, keeping soil consistently moist but not soggy.
Apply a balanced fertilizer (10-10-10) at planting and again in early summer to encourage strong root and shoot development. Avoid high-nitrogen fertilizers—they promote leafy growth at the expense of root storage. Mulch with 2-3 inches of organic matter (like straw) to retain moisture and suppress weeds.
🌿 Step 3: Second Year – The Transition to Harvestable Spears
The second year is when asparagus finally produces harvestable spears, but only after the soil warms to 50°F. Wait until at least 3-4 spears emerge per plant before cutting—this ensures the plant has enough energy to sustain itself. Harvest in the morning when spears are tender and firm, cutting them at ground level with a sharp knife.
After harvesting, let the ferns regrow to continue storing nutrients. You’ll see shorter spears later in the season, but these are still edible. Avoid cutting more than one-third of the spears in the first year to prevent stressing the plant. By the third year, you’ll get full harvest potential with 6-8 weeks of spears per season.
⏰ Step 4: Long-Term Maintenance and Year-Round Care
Asparagus is a perennial crop that thrives for 10-15 years with proper care. In late fall, cut back the ferns to 2-3 inches above ground and mulch heavily to protect roots from freezing. In early spring, remove old mulch and add fresh compost to replenish nutrients.
Continue fertilizing in early spring with a low-nitrogen, high-phosphorus fertilizer (like 5-10-10) to support root and spear growth. Water deeply 1-2 times per week during dry spells, ensuring soil stays moist but well-drained. Over time, you’ll notice fewer but stronger spears, as the plant matures and focuses energy on quality over quantity.
Tips & tricks for perfect asparagus growth
Growing asparagus successfully comes down to patience and precision—here's how to avoid common pitfalls and maximize your harvest.
Planting Depth and Spacing: The 12-18 inch deep trenches and 12-15 inch spacing in Step 1 aren't just suggestions—they're essential for root development. Deeper trenches prevent crowns from heaving during freeze-thaw cycles, while proper spacing gives roots room to spread horizontally. I've seen gardeners crowd plants too closely, which leads to competition for nutrients and weaker spears later.
Soil Temperature Matters: That 50°F soil temperature threshold in Step 3 is critical for spear emergence. Use a soil thermometer to monitor temperatures, especially in cooler climates. I've planted in spring only to have spears emerge too late in the season. If your soil stays below 50°F for extended periods, consider using black plastic mulch to warm the soil faster and extend your growing season.
Fertilizer Strategy: The balanced 10-10-10 fertilizer recommendation in Step 2 is perfect for asparagus, but timing matters just as much as type. Apply the second dose in early summer when you see the ferns reaching 1-2 feet tall—not when they're fully grown. This timing ensures nutrients are available when the plant needs them most for root development, rather than when it's already shifted energy to foliage growth.
Winter Preparation: The late fall fern trimming to 2-3 inches in Step 4 is one of the most overlooked but crucial steps. I've seen gardeners leave ferns too tall through winter, which can lead to crown rot from trapped moisture. After cutting back, add an extra 4-6 inches of mulch in colder climates to create an insulating barrier. This protects the crowns during temperature swings that can cause heaving.
Pro Tips for Seed Stages Of Growing Asparagus
- Growing asparagus successfully comes down to patience and precision—here's how to avoid common pitfalls and maximize ...
- Planting Depth and Spacing: The 12-18 inch deep trenches and 12-15 inch spacing in Step 1 aren't just suggestions—the...
- Soil Temperature Matters: That 50°F soil temperature threshold in Step 3 is critical for spear emergence. Use a soil ...
Frequently asked questions
Got questions about kickstarting your asparagus garden? Here are answers to the most common ones—so you can grow like a pro!
How long does it take for asparagus seeds to sprout?
Asparagus seeds typically take 2–4 weeks to sprout under ideal conditions (warm soil, 65–75°F, and consistent moisture). Patience is key—don’t disturb the soil while waiting! If nothing emerges after 4 weeks, check moisture levels or test seed viability.
Can I harvest asparagus the first year from seeds?
Nope! Asparagus grown from seed takes 2–3 years before you can harvest spears. The first year focuses on establishing roots, and the second year yields tiny, thin shoots. Plan ahead—rewarding harvests start in year three!
What’s the best soil temperature for planting asparagus seeds?
Sow seeds when soil reaches 60–70°F (spring or early summer). Use a soil thermometer to check—cool soil slows germination, while overly hot soil can dry seeds out. A raised bed or black plastic mulch helps warm the soil faster.
Why are my asparagus seedlings dying or wilting?
Wilting often signals overwatering, underwatering, or pests. Check soil moisture (top inch should be dry), ensure good drainage, and inspect for aphids or cutworms. Mulch helps retain moisture and deter pests—keep seedlings happy with consistent care!
Can I grow asparagus from store-bought spears instead of seeds?
Yes! Planting crowns (root sections) from organic spears is faster (harvest in 1–2 years). Cut spears 6+ inches long, soak in water for 24 hours, and plant the woody base 6–8 inches deep. Avoid treated spears—they won’t root!
Wrapping up and next steps
Growing asparagus from seed is a rewarding journey that demands patience and care—but the payoff is years of lush, homegrown harvests! By following the right soil prep, planting techniques, and seasonal maintenance, you’ll set the stage for a thriving asparagus bed. Remember: the first harvest is worth the wait!
Now that you’re armed with the knowledge, take the next step—mark your calendar, gather your tools, and start planting those seeds! Whether you’re a seasoned gardener or a curious beginner, your future asparagus patch is just a few months (and a little elbow grease) away. 🌱