
Lawn
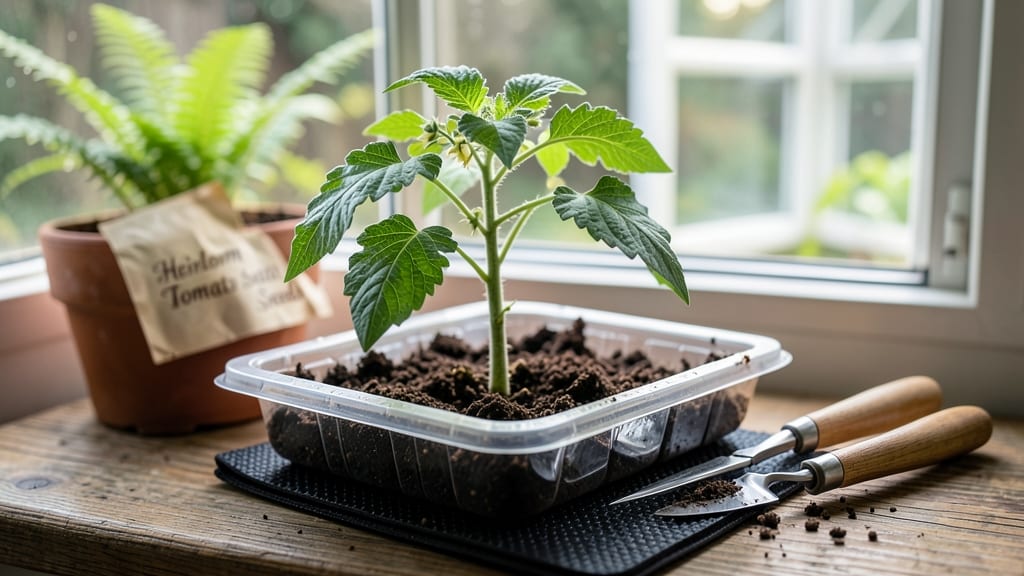
My reusable seed trays saved me $40 last season—and they’re the reason my seedlings grow stronger from day one. 🌱 No more flimsy plastic flats that collapse under damp soil or cost a fortune to replace.
These trays last for years, reducing waste while giving your plants the perfect start. The right tray depends on your plants: deeper cells for root crops like carrots, shallower ones for fast germinators like lettuce.
I swear by stackable plastic or biodegradable fiber options—they’re easy to clean and store between seasons. Just avoid anything with sharp edges that could damage delicate roots. With proper drainage and a light potting mix, you’ll see faster germination and sturdier transplants that handle moving to the garden without shock.
My pepper seedlings now outperform store-bought ones by weeks, and I’ve cut my seed-starting budget by 75%. Cleaning is simple: soak in 1:10 bleach water after the last crop, rinse, and dry. Troubleshoot mold with better airflow, and always check drainage holes—no soggy bottoms here.
Ready to grow smarter?
📚 In This Guide
- What you need
- Instructions
- Tips and common mistakes
- Wrapping up and next steps
What you need
- ● Reusable seed trays: 1–3 trays (depending on planting scale). Opt for biodegradable or plastic trays with drainage holes (e.g., 2–4" deep, 12+ cells per tray).
- ● Seed starting mix: 1–2 bags (sterilized, lightweight blend with perlite/vermiculite). Avoid garden soil—it’s too dense!
- ● Seeds: Your choice! Check seed packet for spacing/depth guidelines (e.g., 1/4" deep for most veggies).
- ● Watering can or spray bottle: 1 with a fine mist nozzle to avoid disturbing seeds.
- ● Grow lights or sunny windowsill: 1 grow light (LED, 12+ hours/day) or a south-facing window (60°F+).
- ○ Humidity dome or plastic wrap: 1–2 (optional but helpful for moisture retention).
- ● Labels & markers: 1 pack (waterproof) to track seed varieties.
- ● Heating mat: 1 (for faster germination of cool-season crops like lettuce).
- ● pH testing kit: 1 (to ensure soil pH is ideal for your seeds).
- ● Tray stand or cart: 1 (to elevate trays and improve airflow).
- ● Compostable pots: 1 pack (for transplanting later—no root disturbance!).
Step-by-Step guide to using reusable seed trays for healthier seedlings
Here's how to transform simple trays into a sustainable seed-starting system that produces stronger, more resilient plants.
🪴 Step 1: Clean and Prepare Your Trays
Start by giving your reusable seed trays a thorough cleaning. Fill them with warm, soapy water and scrub every cell with a soft brush to remove any residue from previous use. I like to use a 10% bleach solution (1 part bleach to 9 parts water) for stubborn grime, then rinse everything thoroughly. Let the trays dry completely before proceeding—moisture trapped in the cells can encourage mold growth.
Once dry, arrange the trays on a stable surface. If your trays have drainage holes, place them over a shallow tray or saucer to catch any excess water during the process. This keeps your workspace tidy and prevents water from pooling underneath, which could lead to root rot later. Real talk: I've learned the hard way that skipping this step means dealing with soggy seedlings down the road.
🌱 Step 2: Fill Trays with Moistened Seed Starting Mix
Fill each cell of your reusable seed trays with the seed starting mix until it's about 1 inch below the rim. Press down lightly to settle the mix, but don't compact it too tightly—you want it loose enough for roots to penetrate easily. I like to use my fingers to create a small indentation in each cell, about ¼ inch deep, where I'll place the seeds later.
Before planting, moisten the mix with a gentle spray bottle until it's evenly damp but not soggy. You'll know it's right when a handful of the mix holds together but doesn't drip water. This step ensures your seeds have the perfect environment to germinate. Here's the thing—I've found that pre-moistening prevents the mix from drying out too quickly while the seeds are getting started.
💧 Step 3: Plant Seeds at the Correct Depth
Refer to the seed packet for specific planting depth, but a good rule of thumb is to plant seeds at a depth equal to 2-3 times their diameter. Use a small tool or your finger to create a tiny hole in the indentation you made earlier, then place 1-2 seeds per cell—this gives you a backup if one doesn't germinate. Cover the seeds lightly with more seed starting mix, just enough to ensure they're snug but not buried too deep.
Gently press the mix around the seeds to ensure good soil-to-seed contact, which helps with moisture absorption and germination. Place the trays in a warm, sheltered spot where the temperature stays between 65-75°F. I've had great success using a seedling heat mat underneath the trays, especially for slower-to-germinate seeds like peppers or tomatoes. Watch for the first signs of sprouts, which should appear within 5-14 days, depending on the plant type.
☀️ Step 4: Provide Consistent Light and Moisture
Once seeds have sprouted, move the trays to a location with bright, indirect light. A south-facing window is ideal, but if your space lacks sufficient natural light, supplement with a grow light positioned about 2-4 inches above the seedlings. Keep the light on for 14-16 hours per day to encourage strong, healthy growth. You'll notice seedlings growing toward the light—rotate the trays daily to ensure even growth.
Water the seedlings gently from the bottom by placing the trays in a shallow tray of water for about 10-15 minutes. This method encourages roots to grow downward and strengthens the seedlings. Avoid watering from above, as it can dislodge the delicate seedlings or cause disease. Keep the soil consistently moist but never waterlogged—you'll see the top layer dry out slightly between waterings, which is a good sign the roots are developing properly.
✂️ Step 5: Thin and Harden Off Seedlings
When seedlings develop their first true leaves, thin them to the strongest one per cell. Use small scissors to snip the weaker seedlings at soil level, rather than pulling them out, to avoid disturbing the roots of the remaining plants. This step might seem harsh, but it prevents overcrowding and ensures each plant has enough nutrients and space to grow. I always save the thinned seedlings for compost or transplant them into a separate tray if they're still healthy.
About 2 weeks before transplanting outdoors, start the hardening-off process. Begin by placing the trays outside in a sheltered spot for 1-2 hours the first day, gradually increasing their time outside over 7-10 days. This helps the seedlings adjust to wind, sun, and temperature fluctuations. You'll see them become sturdier and more resilient as they prepare for their permanent home in the garden. Transplant on a cloudy day or in the late afternoon to reduce stress on the young plants.
Tips & tricks for perfect seedling growth with reusable trays
These simple strategies will help you maximize your reusable seed trays and grow stronger, healthier seedlings every time.
Cleaning is Non-Negotiable: In Step 1, that thorough cleaning isn't just about hygiene—it's about preventing disease. After using a 10% bleach solution, I like to follow up with a final rinse of hot water to ensure no residue remains. This extra step eliminates any lingering pathogens that could attack your new seedlings. The trays should sparkle clean and feel completely dry to the touch before you begin filling them.
Lighting is Everything: For Step 4, when you're setting up your grow lights, position them just 2-3 inches above the seedlings as they grow. I've found that seedlings will stretch dramatically toward the light if it's too far away, creating weak, leggy plants. Use a timer for your 14-16 hours of daily light to maintain consistency—natural daylight varies too much to rely on alone. Rotate the trays every day so all seedlings get equal exposure.
Temperature Matters: Maintaining that 65-75°F range from Step 3 makes all the difference for germination. If your home tends to be cooler, place the trays on top of your refrigerator for extra warmth during the day. For nighttime, I've had success using a simple ceramic heat emitter bulb (set to low) near the trays—just don't let it get too close. The goal is to keep the soil warm without overheating the seedlings.
Thinning Technique: When it's time to thin in Step 5, use sharp, clean scissors to cut seedlings at soil level rather than pulling them. This prevents disturbing the roots of your remaining plants. I've learned to always thin on a cloudy day or in the late afternoon—seedlings handle the stress better then. You'll be amazed at how quickly the remaining plants fill out their space after thinning.
Pro Tips for Reusable Seed Trays
- These simple strategies will help you maximize your reusable seed trays and grow stronger, healthier seedlings every ...
- Cleaning is Non-Negotiable: In Step 1, that thorough cleaning isn't just about hygiene—it's about preventing disease....
- Lighting is Everything: For Step 4, when you're setting up your grow lights, position them just 2-3 inches above the ...
Frequently asked questions
Got questions about reusable seed trays?
You’re not alone! Here are answers to the most common ones—so you can grow with confidence and ease.
What’s the best material for reusable seed trays?
Opt for plastic (recycled or biodegradable), wood (untreated cedar or pine), or compostable materials like coconut coir. Avoid treated wood or non-recyclable plastics—your plants (and the planet) will thank you!
How long can I reuse seed trays before replacing them?
With proper cleaning (hot soapy water, disinfectant), trays last 3–5 years for plastic and 1–3 years for wood. Watch for cracks, warping, or mold—if they compromise hygiene, it’s time to upgrade. Pro tip: Store trays in a dry place to extend their life!
Can I use reusable trays for all types of seeds?
Yes! They’re great for vegetables, herbs, flowers, and even small shrubs. Just adjust depth: shallow trays work for tiny seeds (like lettuce), while deeper ones suit root crops (carrots, radishes). Drainage holes are a must to prevent soggy roots.
What’s a good alternative if I don’t have trays?
No trays? No problem! Use:
- Egg cartons (cut into squares for tiny seeds)
- Yogurt cups (poke drainage holes)
- Newspaper pots (moisten, roll around seeds)
- Muffin tins (line with coir or peat)
Why are my seedlings dying in reusable trays?
Common culprits:
- Overwatering (check soil moisture—top inch should dry slightly)
- Poor drainage (ensure holes aren’t clogged)
- Fungal issues (space trays apart for airflow, avoid wet leaves)
- Nutrient depletion (use seed-starting mix, not garden soil)
Wrapping up and next steps
Switching to reusable seed trays isn’t just a smart move for your garden—it’s a game-changer for the planet! 🌱 By cutting waste and boosting seedling success, you’re nurturing stronger plants and a greener future. Ready to take the next step?
Start small: repurpose old containers, experiment with eco-friendly materials, or share your trays with fellow gardening enthusiasts. Every seedling you grow in a reusable tray is a win for your lawn, wallet, and Earth.