
Planting
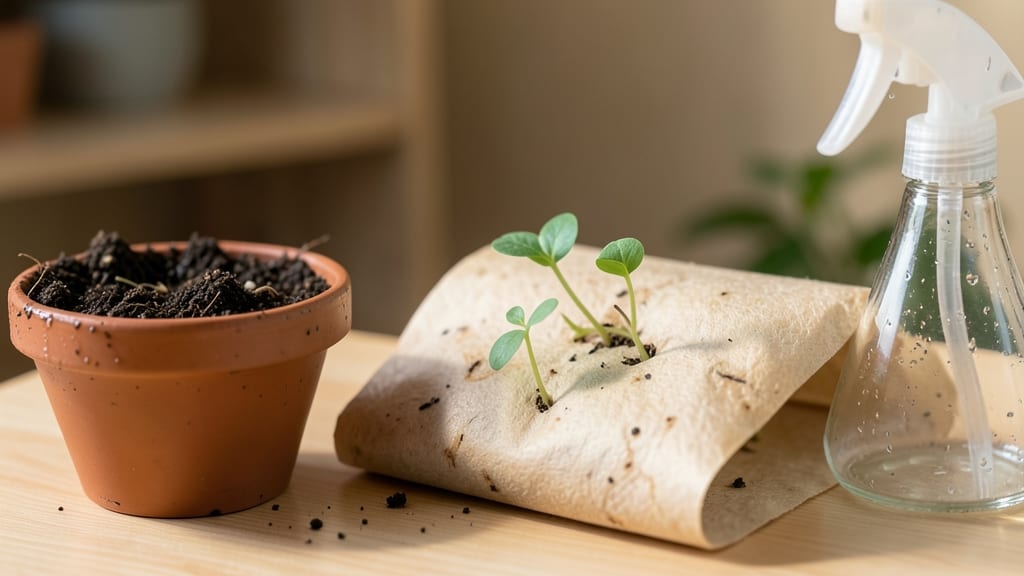
Plantable paper that grows into wildflowers is the most satisfying way to turn trash into beauty. ✨ I’ve made seed paper for weddings, gifts, and garden borders—it’s a project that feels magical yet simple, perfect for anyone who wants to grow flowers without the fuss of traditional seed starting.
The best part? You only need a few basic supplies: wildflower seeds, water, a blender, and paper pulp (or recycled paper). Mix them together, press into molds, and let dry.
Once planted, the paper decomposes while the seeds sprout, creating a zero-waste gift that keeps giving. Even beginners can master this in under an hour.
By the time the first green shoots appear, you’ll be hooked on the idea of growing flowers from something as unexpected as paper. The results are delicate, fragrant blooms that thrive in containers, garden beds, or even as floating flower pots.
It’s gardening with a twist—where the planter becomes part of the plant.
Works for wildflowers, herbs, or even microgreens, and adapts to any space—indoor windowsills or outdoor gardens. Here’s how to make it work without a single failed batch.
📚 In This Guide
- What you need
- Instructions
- Tips and common mistakes
- Wrapping up and next steps
What you need
- ● Wildflower seeds – Choose a mix of fast-growing, drought-tolerant varieties (e.g., cosmos, marigold, or sunflower seeds). Aim for 1–2 tablespoons per sheet of paper.
- ● Unbleached paper pulp – Opt for 100% post-consumer recycled paper (e.g., printer paper, egg cartons, or scrap paper). You’ll need about ½ cup per batch (roughly 4–5 sheets).
- ● Water – Enough to soak the paper pulp and create a smooth slurry.
- ● Screen or mesh frame – A fine-mesh screen (16–32 mesh) or an old picture frame with window screen material stretched tightly.
- ● Spray bottle – For evenly misting the seed paper while drying.
- ○ Non-toxic glue (optional but recommended) – A small amount of flour paste or cornstarch glue (1 tbsp flour + ½ cup water) to bind seeds and pulp.
- ● Blender or food processor – To break down the paper into pulp. A high-powered blender works best for smoother results.
- ● Rolling pin or flat surface – For pressing out excess water from the pulp.
- ● Tray or drying rack – A flat, non-stick surface (like a baking sheet or plastic tray) to dry the seed paper.
- ● Scissors or craft knife – For cutting the paper into desired shapes (e.g., cards, squares, or custom designs).
- ● Newspaper or parchment paper – To protect your workspace while drying.
- ● Natural dyes – Turmeric, beet juice, or coffee for colored seed paper.
- ● Essential oils (sparingly!) – A drop of lavender or citrus oil for scent (ensure it’s pet-safe).
- ● Decorative elements – Dried flowers, glitter (biodegradable), or pressed leaves for embellishments.
- ● Seed paper mold – A wooden or plastic frame with a handle for shaping thicker sheets.
Step-by-step instructions for making seed paper
Here's how I craft blooming seed paper—no fancy tools, just a few simple supplies and patience.
🌱 Step 1: Mix the Paper Pulp Base
Tear 4 sheets of recycled paper into tiny pieces—about ½-inch squares. Place them in a blender with 1 cup of water and blend until smooth. You want a thick, creamy consistency, like applesauce. If it's too runny, add another sheet of paper and blend again.
Here's the thing—don't skip this step. The paper needs to break down completely so the seeds embed evenly. If you see fibers still floating, blend another 10 seconds. The pulp should coat the back of a spoon without dripping.
💧 Step 2: Add Seeds and Water
In a separate bowl, mix 1 tablespoon of wildflower seeds with ½ cup of water. Stir gently to prevent seed clumping. Pour this mixture into the blender with the pulp. Add ¼ cup more water if needed to reach a thick, paint-like consistency. You want it spreadable but not watery.
Real talk: don't overmix now. Just stir until the seeds are evenly distributed. Overblending can damage delicate wildflower seeds. Give it a quick pulse—just until combined—and stop before it gets frothy.
🪴 Step 3: Pour and Shape the Seed Paper
Line a baking sheet with parchment paper. Pour the seed pulp mixture evenly onto the sheet, spreading it into a ¼-inch thick layer with a spatula. Work quickly—this stuff sets fast! Use the spatula to smooth the surface, pressing gently to remove air bubbles.
Here's where it gets fun—watch the seeds settle. You'll see them floating to the top as you spread. That's perfect! Just keep smoothing until the surface looks uniform. If any spots look too thick, spread them thinner with the spatula.
☀️ Step 4: Dry Completely
Let the seed paper dry for 24-48 hours in a warm, dry place away from direct sunlight. I prop mine up against a wall in my kitchen where it gets gentle airflow. Flip it halfway through drying to prevent warping.
You'll know it's ready when the edges lift easily and the paper feels stiff to the touch. If it's still bendy after 48 hours, give it another 12 hours. Patience here prevents seeds from sprouting prematurely in the paper.
✂️ Step 5: Cut and Plant
Once completely dry, use scissors to cut the seed paper into your desired shapes—rectangles, squares, or even custom designs. Store them in a cool, dry place until ready to plant. When you're ready, simply place the paper on prepared soil, press lightly, and water gently.
Don't skip the pressing step! Lightly firm the paper against the soil so seeds make good contact. Water until the soil is moist 1 inch deep. You'll see sprouts in 7-14 days, depending on your climate and seed type.
Tips & tricks for perfect seed paper
These little details make all the difference between seed paper that blooms beautifully and paper that falls apart—or worse, sprouts too soon.
Paper Selection Matters: Use uncoated, recycled paper like printer paper or newspaper—avoid glossy or coated papers that repel water. I've found that 4 sheets of standard printer paper work best because they break down evenly without leaving gummy residue. If you're using thicker paper, reduce to 3 sheets to maintain the right consistency.
Seed Distribution Secret: When mixing the seeds in Step 2, don't just pour them in all at once. Sprinkle them gradually while stirring to prevent clumping. I like to divide the 1 tablespoon of seeds into two portions—mix half first, then add the rest. This ensures even distribution throughout the pulp mixture, so every piece of paper has planting potential.
Drying Technique: The 24-48 hour drying time is crucial for both strength and seed viability. For faster drying in humid climates, prop a small fan nearby on low setting—just keep it away from direct airflow on the paper itself. If you notice condensation forming on the paper during drying, extend the time by 12 hours to prevent mold. The edges should lift easily when ready, but the center should still feel slightly firm to the touch.
Storage Wisdom: Once completely dry, store your seed paper in a sealed container with a desiccant packet (like those that come with electronics) to prevent moisture absorption. I keep mine in a ziplock bag with a silica gel packet—this ensures the seeds stay dormant until planting time. If stored properly, your seed paper will remain viable for up to 1 year.
Pro Tips for Seed In Paper
- These little details make all the difference between seed paper that blooms beautifully and paper that falls apart—or...
- Paper Selection Matters: Use uncoated, recycled paper like printer paper or newspaper—avoid glossy or coated papers t...
- Seed Distribution Secret: When mixing the seeds in Step 2, don't just pour them in all at once. Sprinkle them gradual...
Frequently asked questions
Got questions about seed paper? You’re not alone—this eco-friendly craft is full of possibilities! Here are answers to the most common queries to help you get started with confidence.
How long does it take for seeds in paper to sprout?
Seed paper typically sprouts within 7–21 days, depending on the seed type, moisture, and sunlight. Keep it moist (but not soggy) and place it in a warm, sunny spot. Fast-growing seeds like marigolds may appear in a week, while slower varieties like basil could take three weeks.
Do I need to water seed paper differently than regular soil?
Yes! Mist seed paper lightly 2–3 times daily until sprouts emerge (about 1–2 weeks). Once roots form, plant it in soil and water as usual. Avoid overwatering—seed paper is delicate and can rot if too wet. Think of it like a seedling spa, not a swamp!
Can I make seed paper without a blender or food processor?
If you lack a blender, try these alternatives:
- Mortar and pestle: Crush dried flowers or herbs into a fine powder.
- Rolling pin: Fold paper with seeds between sheets and press hard to break them down.
- Coffee grinder: Use sparingly for small batches (clean it thoroughly afterward!).
Will seed paper survive winter or extreme heat?
Seed paper is not frost-proof—plant it after the last frost in spring (or use it indoors as a decorative planter). For heat, store unused sheets in a cool, dry place (like a sealed container) to prevent premature sprouting. If planting in summer, water more frequently to combat drought.
What if my seed paper moldy or smells bad?
Mold or a funky smell usually means too much moisture. If this happens:
- Spread the paper in a dry, shaded area to air out.
- Plant it immediately in soil if roots are forming.
- Discard it if mold is extensive (safety first!).
Pro Tip:
Need extra durability? Add 1 tsp of unflavored gelatin to your pulp mixture for stronger, longer-lasting seed paper. Just let it cool before pressing!
Wrapping up and next steps
Creating your own seed paper is a rewarding way to blend creativity with sustainability—turning everyday materials into living art that blooms into beauty! 🌱 Whether you’re crafting gifts, decorating your garden, or teaching kids about nature, this project proves small actions can grow big impact.
The best part? Every sheet has the potential to become a wildflower patch!
Ready to take the next step? Start small—experiment with local seeds and recycled paper, then scale up for larger projects. Share your blooms with friends or plant them in unexpected places to inspire others. Your green thumb (and paper craft) just got a whole new meaning!