
Planting
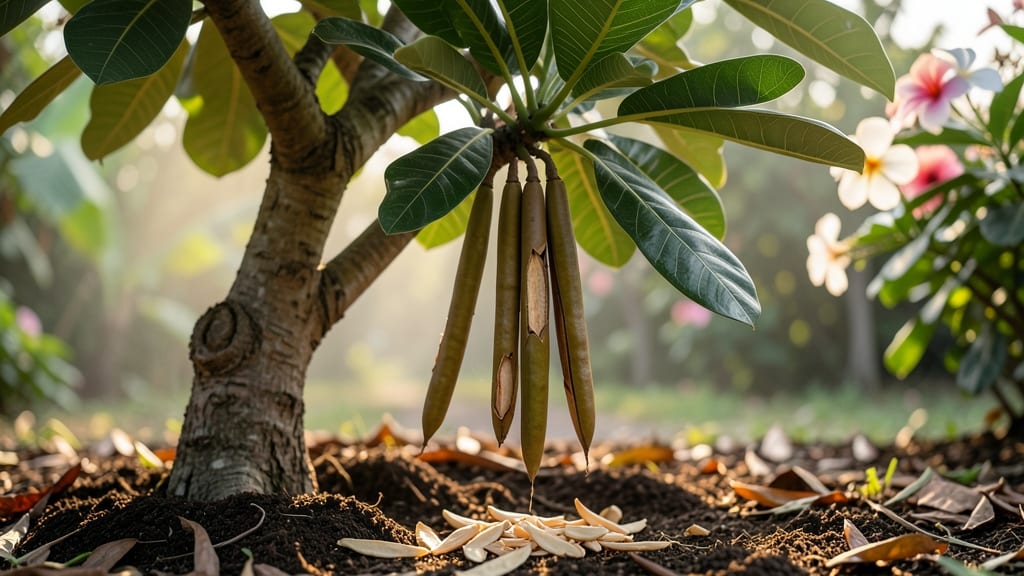
The plumeria plant seed pod holds the secret to growing your own fragrant tropical blooms—no nursery needed. 🌺 I cracked the code after struggling with slow germination, and now my seedlings sprout in just 2-3 weeks with the right prep.
The key lies in mimicking nature: soak the pods overnight to soften the shell, then plant the seeds ½-inch deep in warm, moist soil. No fancy stratification required—just warmth and patience. Most beginners skip this step and end up with moldy seeds instead of seedlings.
By the time your first true leaves appear, you'll be pinching back leggy stems to encourage bushier growth. The scent alone makes it worth the wait—imagine that tropical fragrance in your own garden by next summer.
This method beats cuttings for variety and cost, though it takes longer. Perfect for those who love the challenge of growing from seed or want to experiment with heirloom plumeria types.
📚 In This Guide
- What you need
- Instructions
- Tips and common mistakes
- Wrapping up and next steps
What you need
- ● Plumeria seed pods: 1–3 fresh, mature pods (harvested when slightly dry but still plump). Pro tip: 💡 Collect pods from healthy, blooming plants for the best germination rates!
- ● Pruning shears or sharp knife: 1 pair (for carefully opening pods without damaging seeds).
- ● Paper towels or coffee filters: 2–3 sheets (to line a container for seed stratification).
- ● Plastic storage bag or airtight container: 1 small (to create humidity for stratification).
- ● Well-draining potting mix: 1 bag (cactus/succulent mix or a blend of perlite, peat, and sand—avoid heavy garden soil).
- ● Small pots or seed trays: 2–4 (3–4 inches in diameter, with drainage holes).
- ● Spray bottle: 1 (for gentle watering—no soaking!).
- ○ Heat mat (optional but helpful): 1 (set to 75–85°F to mimic tropical conditions).
- ● Grow lights or sunny windowsill: Access to bright, indirect light (6+ hours daily).
- ● Fungicide (like hydrogen peroxide 3%): A few drops (to prevent mold during stratification).
- ● Humidity dome or plastic wrap: 1 (to retain moisture while seeds sprout).
- ● pH test kit: 1 (ideal soil pH: 6.0–6.5 for plumeria).
- ● Label markers: 2–3 (to track seed varieties and planting dates!).
How to germinate plumeria seed pods for fast, thriving plants
Here's my foolproof method for breaking dormancy and coaxing those stubborn plumeria seeds to sprout quickly.
🌱 Step 1: Harvest and Prepare the Seed Pods
Collect fully mature plumeria seed pods when they turn brown and begin splitting open naturally. The seeds inside should be plump and firm—any shriveled seeds won't germinate. I like to work outdoors or in a well-ventilated area because the pods release a sticky resin that can irritate skin.
Use sharp pruning shears to open the pods lengthwise, avoiding the sharp edges that can puncture your hands. Remove the seeds and discard the fibrous interior pulp. Rinse seeds under lukewarm water to remove any residual resin, then pat them dry with paper towels. This preparation prevents fungal issues later in the process.
💧 Step 2: Stratify Seeds for Faster Germination
Plumeria seeds require stratification to break their natural dormancy. Place the cleaned seeds in a sealed plastic bag with a damp paper towel—just enough moisture to feel slightly damp, not soaking wet. Seal the bag and refrigerate for 4-6 weeks at 40-50°F.
Check the seeds weekly to ensure the paper towel stays consistently moist. If you notice mold developing, discard those seeds immediately and start fresh. This cold treatment mimics winter conditions in tropical climates, tricking the seeds into thinking spring has arrived. After 6 weeks, remove the seeds and let them sit at room temperature for 24 hours before sowing.
☀️ Step 3: Sow in Warm, Well-Draining Medium
Fill 4-inch pots with a sterile cactus/succulent mix—plumerias hate soggy roots. Pre-warm the soil by placing the pots in a sunny window or under a heat mat for 24 hours before planting. Warm soil speeds germination and prevents damping-off.
Plant seeds ½ inch deep, spacing them 2 inches apart in each pot. Water lightly from below by placing the pots in 1 inch of warm water for 10 minutes, then drain excess. Cover the pots with clear plastic wrap to retain humidity, but leave a small gap for airflow. Place the pots in bright, indirect light—direct sun at this stage will scorch tender seedlings.
⏰ Step 4: Maintain Ideal Germination Conditions
Keep the soil consistently warm at 75-85°F using a seedling heat mat if needed. Germination typically takes 4-8 weeks, but some stubborn seeds may take up to 12 weeks. Patience is key—don’t disturb the seeds by checking daily.
Mist the plastic wrap occasionally to prevent condensation buildup, which can suffocate seedlings. Once you see first true leaves (not the initial seed leaves), remove the plastic wrap immediately to harden off the seedlings. At this stage, they’ll need bright, indirect light for 2-3 hours daily to prevent leggy growth.
🌿 Step 5: Transplant and Transition to Outdoor Light
When seedlings reach 3-4 inches tall with 3-4 sets of true leaves, transplant them into 6-inch pots with the same cactus mix. Handle the roots gently—plumerias are sensitive to root disturbance. Water deeply after transplanting to settle the soil around the roots.
Gradually introduce them to direct sunlight over 7-10 days, starting with 1-2 hours daily and increasing exposure. Watch for yellowing leaves—this signals too much sun too soon. Once acclimated, move them to a south-facing window or under grow lights for 12-14 hours daily to encourage strong, compact growth.
Tips & tricks for perfect plumeria seed pod germination
Between us, these small details make the difference between waiting months for sprouts and watching little plumeria shoots emerge in record time.
Pod Selection Matters: The brown, slightly papery pods are your goldmine—but only if they're fully mature. Look for pods that have naturally begun splitting open; these contain the most viable, plump seeds. I've learned the hard way that green pods yield shriveled seeds that won't germinate. Also, work in a well-ventilated area—the resin from these pods can be quite irritating to skin.
Stratification Temperature Secret: While the instructions specify 40-50°F for your 4-6 week cold treatment, I've found that consistency is more important than exact degrees. If your fridge runs cooler, that's fine—just maintain that steady temperature. The key is avoiding temperature fluctuations, which can shock the seeds. I use a small cooler with a thermometer to monitor the environment if my fridge varies too much.
Soil Pre-Warming Hack: That 24-hour soil pre-warming in Step 3 isn't just about speed—it's about preventing damping-off disease. I place my pots on a seedling heat mat set to 80°F for 12 hours, then move them to a sunny windowsill for the remaining 12 hours. This dual approach ensures the soil stays warm enough to prevent fungal issues while also giving you that jumpstart on germination timing.
Light Transition Strategy: When you're ready to move seedlings to direct sunlight in Step 5, I recommend starting with just 1 hour on the first day rather than the full 1-2 hours. Plumeria seedlings are particularly sensitive to sunburn at this stage. Gradually increase exposure by 30 minutes each subsequent day until you reach the full recommended time. Watch for that telltale yellowing—it's your first warning sign of too much sun.
Pro Tips for Plumeria Plant Seed Pod
- Between us, these small details make the difference between waiting months for sprouts and watching little plumeria s...
- Pod Selection Matters: The brown, slightly papery pods are your goldmine—but only if they're fully mature. Look for p...
- Stratification Temperature Secret: While the instructions specify 40-50°F for your 4-6 week cold treatment, I've foun...
Frequently asked questions
Got questions about growing plumeria from seed pods? We’ve got answers! Here are some of the most common queries to help you navigate the process like a pro.
How long does it take for plumeria seed pods to germinate?
Germination can take anywhere from 2 to 6 weeks, depending on conditions like warmth (75–85°F), moisture, and light. Patience is key—some seeds may sprout faster if pre-soaked or kept in a humid environment. If nothing emerges after 8 weeks, the seeds might be non-viable.
Do plumeria seed pods need special treatment before planting?
While not always required, light scarification (gently nicking the pod with sandpaper) or a warm soak (80°F water for 24 hours) can improve germination rates. Avoid over-soaking, as plumeria seeds are sensitive to rot. Fresh pods often germinate best without extra steps!
Can I plant plumeria seeds directly in the ground, or should I start indoors?
For tropical climates, direct sowing in well-draining soil is fine, but starting indoors (6–8 weeks before last frost) gives seedlings a head start. Use seed-starting mix and small pots to protect tender sprouts. If you’re in a cooler zone, wait until spring to transplant outdoors.
Why aren’t my plumeria seeds sprouting? Troubleshooting tips?
Check these common issues:
- Too cold: Plumeria seeds need warmth—use a heat mat if temps dip below 70°F.
- Poor drainage: Overwatering causes rot. Ensure pots have drainage holes and use a cactus/succulent mix.
- Old seeds: Fresh pods (less than 6 months old) germinate best. Store dried pods in a cool, dry place if saving for later.
- Low humidity: Cover seeds with plastic wrap or a humidity dome until sprouts appear.
How do I know if my plumeria seedling is healthy?
Healthy seedlings have bright green, firm leaves (not yellow or mushy) and a sturdy stem. Avoid overcrowding—thin to 1–2 inches apart. Once they develop 3–4 true leaves, they’re ready for gradual sunlight exposure (start with morning sun to prevent scorching).
Wrapping up and next steps
Growing plumeria from seed pods is a rewarding journey that unlocks the magic of these fragrant tropical beauties! 🌺 With the right patience, care, and the step-by-step blueprint you’ve just explored, you’re well on your way to nurturing vibrant blooms that’ll fill your space with intoxicating scents.
Now that you’ve mastered the basics—from seed prep to transplanting—it’s time to roll up your sleeves and get planting!
Start small: grab those seed pods, follow your germination guide, and soon, you’ll be basking in the pride of watching your very own plumeria thrive. Happy growing—your future fragrant paradise awaits! 🌱✨