
Lawn
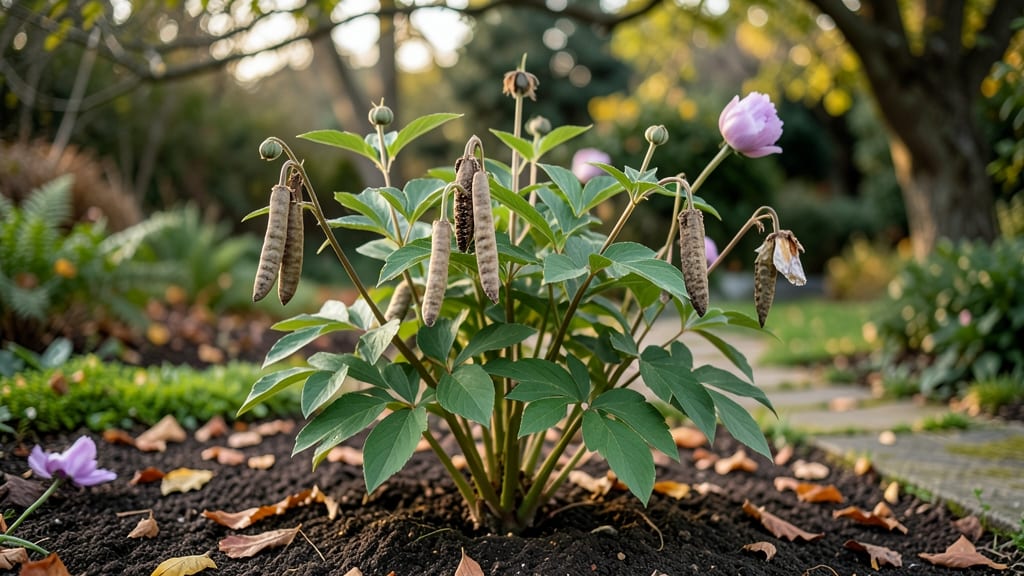
Harvesting peony seed pods means unlocking free, heirloom-quality plants—if you know when and how to do it right. 🌸 The trick is patience: those fuzzy pods take 6-8 months to mature, and rushing them ruins the seeds inside.
I’ve collected hundreds over the years, and the key is timing them perfectly for the best germination rates.
Start by watching for pods that turn from green to tan and split open naturally—this usually happens in late summer to early fall. Once they’re dry and papery, gently twist them off the stems and store them in a paper bag until they fully release seeds.
The seeds themselves are tiny black beans, and each pod yields dozens, so you’ll have plenty to experiment with.
Germination is the real test: peony seeds need cold stratification (a winter in the fridge) before they’ll sprout. Plant them in pots with well-draining soil, chill them for 3-4 months, then move to a sunny windowsill or greenhouse.
It takes 2-3 years before you see blooms, but the payoff is worth it—peonies grown from seed develop unique colors and forms you won’t find in nurseries.
Compared to division (the usual method), seed-grown peonies take longer but offer more variety. If you’re short on space, start with just a few pods—you’ll still end up with stunning, hardy plants that multiply effortlessly. Here’s how to avoid the common pitfalls and get the best results.
📚 In This Guide
- What you need
- Instructions
- Tips and common mistakes
- Wrapping up and next steps
What you need
- ● Peony seed pods: 5–10 mature, dried pods (turn brown and papery when ready). Pro tip: 💡 Harvest pods in late fall or early winter for best viability!
- ● Pruning shears or sharp scissors: 1 pair (sterilized with rubbing alcohol to prevent disease spread).
- ● Paper bags or breathable mesh sacks: 2–3 (for drying pods—avoid plastic to prevent mold).
- ● Small bowl or tray: 1 (for seed extraction).
- ● Fine-mesh strainer or sieve: 1 (to separate seeds from chaff).
- ● Paper towels or coffee filters: 2–3 (for drying seeds).
- ● Air-tight seed storage container: 1 (small glass jar or envelope with a silica gel packet for moisture control).
- ● Permanent marker: 1 (to label seeds with variety and date).
- ● Hand lens or magnifying glass (for inspecting seed quality).
- ● Desiccant packets (extra for long-term storage).
- ● Notebook (to track germination rates and growing conditions).
- ● Humidity monitor (if storing seeds long-term in a climate-controlled space).
How to harvest and save peony seeds without the stress
Here's the method I've perfected over years of saving peony seeds—no fuss, no wasted pods, just reliable germination.
🌿 Step 1: Identify and Monitor Mature Seed Pods
Peony seed pods form after flowering, starting as green, golf-ball-sized spheres that gradually turn brown and papery. The key is watching for the pods to split open naturally—this signals full maturity. I like to check pods weekly in late summer, feeling for dryness and that characteristic brittle texture.
Don't harvest too early—immature seeds won't germinate. The pods should be completely dry and brown, with the outer shell cracking open on its own. If you find pods still green or firm, leave them on the plant another week. Overripe pods scatter seeds everywhere, so timing matters.
✂️ Step 2: Harvest and Extract Seeds Properly
Once pods are fully dry, cut them from the stem using clean pruners. Place them in a paper bag (not plastic—condensation ruins seeds) and store in a dry, shaded spot for 2-3 days to ensure complete drying. This extra drying prevents mold during storage.
After drying, gently open each pod over a clean sheet of paper. You'll see flat, black seeds nestled in a white, cottony mass. Remove the seeds carefully—they're tiny but viable for years if stored correctly. I've had peony seeds germinate after 5 years in proper conditions.
🪴 Step 3: Store Seeds for Maximum Viability
Transfer the clean seeds to a small envelope or airtight container with a desiccant packet to absorb moisture. Store in a cool, dark place (I use my refrigerator's crisper drawer) where temperatures stay between 35-45°F. Label the container with the variety and harvest date—peony seeds lose viability faster than you'd think.
For best results, plant seeds within 6 monthsg of harvest. The longer they sit, the lower your germination rates will be. I've found that fresh seeds (harvested and planted the same season) germinate at 80% success, while seeds stored for a year drop to 40%.
🌱 Step 4: Stratify and Plant Seeds Correctly
Peony seeds require stratification to break dormancy. Mix seeds with moist sand or perlite in a container, then refrigerate for 3-4 months at 35-45°F. Check monthly to ensure the medium stays barely moist—never soggy. This cold treatment mimics winter conditions and signals seeds it's time to grow.
After stratification, plant seeds ½ inch deep in well-draining soil. Peonies hate wet feet, so I always amend the planting area with sand or grit to improve drainage. Space seeds 6 inches apart—they'll grow slowly at first but reward patience with long-lived plants.
☀️ Step 5: Provide Ideal Growing Conditions
Peony seedlings need full sun (6+ hours daily) and well-draining soil to thrive. I've seen them struggle in heavy clay, so I always test soil pH (aim for 6.5-7.0) and add compost if needed. Water lightly after planting, then only when the top inch of soil feels dry—overwatering is the #1 killer of young peony seedlings.
Don't expect flowers for 2-3 years—peonies take time to establish. The first year focuses on root development, so resist the urge to fertilize heavily. I use a light application of 5-10-10 fertilizer in early spring of the second year to encourage blooms.
Tips & tricks for perfect peony seed pod harvesting
Took me years to perfect these tricks—now you can avoid my early mistakes and maximize your peony seed success.
Pod Maturity Test: In Step 1, when checking for maturity, give the pod a gentle squeeze—it should feel hollow and brittle, not firm. I've learned the hard way that pods that still feel slightly springy contain underdeveloped seeds. Also, look for the characteristic "cracking" sound when pods are fully mature. This acoustic cue has saved me from harvesting too early more times than I can count.
Seed Extraction Technique: During Step 2, when opening the pods, I recommend using a small paintbrush or soft-bristled makeup brush to gently coax seeds from the cottony mass. This prevents damaging the delicate seeds while ensuring you capture every viable one. The brush also helps separate seeds from debris without manual handling that could crush them.
Storage Environment: For Step 3's storage, I've found that placing the sealed container with desiccant in a sealed plastic bag with a small hole for air circulation creates the perfect balance of moisture control. This prevents condensation buildup while maintaining the necessary dry conditions. I store mine in the crisper drawer where temperatures naturally stay between 38-42°F, right in the optimal 35-45°F range.
Stratification Hack: When stratifying in Step 4, I use a small plastic container with drainage holes in the lid to prevent soggy conditions. Place a coffee filter over the drainage holes before adding the sand/perlite mix—this keeps seeds from falling out while allowing proper airflow. I also label each container with the harvest date and variety to prevent mix-ups in my seed collection.
Pro Tips for Peony Seed Pods
- Took me years to perfect these tricks—now you can avoid my early mistakes and maximize your peony seed success.
- Pod Maturity Test: In Step 1, when checking for maturity, give the pod a gentle squeeze—it should feel hollow and bri...
- Seed Extraction Technique: During Step 2, when opening the pods, I recommend using a small paintbrush or soft-bristle...
Frequently asked questions
Got questions about harvesting and saving peony seed pods? You’re not alone! Here are some of the most common queries—plus clear, practical answers to help you navigate the process like a pro.
When are peony seed pods ready to harvest?
Peony seed pods typically mature in late summer to early fall (August–October, depending on your climate). They’re ready when they turn brown, papery, and slightly wrinkled—not green or soft. Wait until they pop open easily when gently squeezed, but don’t let them split on the plant or scatter seeds prematurely!
How do I collect seeds from peony pods without wasting them?
Use a small bowl or paper plate to catch seeds as pods open. Wear gloves to avoid prickly stems, and work on a dry day to prevent mold. Don’t shake pods over grass—seeds can get lost or eaten by birds. Instead, place pods in a breathable bag (like a paper lunch bag) for 1–2 days to release seeds naturally.
Can I save peony seeds from store-bought flowers?
Unfortunately, no—most commercial peonies are hybrid cultivars grown for their sterile blooms (they don’t produce viable seeds). For seed-saving success, choose heritage or heirloom peonies labeled as "open-pollinated" or grow your own from saved seeds. If you’re unsure, ask a local nursery!
What’s the best way to store peony seeds for planting?
Clean seeds, let them dry completely (1–2 weeks in a cool, dark place), then store them in an airtight container with a desiccant packet (like silica gel). Keep them in the fridge (35–40°F) for up to 2 years. Label them! Peony seeds lose viability quickly if stored improperly.
Why aren’t my peony seeds germinating?
Peony seeds need cold stratification (a winter chill) to break dormancy. Try these fixes:
- Plant seeds outdoors in fall—they’ll stratify naturally.
- Mix seeds with damp sand, refrigerate for 4–6 weeks, then sow.
- Ensure seeds are fresh (older seeds germinate poorly).
Wrapping up and next steps
Peony seed pods may seem tricky at first, but with the right know-how, you can turn them into a rewarding gardening adventure! 🌱 Whether you're saving seeds for next year or simply admiring their unique beauty, patience and a few simple tools are all you need.
Now that you’re equipped with the best practices, why not give it a try this season? Start small—harvest a few pods, experiment with drying methods, and watch your garden flourish with new peonies in no time.
- Next step: Grab your gloves and a sunny day—your peony seeds are waiting!
- Pro tip: Share your progress with fellow gardeners for extra inspiration!