
Lawn
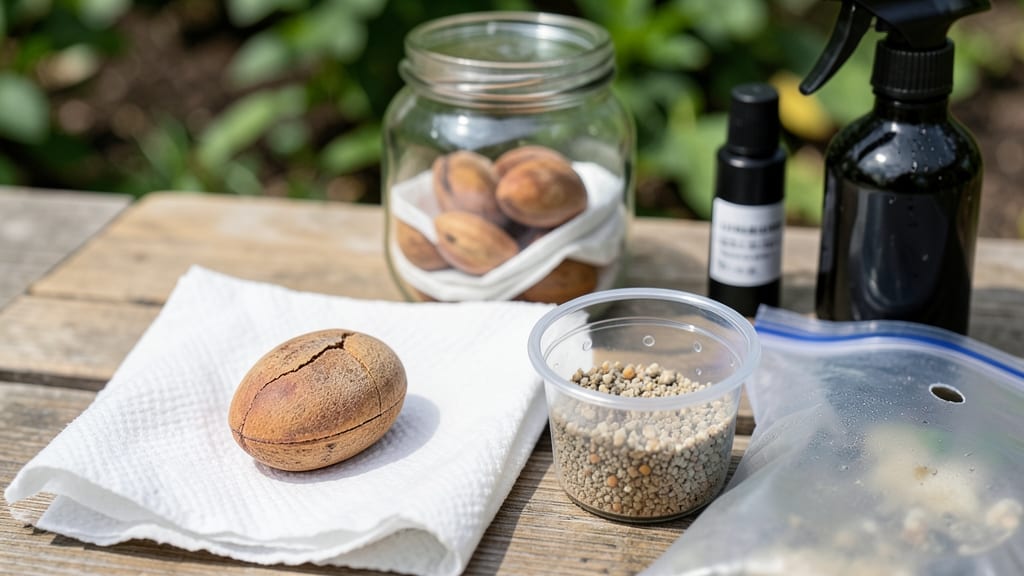
Peach seed stratification isn't just science—it's your secret weapon for breaking dormancy and getting those tiny seeds to sprout fast and reliably. 🌱 I've struggled with peach pits that took months to germinate (or never did) until I learned this moist cold treatment trick straight from fruit-tree growers.
The process mimics what happens naturally when a peach falls and overwinters: seeds soak up moisture while buried in cold soil, then burst to life in spring. You'll need just three simple supplies—a damp paper towel, a sealed bag, and your fridge's crisper drawer—and about 8-12 weeks of patience.
No fancy equipment, just nature's timing. What you end up with are sturdy little seedlings ready to transplant in early spring, skipping the frustrating wait of direct sowing. The first true leaves appear in 3-4 weeks after stratification, and the roots develop strong enough to handle repotting without shock.
Here's where most gardeners mess up: either rushing the cold period or letting the seeds dry out. Keep that paper towel consistently damp (not soggy) and check weekly for mold—if you see fuzzy white spots, air it out for a day before resealing. This method works for nectarines too!
📚 In This Guide
- What you need
- Instructions
- Tips and common mistakes
- Wrapping up and next steps
What you need
- ● Peach pits (seeds): 5–10 fresh, organic peach pits (avoid processed or treated seeds).
- ● Paper towels or coffee filters: 2–3 sheets (for moisture retention).
- ● Plastic zip-top bag: 1 quart-sized bag (resealable, for stratification).
- ● Water: Room-temperature, distilled or filtered (to prevent contaminants).
- ● Refrigerator or cold frame: Space for storage at 35–45°F (2–7°C) for 6–12 weeks.
- ● Small container or tray: For planting sprouted seeds (e.g., 6-inch pot or seedling tray).
- ● Potting soil: Well-draining, sterile mix (e.g., 50% peat moss, 50% perlite).
- ● Hydrogen peroxide (3%): 1 tsp diluted in water to sterilize pits (prevents mold).
- ● Label & marker: To track stratification dates.
- ● Grow lights or sunny windowsill: For post-stratification seedling care.
- ● Humidity dome: To retain moisture during germination.
Step-by-Step instructions for peach seed stratification
This cold-moist method breaks dormancy and speeds up germination—here's how I do it reliably.
🌱 Step 1: Extract and Clean the Seeds
Cut open a ripe peach and carefully remove the flat, brown seed inside. Rinse it under running water to remove any remaining fruit pulp—this prevents mold during stratification. Pat the seed dry with a paper towel, then let it air-dry for 1-2 hours at room temperature. You'll know it's ready when the outer shell feels slightly rough but not damp to the touch.
Don't skip drying. A wet seed will rot in the cold, and you'll lose your chance at germination. I like to work with 4 seeds at once—this method works for all peach varieties, from freestones to clingstones. Place them on a clean towel in a single layer to dry evenly.
💧 Step 2: Soak Seeds for 24 Hours
Fill a small container with lukewarm water (about 80°F) and add the dried seeds. Let them soak for 24 hours. You'll see the seed coats soften slightly and tiny cracks appear—this is normal and necessary for breaking dormancy. Change the water halfway through if it cools significantly.
Here's the thing—I know it seems counterintuitive to soak seeds before cold treatment, but this step mimics natural winter moisture. Without it, many peach seeds never sprout. After soaking, drain the water completely and let the seeds sit uncovered for 30 minutes to prevent mold. You'll notice they feel heavier and slightly swollen.
❄️ Step 3: Stratify in Moist Medium for 6-8 Weeks
Fill a plastic bag with damp but not soggy peat moss or coconut coir—the medium should hold its shape when squeezed but not drip. Place the soaked seeds 1 inch deep in the medium, spacing them 1 inch apart. Seal the bag loosely (leave a small gap for airflow) and store it in your refrigerator's crispier drawer, where temperatures hover around 35-40°F.
Check the seeds every 2 weeks to ensure the medium stays moist. If it feels dry, mist it lightly with water and reseal. You won't see any visible changes yet—that's normal. The cold period mimics winter conditions, tricking the seed into thinking spring has arrived. After 6-8 weeks, the seeds will be ready for planting.
🌿 Step 4: Plant Stratified Seeds and Monitor Growth
Remove the seeds from cold storage and plant them ½ inch deep in a well-draining potting mix. Keep the soil consistently moist but never soggy—peach seedlings hate wet feet. Place the container in a warm spot with indirect light (around 70°F) and cover it loosely with plastic wrap to retain humidity.
Germination can take 2-4 weeks after planting, depending on your climate. You'll see the first true leaves emerge as small, rounded cotyledons—this is your signal that the stratification worked. Once seedlings reach 4 inches tall, transplant them into individual pots and provide bright, indirect light for strong growth.
Tips & tricks for perfect peach seed sprouting
These little-known details make all the difference between seeds that sprout and seeds that rot in your fridge.
Drying is Non-Negotiable: After rinsing your seeds in Step 1, that 1-2 hour drying period isn't optional—it's critical. I've lost three batches of seeds because I skipped this step, thinking "a little damp won't hurt." Wrong! The moisture trapped between the seed coat and shell creates the perfect environment for mold. Test dryness by gently pressing the seed—it should feel slightly rough but not sticky. Place them on a clean paper towel in a single layer to dry evenly, and resist the urge to speed it up with heat.
The Soak Water Temperature Matters: That 80°F lukewarm water in Step 2 isn't arbitrary—it's the Goldilocks zone for seed hydration. Too hot and you shock the seed; too cold and you slow down the dormancy-breaking process. I use a thermometer to check my tap water, especially in winter when water comes out cooler. If your kitchen is cold, let the water sit for 10-15 minutes to reach the right temperature. The tiny cracks you'll see after 24 hours are your first sign the stratification is working.
Medium Moisture is Everything: In Step 3, when you're preparing your peat moss or coconut coir, squeeze it firmly—it should hold its shape but not drip water. Too wet and your seeds will suffocate; too dry and they'll dry out completely. I like to use a spray bottle to mist the medium after the initial dampening, adding just enough water to maintain that perfect "wrung-out sponge" texture. The 2-week check-ins are crucial—this is when most people accidentally let their seeds dry out completely between fridge visits.
Planting Depth Makes a Difference: That ½-inch planting depth in Step 4 might seem shallow, but it's perfect for peach seeds. Planting too deep (more than ½ inch) can prevent the seedling from breaking through the soil surface. Too shallow (less than ¼ inch) exposes the seed to drying out. I use a pencil to mark the planting depth on my pots—it's an easy visual guide. The plastic wrap trick is especially helpful if you're in a dry climate or using a forced-air heating system that dries out the air.
Pro Tips for Peach Seed Stratification
- These little-known details make all the difference between seeds that sprout and seeds that rot in your fridge.
- Drying is Non-Negotiable: After rinsing your seeds in Step 1, that 1-2 hour drying period isn't optional—it's critical.
- The Soak Water Temperature Matters: That 80°F lukewarm water in Step 2 isn't arbitrary—it's the Goldilocks zone for seed hydration.
Frequently asked questions
Got questions about peach seed stratification? You’re not alone—this process can feel tricky at first! Below, we’ve answered the most common questions to help you avoid pitfalls and maximize your success.
How long should I stratify peach seeds?
Peach seeds typically need 8–12 weeks of cold, moist stratification for optimal germination. Place them in the fridge (34–40°F) and check monthly—if mold appears, reduce moisture slightly. Patience pays off! Pro tip: Some seeds may sprout earlier, but longer stratification improves success rates.
Can I use the freezer instead of the fridge?
While the freezer (0°F) can work in a pinch, it’s riskier. Freezing can kill the embryo or cause uneven moisture. Stick to the fridge’s crisp cooler drawer (like a vegetable bin) for steady, safe stratification. If you must use the freezer, thaw seeds gradually over 24 hours before planting.
What if my seeds rot or mold?
Mold or rot usually means too much moisture or poor airflow. Drain excess water, add a thin layer of sand or perlite to the mix, and ensure your container has holes. Discard any slimy or foul-smelling seeds—start fresh with a new batch. Prevent it: Use sterilized materials and avoid overcrowding.
Do I need to scarify peach seeds first?
Peach seeds have hard coats, but stratification alone often works. If you’re impatient, lightly file the seed coat with sandpaper—just enough to scratch the surface. Skip this step if seeds are fresh (<1 year old), as stratification may suffice.
When’s the best time to start stratification?
Start 8–10 weeks before your last frost date (typically late winter for spring planting). This gives seeds time to cold-treat and sprout by early spring. Example: If your frost date is April 15, begin in February. Late starts may delay germination or require indoor growing lights.
Wrapping up and next steps
Mastering peach seed stratification unlocks the secret to growing your own peach tree from scratch—no nursery needed! 🌱 With just a little patience and the right conditions, you can transform a simple seed into a thriving sapling.
Whether you're a gardening newbie or a seasoned green thumb, this method makes it easier than ever to nurture life from something as small as a peach pit.
Now that you’re armed with the know-how, take the next step! Grab those seeds, follow your stratification plan, and watch as tiny roots peek through the soil. Before you know it, you’ll be harvesting fresh peaches from a tree you grew yourself—what’s more rewarding than that? Happy planting! 🌿