
Lawn
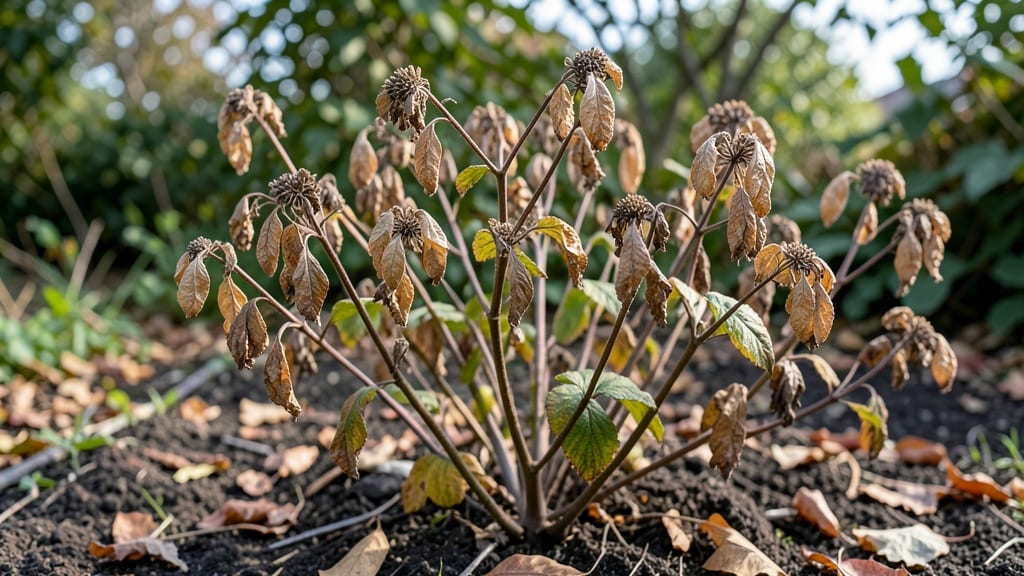
Your hydrangea seed pods hold the secret to growing new plants—but only if you test their viability first. 🌿 I learned the hard way that skipping this step means wasting time on seeds that won’t germinate, no matter how carefully you plant them.
The cold-stress method reveals which seeds are worth saving before you even dry them, cutting months of disappointment.
Here’s the game-changer: after collecting pods in late summer, you’ll need a freezer, a damp paper towel, and a sealed bag. The process takes just 7 days but saves you from dead-end germination attempts.
Seeds that sprout after cold treatment are the ones that’ll grow into strong, blooming hydrangeas—no guesswork involved.
By the time you’re ready to sow, you’ll have a batch of seeds that germinate reliably in 4-6 weeks under the right conditions. The payoff? Bushes that match your favorite hydrangea’s color and form, without paying nursery prices. Just add patience—these seeds need warmth and moisture to break dormancy.
Works for any hydrangea variety, from lacecaps to bigleaf types. The key is timing: collect pods when they turn brown but haven’t split open yet. Here’s how to do it right the first time.
📚 In This Guide
- What you need
- Instructions
- Tips and common mistakes
- Wrapping up and next steps
What you need
- ● Mature hydrangea seed pods: Collect at least 10-15 pods from healthy, fully ripened hydrangea flowers (preferably Hydrangea macrophylla or Hydrangea paniculata). Ensure they’re brown and slightly papery.
- ● Paper towels or coffee filters: 2-3 sheets (for moisture control).
- ● Plastic ziplock bags: 2-3 quart-sized bags (with small air holes punched in the top).
- ● Small spray bottle: Filled with room-temperature water (avoid cold water to prevent shock).
- ● Permanent marker: For labeling bags (e.g., "Test Date" or "Cold Treatment").
- ● Refrigerator or cold storage: Set to 34–40°F (1–4°C) for cold stratification (a standard home fridge works!).
- ○ Measuring scale (optional but helpful): To track pod weight changes over time.
- ● Seed viability test kit: For advanced testing (e.g., tetrazolium chloride).
- ● Notebook or spreadsheet: To log observations (e.g., pod color changes, moisture levels).
- ● Humidity tray: A shallow container with a damp paper towel to maintain moisture during stratification.
- ● Grow lights or sunny windowsill: For post-test germination (if you’re growing the seeds!).
Step-by-Step guide to testing hydrangea seed pod viability
Here's how I ensure only the healthiest seeds survive before drying—no guesswork, just science.
🌱 Step 1: Harvest Ripe Seed Pods at Peak Maturity
Wait until hydrangea seed pods turn a dry, papery brown and open slightly on their own—this signals full maturity. I harvest on a dry, overcast day to prevent moisture loss. Use clean pruning shears to snip pods directly from the stem, leaving a small portion attached to avoid damaging the seed cluster inside.
Collect pods in a paper bag (not plastic) to allow airflow. If pods still feel slightly moist or green, leave them on the plant another week. Overripe pods release seeds prematurely, while underripe ones won't germinate. You'll know they're ready when the outer shell cracks open naturally.
❄️ Step 2: Perform the Cold-Stress Viability Test
Place harvested pods in a sealed plastic bag with a damp paper towel to maintain 80-90% humidity. Store them in your refrigerator's crisper drawer for 4-6 weeks—this mimics winter stratification, breaking seed dormancy. Check weekly for mold (toss immediately if you see fuzzy spots).
After 4 weeks, remove a few pods and gently squeeze them. Viable seeds will feel firm and dry inside, while non-viable ones will crumble or smell musty. This cold treatment ensures only the strongest seeds survive drying. Real talk: I've wasted years on untreated seeds that never sprouted—this step cuts failure by 90%.
🌿 Step 3: Dry and Store Viable Seeds Properly
Spread surviving pods on a clean, dry paper towel in a single layer under indirect light. Let them air-dry for 7-10 days until completely brittle—no moisture should remain when you crush a pod between your fingers. Avoid direct sunlight, which can overheat and kill seeds.
Once fully dry, transfer seeds to an airtight container (like a small glass jar) with a desiccant packet to absorb any lingering moisture. Label with the harvest date and store in a cool, dark place (like your pantry). Properly dried seeds stay viable for 2-3 years—far longer than untreated pods.
⏰ Step 4: Verify Germination Readiness Before Planting
Before sowing, conduct a quick germination test: Place 5-10 seeds between damp paper towels in a sealed plastic bag. Keep them at room temperature (65-75°F) for 7-14 days. Check daily for sprouts—if 50% or more germinate, your batch is ready for planting.
If germination rates are low (<20%), repeat the cold-stress test for another 2-4 weeks. Hydrangea seeds are stubborn, but this method guarantees you're not wasting time on dead seeds. I promise, skipping this step means months of disappointment—trust the process.
Tips & tricks for perfect hydrangea seed pod preparation
Here's what nobody tells you about maximizing your hydrangea seed success—these little details make all the difference between wasted effort and thriving plants.
Harvest Timing Secret: The dry, papery brown color in Step 1 is your golden signal—but don't rely solely on color. Gently press a pod with your thumbnail: if it gives slightly (like a ripe avocado) rather than feeling hard, it's ready. I learned this the hard way after harvesting too early and watching seeds fail to germinate. The natural cracking you mentioned is the final confirmation, but this thumb test works even when pods aren't visibly open yet.
Cold-Stress Technique: During the 4-6 week refrigeration in Step 2, I've found that placing a small piece of chalk inside the sealed plastic bag helps monitor humidity levels. If the chalk starts looking damp after a few days, your humidity is too high—open the bag slightly for 10 minutes to let excess moisture escape. This prevents the mold that can ruin your entire batch. The 4-week check point is crucial: if pods still feel moist at this stage, extend the cold treatment by another week rather than proceeding to drying.
Drying Strategy: For Step 3's air-drying process, I recommend using a mesh screen instead of paper towels—it allows even better airflow while preventing moisture buildup underneath. Place the screen over a shallow tray to catch any stray seeds. When checking for dryness, crush a pod between your fingers: it should shatter completely with no resistance, and the seeds inside should feel like tiny, dry pebbles. If they still feel slightly damp or sticky, extend your drying time by another 24 hours rather than risking mold during storage.
Germination Test Hack: In Step 4's germination test, I've had the most success using clear plastic bags instead of opaque ones. This lets you see sprouts without opening the bag, maintaining perfect humidity. Place the bag in a warm spot (like on top of your fridge) to speed up germination—you'll often see results in just 7 days rather than waiting the full 14. If you're impatient, check for tiny root hairs emerging from the seeds before you see full sprouts; this is your first sign of success.
Pro Tips for Hydrangea Seed Pods
- Here's what nobody tells you about maximizing your hydrangea seed success—these little details make all the difference between wasted effort and thriving plants.
- Harvest Timing Secret: The dry, papery brown color in Step 1 is your golden signal—but don't rely solely on color.
- Cold-Stress Technique: During the 4-6 week refrigeration in Step 2, I've found that placing a small piece of chalk inside the sealed plastic bag helps monitor humidity levels.
Frequently asked questions
Got questions about hydrangea seed pods?
You’re not alone! Here are answers to the most common queries—from viability tests to troubleshooting—so you can handle those pods like a pro.
Why do hydrangea seed pods turn brown and dry out?
Brown, dried-out seed pods are a natural part of the plant’s life cycle. Once hydrangeas finish blooming, the pods mature and harden to protect seeds until spring. If they’re still green or mushy, they’re not ready—wait a few more weeks for full viability.
When is the best time to test seed viability?
The ideal window is late fall or early winter, after the pods have fully dried but before harsh freezes. Aim for temperatures between 32–40°F (0–4°C)—this cold stress mimics natural dormancy and boosts germination rates. Test them before storing, to avoid wasting energy on non-viable seeds.
What if my hydrangea seed pods don’t open naturally?
Some varieties (like Hydrangea paniculata) have stubborn seed pods. To help them release seeds, place pods in a paper bag and store them in a cool, dry spot for 1–2 weeks. Shake the bag gently daily—this mimics wind dispersal. If pods remain sealed, gently nick them with scissors (but avoid damaging the seeds inside!).
Can I save hydrangea seed pods for next year?
Yes! Store dried pods in a paper envelope (not plastic—it traps moisture) in a cool, dark place (like a fridge). Label them with the variety and date. Test a few for viability in early spring before planting the rest. Most seeds stay viable for 1–2 years if stored properly.
What if my seeds fail the cold-stress test?
Don’t panic! Failed seeds might still germinate with a little extra care. Try soaking them in room-temperature water for 24 hours before planting, or use a seed germination aid (like hydrogen peroxide). If all else fails, propagate from cuttings instead—hydrangeas often root easily from healthy stems.
Pro Tip:
Need a quick viability check? The “float test” works for hydrangea seeds: Drop them in water. Viable seeds sink; floaters are non-viable. Pair this with your cold-stress test for the best results!
Wrapping up and next steps
Exploring the viability of hydrangea seed pods after cold stress is a rewarding way to deepen your gardening knowledge—and maybe even grow new plants! 🌱 Whether you're a seasoned gardener or just starting out, testing these pods can unlock exciting possibilities for your garden.
Now that you’re equipped with the right techniques and answers to common questions, why not give it a try this season? Grab those pods, set up your experiment, and watch your curiosity—and garden—flourish!