
Lawn
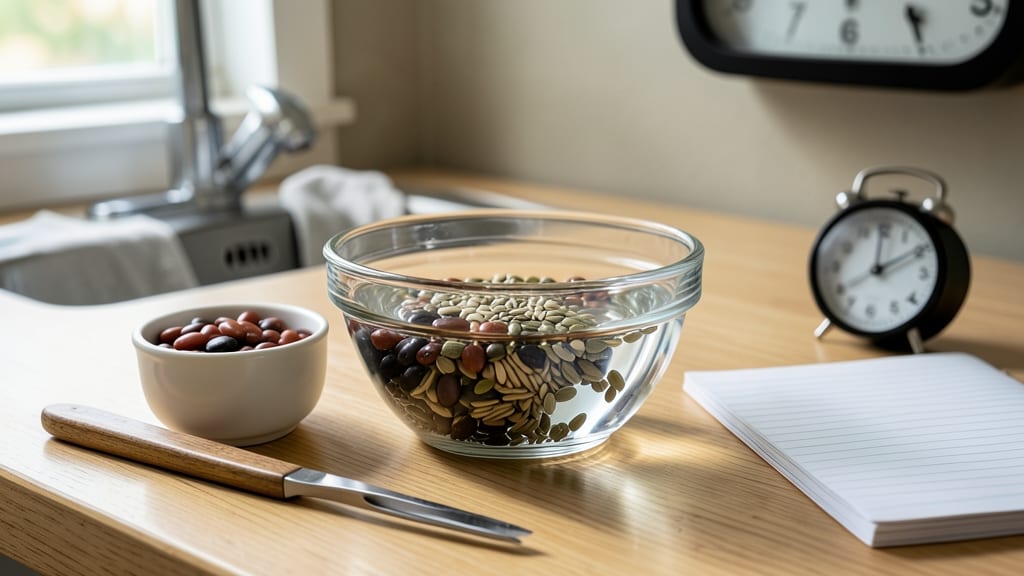
The seed float test saves you from planting seeds that’ll never sprout—just fill a bowl with water and watch which ones sink. 🌱 I’ve wasted enough seed packets on duds to know this 3-minute trick is a game-changer for gardeners who refuse to gamble with germination.
Most seeds need moisture to germinate, so if they float, they’re either dead or too old to bother with. The few that float? Toss them—no point planting them. But the ones that sink? Those are your winners, ready to start growing in soil within days.
This test works for most vegetables, flowers, and herbs, though a few exceptions (like poppy seeds) need special handling. You’ll need just two things: a bowl of water and a spoon to stir. Drop in a handful of seeds, give them a quick stir, and wait 3 minutes.
The results tell you exactly which seeds to plant—and which to save for next year’s stash. It’s that simple, and it prevents the heartbreak of empty seed trays. This method works best for seeds you’re unsure about, like old packets or those stored in less-than-ideal conditions.
For extra peace of mind, pair it with the paper towel test for seeds that sink but still might be questionable. Now you’ve got a foolproof way to know what’s worth planting before you even dig in the soil.
📚 In This Guide
- What you need
- Instructions
- Tips and common mistakes
- Wrapping up and next steps
What you need
- ● Seeds: The ones you’re testing (any type—grass, veggies, flowers, etc.). Aim for at least 10 seeds per variety for accurate results.
- ● Clear glass or jar: A standard drinking glass (8–12 oz) or a mason jar with a wide opening works best.
- ● Water: Room-temperature tap water (avoid distilled or softened water—it lacks minerals that affect buoyancy).
- ● Paper towel or coffee filter: A small square (about 4x4 inches) to drain excess water if needed.
- ● Timer or stopwatch: Your phone’s timer works perfectly for the 3-minute test.
- ○ Notebook & pen: To log results (optional but helpful for tracking seed viability over time).
- ● Ruler or measuring tape: To standardize seed placement if testing large batches.
- ● Magnifying glass: For inspecting tiny seeds or seed coats post-test.
- ● Labeling tape: To mark jars if testing multiple seed types simultaneously.
- ● Seed viability chart: A reference guide for interpreting float/sink ratios by seed type.
How to test seed viability in under 3 minutes
Skip the guesswork—this quick method tells you which seeds will sprout before you even plant.
💧 Step 1: Fill a Bowl with Room-Temperature Water
Use a clean, shallow bowl or glass large enough to hold all your seeds without crowding. Fill it with about 2 inches of room-temperature water—cold water can shock seeds, while hot water may damage delicate seed coats. I like to use a clear container so I can see everything clearly.
Stir the water gently to create a slight ripple. This helps distribute seeds evenly and prevents them from clumping together. If your water is chlorinated, let it sit uncovered for 24 hours first—chlorine can interfere with the test results.
🌱 Step 2: Drop Seeds Into the Water
Place all your seeds into the water at once. Don't press them down or stir aggressively—just let them float freely. I like to use a spoon to gently nudge stubborn seeds toward the surface. Watch closely as some immediately sink while others stay afloat.
After 30 seconds, you'll start seeing a clear separation. Seeds that float are typically non-viable, while those that sink have a good chance of germinating. This works because viable seeds contain more starch, making them denser and heavier.
⏰ Step 3: Observe and Separate After 3 Minutes
Let the seeds sit for the full 3 minutes. During this time, some seeds that initially floated may sink—these are borderline cases and worth saving. Most seeds will have settled into one of two categories by now: floating or sunk.
Use a slotted spoon or fine mesh strainer to carefully remove the floating seeds. Discard these or set them aside for composting—they won't germinate. The seeds that remain sunk are your winners. Drain them thoroughly on a paper towel before storing or planting.
🌿 Step 4: Store Viable Seeds Properly
Lay the viable seeds on a dry paper towel in a single layer. Let them air dry completely for 1-2 hours—this prevents mold growth during storage. I like to place them in a small paper envelope labeled with the seed type and date.
Store the envelopes in a cool, dark place like a seed storage box or even the back of your freezer. Properly dried and stored seeds can maintain viability for months. When you're ready to plant, these seeds will have a much higher success rate.
✂️ Step 5: Plant the Viable Seeds Immediately
Use your tested seeds within 1-2 weeks for best results. Plant them at the proper depth according to the seed packet instructions—usually 2-3 times the seed's diameter. The soil should be moist but not soggy before planting.
Water gently after planting to settle the soil around the seeds. Place the container in a warm, bright spot (around 70-75°F) and expect germination in 5-14 days, depending on the seed type. This test gives you peace of mind knowing you're not wasting time or resources on seeds that won't grow.
Tips & tricks for perfect seed viability testing
This quick method reveals which seeds will sprout—and these little tricks make it even easier to get accurate results.
Water Temperature Matters: Room temperature water is key, but if you're in a hurry, use water that's slightly warmer than room temp (around 75°F). Cold water can shock seeds, while hot water may damage their delicate outer layers. I've found that water straight from the tap at 75°F works perfectly for most seeds without any negative effects.
Timing Secret: That 3-minute wait in Step 3 is crucial—don't rush it! Some seeds might take the full 3 minutes to show their true nature. I've seen seeds that floated at 30 seconds sink by minute 3, so patience pays off. Set a timer to avoid second-guessing whether you've waited long enough.
Storage Wisdom: When storing your viable seeds in Step 4, consider adding a small packet of silica gel to your storage envelope. This extra moisture absorber helps maintain dryness, especially if you're storing seeds in humid environments. The 1-2 hour drying time is non-negotiable—wet seeds can develop mold within 24 hours.
Seed Selection Tip: For best results, test seeds that are less than a year old. Older seeds often have lower viability, but this test will still reveal their true potential. I like to test a small sample first—about 10 seeds—to get a sense of what to expect before committing to larger batches.
Pro Tips for Seed Float Test
- This quick method reveals which seeds will sprout—and these little tricks make it even easier to get accurate results.
- Water Temperature Matters: Room temperature water is key, but if you're in a hurry, use water that's slightly warmer ...
- Timing Secret: That 3-minute wait in Step 3 is crucial—don't rush it! Some seeds might take the full 3 minutes to sho...
Frequently asked questions
Got questions about the seed float test? You’re not alone! Here are answers to the most common queries—because even the simplest tests can spark curiosity.
Why do some seeds float while others sink in the water test?
The float test works because viable seeds are dense and packed with nutrients, while empty or damaged seeds lack density and float. Think of it like comparing a water balloon (floats) to a rock (sinks)—empty seeds behave like the balloon!
How soon after harvesting can I test seed viability?
You can test seeds anytime, but for the most accurate results, wait at least 24–48 hours after harvesting to let them dry slightly. Freshly harvested seeds may absorb water unevenly, skewing results. Store seeds in a cool, dry place until testing.
Is the float test as reliable as a germination test?
The float test is a quick, low-cost way to eliminate obviously bad seeds, but it’s not 100% foolproof. Some viable seeds (like certain legumes) may float due to waxy coatings, while others might sink even if they’re dead. For maximum accuracy, combine it with a paper towel germination test.
Can I reuse the water from the float test for other seeds?
Nope! The water may contain microbial contaminants from dead seeds or debris. Always use fresh, room-temperature water for each batch to avoid cross-contamination. Pro tip: Sanitize your container with a 10% bleach solution (1 part bleach to 9 parts water) between tests if reusing it.
What should I do with seeds that float?
Discard or compost floating seeds—they’re likely non-viable. However, if you’re testing a large batch, consider setting aside a small portion for a secondary germination test to confirm. Some seeds (like tomatoes) may float but still sprout if given the right conditions!
Troubleshooting: My seeds all sank, but none germinated. What went wrong?
- Water temperature: Too cold (<40°F) can slow absorption. Use lukewarm water for better results.
- Seed coating: Some seeds (e.g., chia, flax) have natural oils that make them sink. Try lightly scratching the seed coat before testing.
- Testing time: If seeds sank but didn’t germinate, they may have been dormantg. Try stratification or scarification to break dormancy.
If all else fails, source new seeds—sometimes old or improperly stored seeds just won’t cooperate!
Wrapping up and next steps
The seed float test is your quick, easy way to save time and money by ensuring only viable seeds make it to your lawn! 🌱 With just a bowl of water and a few minutes, you can skip the guesswork and plant with confidence.
Whether you're a seasoned gardener or a beginner, this simple trick helps you grow a lush, healthy lawn—without the waste.
Ready to take the next step? Grab your seeds, test them, and start planting! Your future lawn will thank you. 🌿