
Lawn
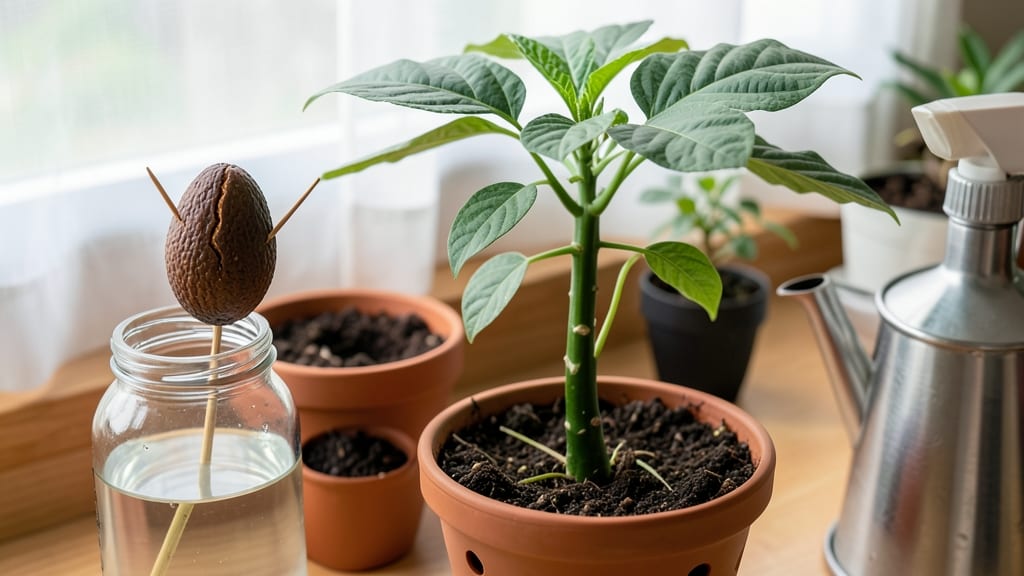
That avocado seed in your kitchen could grow into a thriving houseplant with the right cold stratification method. 🌱 I've sprouted dozens of seeds over the years, and the key to success starts with creating the perfect damp, dark environment—no fancy equipment needed, just patience and a few household items.
The process begins by removing the seed from its pit, suspending it over water in a jar, and waiting for roots to emerge. Most people rush this step, but giving the seed 2-4 weeks of consistent moisture and indirect light before transplanting makes all the difference.
Too much water or sunlight too soon leads to mold, not roots. Once you see those first 1-2 inch roots, you'll know you're on track.
The real magic happens when you transplant into soil, where the seedling transforms from a water baby into a sturdy plant ready for its first leaves. It takes 6-8 weeks total, but the wait is worth the lush, glossy foliage.
This method works for any avocado seed, whether you're growing in a sunny window or under grow lights. The secret isn't forcing growth—it's creating the right conditions and letting nature take its time.
📚 In This Guide
- What you need
- Instructions
- Tips and common mistakes
- Wrapping up and next steps
What you need
- ● 1 ripe avocado (choose firm, blemish-free fruit for the best seed quality).
- ● 1 sharp knife or avocado pit cutter (to safely remove the seed without damaging it).
- ● Toothpicks (3-4) (for suspending the seed in water).
- ● 1 small glass or jar (wide-mouth, ~8–12 oz, to hold water and the seed).
- ● Filtered or room-temperature water (chlorine-free to avoid seed stress).
- ● Paper towels or damp cloth (for cold stratification—keep it slightly moist, not soggy!).
- ● Plastic wrap or a resealable bag (to maintain humidity during stratification).
- ● Small pot (3–4 inches in diameter) (with drainage holes, for transplanting the sprout).
- ● Well-draining potting mix (cactus/succulent blend or 50% perlite + 50% peat moss).
- ● Spray bottle (for misting the seed during stratification).
- ● Heating pad or seedling mat (to gently warm the soil post-sprouting, ~70°F).
- ● Grow lights or sunny windowsill (10+ hours of indirect light daily).
- ● Fertilizer (balanced 10-10-10 or seaweed extract) (diluted to half-strength after 4–6 weeks).
- ● Humidity dome or plastic wrap (to protect the young sprout from drying out).
Step-by-step instructions for sprouting avocado seeds
Here's the foolproof method I use to turn avocado pits into thriving seedlings every time.
🌱 Step 1: Prepare the Avocado Pit
Rinse the avocado pit thoroughly to remove any remaining fruit flesh, then pat it completely dry with a paper towel. The key here is cleanliness—any leftover pulp will rot and prevent sprouting. I like to use a toothpick to gently scrape away any stubborn bits from the pit's surface.
Next, insert three toothpicks evenly around the pit, about ½ inch from the top. These will suspend the pit over water without letting it touch. The toothpicks should be spaced roughly 120 degrees apart for balance. If you're working with multiple pits, label each one with the date—it helps track progress.
💧 Step 2: Suspend Over Water
Fill a shallow container with room-temperature water (about 1 inch deep). The water should cover the bottom ¼ inch of the pit—not more, or the pit will rot. Rest the toothpicks across the container's rim so the pit hangs freely, with the wider end (where the stem will emerge) facing upward.
Change the water every 2-3 days to prevent bacterial growth. You'll notice the pit starts absorbing water within a few days—this softens the hard outer shell and kickstarts the sprouting process. Watch for the first signs of a tiny root emerging from the bottom; this usually happens within 2-4 weeks.
☀️ Step 3: Encourage Sprouting with Warmth and Light
Place your suspended pit in a warm spot with bright, indirect light—a kitchen windowsill or under a grow light works perfectly. Avoid direct sunlight, which can overheat the pit. I keep mine near a south-facing window but out of harsh midday rays. The ideal temperature range is 65-75°F.
Once the root reaches about 2 inches long, it's time to transition to soil. The root should be firm but flexible—if it feels mushy, the pit has stayed too wet too long. Gently remove the pit from the water and let it dry slightly for 10-15 minutes before planting to prevent rot.
🌿 Step 4: Plant in Moist Soil
Fill a small pot (at least 4 inches deep) with well-draining potting mix. Make a hole in the center deep enough to bury about ½ inch of the pit below soil level, leaving the top exposed. This ensures the seedling has stability while allowing the stem to emerge easily.
Water the soil until it's evenly moist but not soggy. Place the pot in a warm, bright spot and keep the soil consistently damp—never waterlogged. You'll see the first true leaves (not the initial sprout) emerge within 2-4 weeks. This is your signal that the seedling is establishing properly.
⏰ Step 5: Care for the Young Seedling
Once the seedling reaches 6 inches tall, transplant it into a larger container (at least 6 inches deep) with fresh potting mix. Keep it in bright, indirect light for the first week to help it adjust. After that, gradually introduce it to more sunlight over 5-7 days to prevent leaf scorch.
Water when the top 1 inch of soil feels dry to the touch. Avocado seedlings need humidity—mist the leaves lightly every few days or place the pot on a tray of pebbles with water to create a humid microclimate. With patience, your seedling will grow into a small avocado tree in just a few months!
Tips & tricks for perfect avocado seed sprouting
Here's what nobody tells you about turning pits into thriving seedlings—lessons I learned after watching three avocado pits fail before finally getting it right.
Cleanliness is Non-Negotiable: In Step 1, when rinsing the pit, take extra time to remove all fruit residue from the crevices. I used to skip this, and mold would develop within days. A toothpick helps scrape hidden pulp—don't rush this step. The cleaner the pit, the faster it'll sprout.
Water Level Matters: The instructions say to cover just the bottom ¼ inch of the pit, but I've seen beginners drown their pits by filling the container too high. Use a shallow dish and monitor water levels—it should never touch more than the very base. Overwatering is the #1 reason pits rot before sprouting.
Root Texture Test: Before planting in Step 4, check that your 2-inch root feels firm but flexible. If it's mushy, your pit has absorbed too much water. Let it dry for the full 10-15 minutes—this critical drying period prevents rot when you transfer to soil. I've lost seedlings because I rushed this step.
Light Transition Strategy: When moving your seedling to brighter light in Step 5, do it gradually over 5-7 days. I made the mistake of moving mine straight to full sun and ended up with crispy leaves. Start with morning sunlight only, then slowly increase exposure as the plant adjusts.
Pro Tips for Make An Avocado Seed Sprout
- Here's what nobody tells you about turning pits into thriving seedlings—lessons I learned after watching three avocad...
- Cleanliness is Non-Negotiable: In Step 1, when rinsing the pit, take extra time to remove all fruit residue from the ...
- Water Level Matters: The instructions say to cover just the bottom ¼ inch of the pit, but I've seen beginners drown t...
Frequently asked questions
about sprouting avocado seeds—because every gardener deserves a little clarity!How long does it take for an avocado seed to sprout?
With cold stratification, expect sprouts in 4–12 weeks. The timing depends on seed health, moisture, and temperature. Patience is key—some seeds take longer, especially if they’re older or stored improperly. Keep checking for tiny cracks or green shoots!
Why isn’t my avocado seed sprouting after cold stratification?
If your seed refuses to sprout, it might be dormant, damaged, or not viable. Try these fixes:
- Check for rot—foul smells or mold mean it’s time to toss it.
- Ensure it’s in consistent moisture (not soggy, not dry).
- Give it more time—some seeds need up to 3 months.
- Test viability by soaking in water—if it sinks, it’s still alive!
Can I plant the avocado seed directly in soil after sprouting?
Not yet! Once your seed sprouts (roots + stem), wait until roots are 2–3 inches long before transplanting. Use well-draining soil and keep it in bright, indirect light to avoid leggy growth. A pot with drainage holes works best!
What if I don’t want to use cold stratification? Are there alternatives?
Yes! Try these methods:
- Warm Stratification: Soak the seed, then place it in warm (70–80°F) water for 24 hours daily.
- Paper Towel Method: Wrap the seed in a damp paper towel and keep it in a plastic bag (check weekly for sprouts).
- Direct Soil Planting: Bury the seed 2 inches deep in moist soil—slower but low-maintenance!
Will my avocado seed grow into a full tree?
Yes! With proper care, your sprout can grow into a mature avocado tree (10–20 years). Start with a 5–6 gallon pot and move it outdoors once temperatures stay above 50°F. Just know—indoor-grown trees may take longer to bear fruit than nursery-grown ones!
Wrapping up and next steps
Growing an avocado seed into a thriving sprout is a rewarding journey that blends patience, care, and a little science! By following the cold stratification method, you’ve set the stage for reliable growth—whether you’re nurturing it indoors or preparing it for outdoor planting.
Remember, consistency is key: keep those roots moist, provide gentle warmth, and watch your tiny seedling transform into something extraordinary.
Now that you’ve mastered the basics, why not take it a step further? Transplant your sprout into a pot with well-draining soil and give it the love it deserves—soon, you could be enjoying your very own avocado tree! 🌱✨