
Lawn
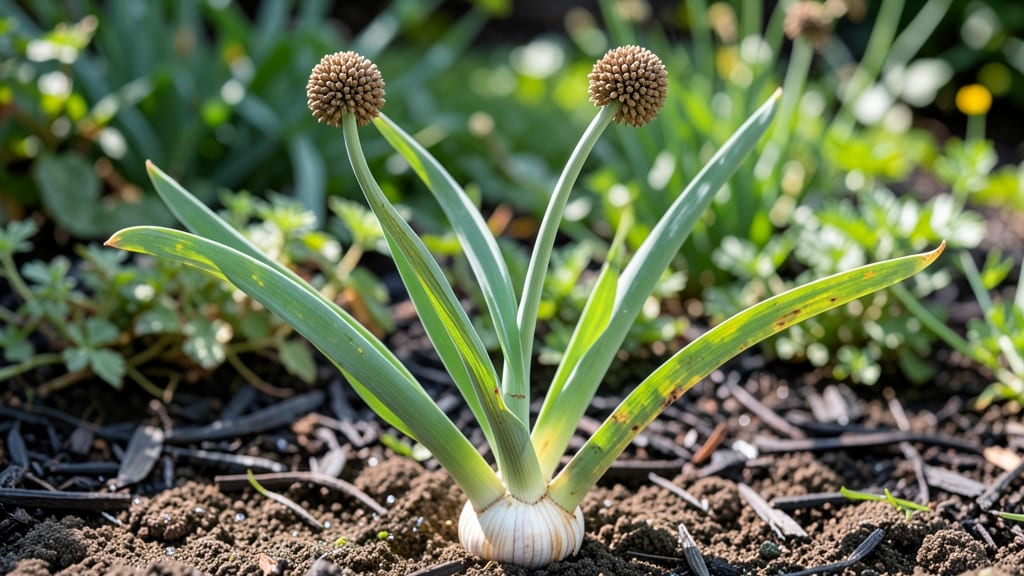
Garlic seed heads are nature’s way of making propagation foolproof—no twisting, no fuss, just dry pods packed with tiny seeds. 🌱 I’ve saved seeds from my own garlic plants for years, and the process gets easier every time you do it.
These papery pods form after the plant flowers, and each one holds dozens of seeds ready to grow into new garlic plants.
The trick is patience and timing. You’ll need a mature garlic plant that’s finished flowering—those tall stems with round seed heads are your signal. Once they’re dry and crispy to the touch, you can gently twist them off.
No special tools needed, just your hands and a paper bag to collect the seeds.
By spring, those seeds will grow into hardy new plants, and you’ll have garlic that’s uniquely yours. The flavor might take a few years to develop, but the satisfaction of growing from seed? That’s instant. Plus, you’ll save money and build a garlic collection tailored to your climate.
Works for any garlic variety, from softnecks to hardnecks, and even adapts to small spaces. Here’s how to do it without losing a single seed—or your patience.
📚 In This Guide
- What you need
- Instructions
- Tips and common mistakes
- Wrapping up and next steps
What you need
- ● Garlic seed heads (bulbs): Choose hardneck varieties (e.g., Rocambole, Porcelain, or Purple Stripe) known for producing seed heads. Aim for 10-20 bulbs for a small harvest.
- ● Well-draining soil: A mix of 60% topsoil, 30% compost, and 10% coarse sand or perlite (1-2 cubic yards for a 4’x8’ bed).
- ● Organic fertilizer: A balanced 5-5-5 or 10-10-10 (1 lb per 10 sq ft) + kelp meal (½ lb per 10 sq ft) for trace minerals.
- ● Mulch: Straw or shredded leaves (2-3 inches thick) to insulate bulbs in winter.
- ● Garden trowel or transplanting spade: For planting cloves 2” deep.
- ● Garden fork: To loosen soil before planting (avoid compacting roots).
- ● Pruners or sharp scissors: For harvesting seed heads when 50% brown.
- ○ Label markers & stakes: To track varieties (optional but helpful!).
- ● Drying tray or mesh screen: For curing seed heads indoors (e.g., a wire cooling rack).
- ● Climate zone 4-9: Hardneck garlic thrives in cold winters (below 40°F) for seed production.
- ● Full sun (6+ hours/day): Seed heads need bright light to develop properly.
- ● Patience (2 years!): Garlic seed heads mature in second-year plants—start saving seeds now for next year’s harvest.
Step-by-Step instructions for harvesting garlic seed heads
Here's how to collect garlic seed pods without the usual messy twist-and-pull method.
🌱 Step 1: Identify and Select Mature Seed Heads
Look for garlic scapes or seed stalks that have turned completely brown and dried out—this signals maturity. The pods should feel crisp and brittle when you gently squeeze them. I always check in late summer when the stalks have stopped growing and the flowers have dried completely.
Cut the entire stalk about 2 inches above the base with clean pruners to avoid damaging the bulb below. Leave the seed heads intact on the stalk for easier handling. If you see any green or moist pods, wait a few more days—they need to dry fully before harvesting.
🪴 Step 2: Bundle and Dry the Seed Heads
Gather 4-5 seed stalks and tie them together at the base with twine or a rubber band. Hang them upside down in a dry, well-ventilated spot—like a garage or covered porch—where they can finish drying for 2-3 weeks. You'll know they're ready when the pods easily crumble between your fingers.
Don't rush this step. If you harvest too soon, the seeds won't store well and may not germinate properly. I like to place a small paper bag under the bundles to catch any loose pods that might fall off during drying.
✂️ Step 3: Remove and Clean the Seed Pods
Once fully dry, carefully break apart each seed head by hand or with a small hammer on a clean surface. The pods will split open to release the tiny black seeds inside. I always work over a large tray or sheet of newspaper to contain the mess—these seeds are tiny and scatter easily.
Sift through the seeds to remove any debris, stems, or empty pods. Store the clean seeds in a paper envelope or small jar in a cool, dark place. Label it with the garlic variety and harvest date—this helps track germination rates over time.
💧 Step 4: Store Seeds for Next Year's Planting
Garlic seeds remain viable for 2-3 years if stored properly. Keep them in a sealed container with a silica gel packet to absorb moisture. I place mine in the refrigerator's vegetable drawer for extra protection against humidity.
Before planting, test a few seeds by soaking them overnight. If they swell and feel firm, they're ready to use. If they feel soft or mushy, they've lost viability and should be discarded.
Tips & tricks for perfect garlic seed collection
These simple strategies will help you save garlic seeds efficiently while avoiding common pitfalls.
Timing is Everything: Late summer is your best window for harvesting garlic seed heads. Look for stalks that have turned completely brown and feel crisp when squeezed—this means they're fully mature. Harvesting too early means seeds won't store well, while waiting too long risks losing your entire crop to weather. I always check my plants in late August when the flowers have dried completely and the pods feel brittle.
Harvesting Technique: When cutting the stalks in Step 1, use clean pruners to make your cut about 2 inches above the base. This prevents damaging the bulb below while leaving enough stalk length to bundle effectively. I've learned the hard way that leaving too much stalk makes drying messy, while cutting too close risks damaging the bulb's growth next season.
Drying Strategy: The 2-3 week drying period in Step 2 is non-negotiable for seed viability. Hang your bundles in a dry, well-ventilated spot where they can receive indirect sunlight. I've found that placing them under a covered porch works perfectly—it keeps them out of direct rain while allowing airflow. Don't be tempted to rush this step; seeds harvested too soon won't germinate properly.
Storage Wisdom: For long-term seed storage in Step 4, I recommend using small paper envelopes rather than jars. Paper breathes slightly, preventing moisture buildup that can reduce viability. Always label your seeds with the variety and harvest date—this helps track germination rates over time. Store them in the refrigerator's vegetable drawer for maximum protection against humidity.
Pro Tips for Garlic Seed Heads
- These simple strategies will help you save garlic seeds efficiently while avoiding common pitfalls.
- Timing is Everything: Late summer is your best window for harvesting garlic seed heads.
- Harvesting Technique: When cutting the stalks in Step 1, use clean pruners to make your cut about 2 inches above the base.
Frequently asked questions
Got questions about saving garlic seed heads with no-twist pods? You’re not alone! Here are some of the most common queries—and their straightforward answers—to help you master the process like a pro.
What’s the best time to harvest garlic seed heads?
Harvest garlic seed heads when the bulbs are fully mature but before they split open or dry out on the plant. Aim for late summer to early fall (typically August–September in most climates). If left too long, seeds may scatter or lose viability.
How long does it take for garlic seed heads to dry?
Once harvested, garlic seed heads need 4–6 weeks of drying in a well-ventilated, dry space (like a mesh bag indoors or a garage). Spread them out to avoid mold—patience pays off for high-quality seeds!
Can I reuse no-twist pods for garlic seed heads?
Yes! No-twist pods are reusable if cleaned and stored properly. After drying, gently remove seeds and reuse the pods for future harvests. Just ensure they’re free of debris to prevent mold or pests.
What if my garlic seed heads mold or rot?
Mold or rot usually means too much moisture during drying. To fix it, move pods to a dry, shaded spot with good airflow. If already moldy, discard affected seeds and pods to avoid spreading contamination.
Are there alternatives to no-twist pods for seed saving?
Use paper bags, mesh produce bags, or even old pantyhose (with a drawstring) to hang seed heads. Just ensure airflow to prevent moisture buildup—creativity works!
Wrapping up and next steps
Garlic seed heads—or no-twist pods—are a game-changer for gardeners looking to save seeds with ease and efficiency. Whether you're a seasoned gardener or just starting out, mastering this method ensures you’ll have healthy, viable seeds for next year’s harvest. 🌱
Ready to take the next step? Start by experimenting with a small batch of garlic this season, and soon you’ll be confidently saving seeds like a pro. Happy gardening—and may your future crops thrive! 🌟