
Lawn
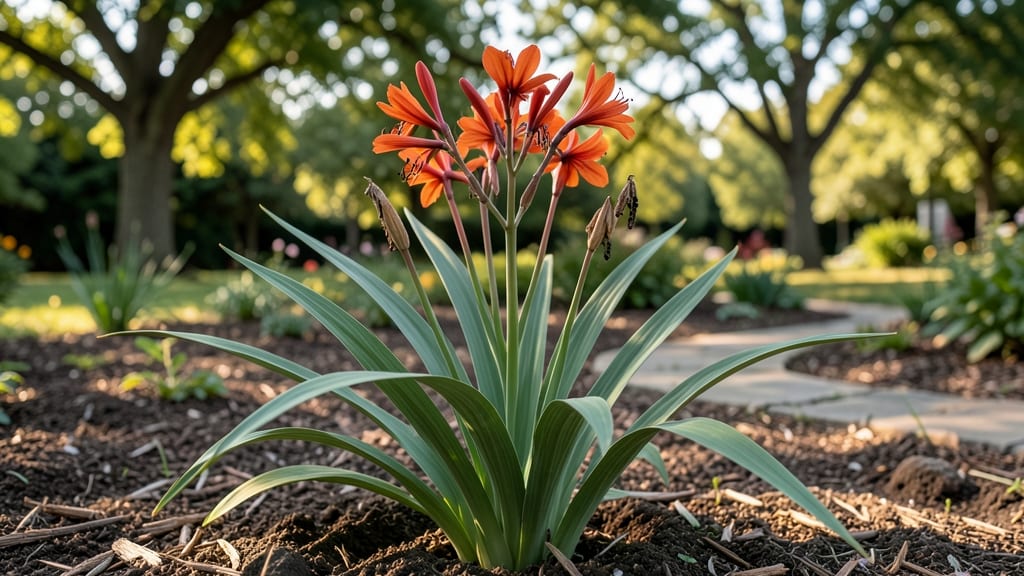
Crocosmia seed pods reveal a surprising secret—cold stress makes them pop open like nature’s own seed package. 🌱 I’ve watched mine split dramatically after a hard frost, releasing tiny black seeds that look like miniature coffee beans.
The process is so reliable it feels almost magical, but there’s more to it than just waiting for winter. These pods rarely produce viable seeds unless they’ve experienced proper cold treatment, which is why most gardeners rely on corm division instead.
When seeds do form, they’re finicky to germinate—often requiring specific moisture and temperature cues to break dormancy. That’s why I’ve switched to propagating from corms, which guarantees plants that bloom the first year.
What you’ll get from this method is a way to expand your garden without digging up mature clumps. The seeds, when they work, create genetic diversity, but the corms deliver instant, reliable growth. Either way, you’ll end up with those striking sword-like foliage and fiery summer blooms.
For best results, collect pods after they’ve dried on the stem but before they shatter completely. Store them in a cool, dry place until spring planting—though I’ll be honest, the germination rate is so low that most gardeners skip the seed route entirely.
📚 In This Guide
- What you need
- Instructions
- Tips and common mistakes
- Wrapping up and next steps
What you need
- ● Mature Crocosmia plants: Ensure they’ve completed blooming and are showing dry, papery seed pods (typically late summer/fall).
- ● Pruning shears or sharp scissors: Clean, sterilized (70% isopropyl alcohol wipe recommended) to avoid spreading disease. Quantity: 1 pair.
- ● Brown paper bags or seed envelopes: Labeled with plant name and date for storage. Quantity: 5–10 (depending on yield).
- ○ Glove (optional but recommended): Protects hands from thorny stems or sap. Type: Lightweight gardening gloves.
- ● Small paintbrush or cotton swab: For gently dislodging seeds from pods. Quantity: 1–2.
- ● Magnifying glass: For inspecting seed viability (look for plump, firm seeds).
- ● Desiccant packets: To keep seed envelopes dry during storage.
- ● Notebook & pen: Track pod maturity or seed counts for future reference.
- ● Spray bottle with water: Light misting to soften stubborn pods if needed.
How to extract crocosmia seeds from cold-stressed pods
The easiest way to collect these vibrant seeds is by letting nature do most of the work—just give the pods a little cold treatment first.
🌿 Step 1: Identify and Select Ripe Seed Pods
Wait until the crocosmia blooms have fully faded and the seed pods turn a papery brown color—this means they're mature but still sealed tight. I like to check pods in late fall when temperatures naturally drop. Gently twist each pod to feel for resistance; if it cracks slightly, it's ready for cold stress.
Don't rush this step—green or partially open pods won't yield viable seeds. You'll know you've picked the right ones when they look dry and slightly wrinkled, but still intact. Collect about 4-6 pods per plant for good seed production.
❄️ Step 2: Cold-Stress the Pods for Natural Opening
Place the collected pods in a paper bag and store them in your refrigerator's crisper drawer for 2-3 weeks. The cold mimics winter conditions and triggers the pods to open naturally. I like to label the bag with the date—this prevents over-stressing, which can dry out the seeds.
Check the pods weekly for any signs of cracking. If you see moisture inside when you peek, remove them immediately—they're ready. The cold treatment also helps kill any potential fungal spores hiding in the pods, giving you cleaner seeds.
🌱 Step 3: Extract Seeds When Pods Open Fully
Once the pods split open completely (usually after 2-3 weeks), remove them from the fridge and place them on a clean sheet of white paper. The seeds will be visible as small, dark brown ovals inside the dry husk. I tap the pods gently with my finger to release the seeds without damaging them.
Use a soft paintbrush to sweep any loose seeds into a small envelope. Be patient—some pods may take an extra week to open fully, especially if your fridge runs cooler. Store the extracted seeds in a dry, airtight container in a cool, dark place until spring planting.
☀️ Step 4: Prepare Seeds for Spring Planting
In early spring, soak the seeds in lukewarm water for 12 hours to soften the outer coating. This step improves germination rates significantly. After soaking, plant them ½ inch deep in a well-draining seed-starting mix, keeping the soil consistently moist but not soggy.
Place the pots in a warm, bright spot (around 65-70°F) and cover them with plastic wrap to retain humidity. Germination typically takes 2-4 weeks. Once seedlings emerge, remove the plastic and provide bright, indirect light until they're ready for transplanting outdoors after the last frost.
Tips & tricks for perfect crocosmia seed extraction
Here's what I learned after collecting seeds from my garden for years—these little details make all the difference with delicate crocosmia pods.
Pod Selection Matters: In Step 1, when checking for mature pods, look for ones that feel slightly hollow when tapped gently. The papery brown color is your best indicator, but the hollow sound confirms readiness. I've found that pods collected in late fall (October-November) tend to open more reliably than those harvested earlier—this gives them that natural cold stress without needing the fridge.
Cold Treatment Consistency: The 2-3 week fridge time in Step 2 is non-negotiable for most climates, but here's the secret: place a small dish of water in the crisper drawer with your pods. This maintains humidity and prevents the pods from drying out prematurely. I also recommend using a standard refrigerator (35-40°F) rather than the freezer section—extreme cold can actually inhibit the natural opening process.
Seed Extraction Technique: When you're ready to extract seeds in Step 3, I've found that using a clean, dry paintbrush works better than fingers for delicate pods. The bristles help release seeds without damaging the fragile husks. For stubborn pods that won't open after 3 weeks, try placing them in a paper bag with a few drops of water and sealing it overnight—the moisture can sometimes trigger the final opening.
Storage Wisdom: After extraction, store your seeds in a small envelope with a silica gel packet (the kind that comes with electronics) to absorb any residual moisture. This prevents premature sprouting during storage. I label each envelope with the year and variety if I'm growing multiple types—this saves headaches come spring planting season.
Pro Tips for Crocosmia Seed Pods
- Here's what I learned after collecting seeds from my garden for years—these little details make all the difference wi...
- Pod Selection Matters: In Step 1, when checking for mature pods, look for ones that feel slightly hollow when tapped ...
- Cold Treatment Consistency: The 2-3 week fridge time in Step 2 is non-negotiable for most climates, but here's the se...
Frequently asked questions
Got questions about crocosmia seed pods?
You’re not alone! Here are answers to the most common queries—because even the easiest blooms need a little extra care.
Why do crocosmia seed pods need cold treatment to open?
Crocosmia seed pods rely on a natural cold stratification process to break dormancy. Mimicking winter’s chill (40–50°F for 4–8 weeks) tricks the pods into opening, ensuring higher germination rates. Without this step, seeds may stay dormant or sprout unevenly. Think of it as a winter nap for your future plants!
How long should I keep crocosmia seed pods in the fridge?
Most gardeners recommend 4–6 weeks for optimal results, but some varieties benefit from up to 8 weeks. Place pods in a sealed container with slightly damp paper towels to maintain moisture. Check them weekly—if they start splitting open, it’s time to plant!
Can I plant crocosmia seeds directly without cold treatment?
Yes, but germination rates will likely be much lower (often under 20%). If you skip cold treatment, soak seeds in warm water for 24 hours first, then plant in well-draining soil. For best success, pair this with a warm strat (68–77°F for 2–4 weeks) afterward to compensate. Patience pays off!
What’s the best way to extract seeds from open crocosmia pods?
Gently squeeze the dried pods over a clean surface—the seeds will pop out easily. Avoid shaking hard, as it can damage the delicate seeds. Store them in a paper envelope (not plastic!) in a cool, dry place until planting. Pro tip: Label your pods by variety if you’re growing multiple types!
Will crocosmia seeds grow if I plant them straight after the pods open?
Possibly, but they’ll need consistent moisture and warmth (70–75°F) to germinate reliably. For faster results, pre-chill the seeds for 2 weeks post-opening before sowing. If planting outdoors, wait until soil temps are above 60°F—crocosmia seeds hate cold soil!
What if my crocosmia pods won’t open at all?
Try these fixes:
- Check moisture: Pods may need higher humidity (place a damp towel in the fridge with them).
- Extend cold time: Some varieties need up to 12 weeks—don’t rush!
- Test viability: Cut open a pod—if seeds are hard and dark, they’re likely viable.
- Alternative method: Soak pods in lukewarm water for 12 hours to soften them.
Wrapping up and next steps
Discovering the beauty—and practicality—of crocosmia seed pods reveals nature’s clever way of making propagation simple! 🌱 These cold-stressed blooms open on their own, offering an effortless way to collect seeds for new plants. Whether you’re a gardening novice or a seasoned green thumb, this process is rewarding and low-maintenance.
Ready to grow your own crocosmia garden? Start by harvesting those seed pods, then plant them in well-draining soil. Watch as your garden transforms with vibrant blooms—nature’s way of saying thank you! 🌸