
Lawn
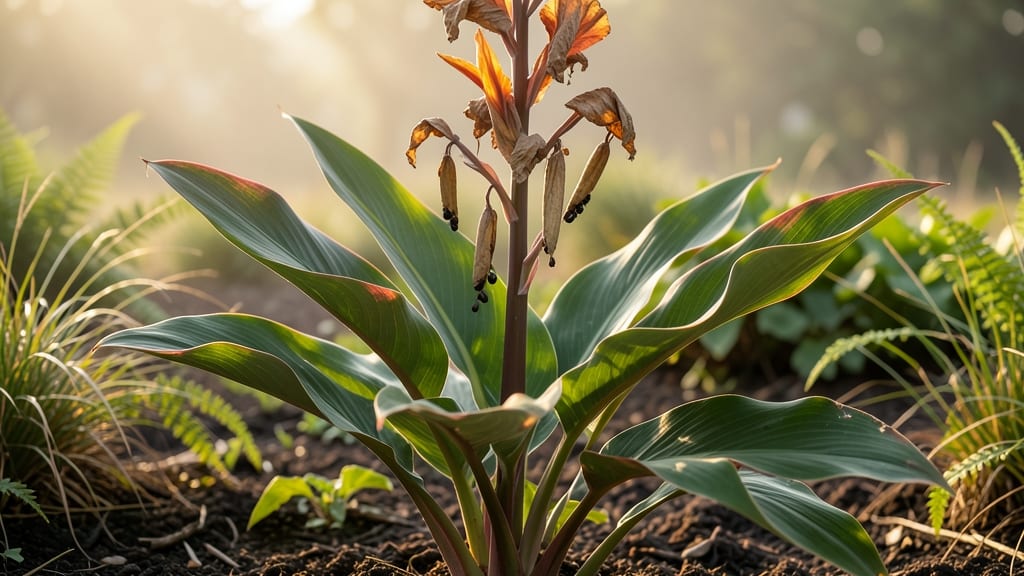
Canna lily seed pods reveal their secrets when you know the right timing—no stubborn twisting required. 🌿 These plump, papery pods split open on their own once they’ve matured, and harvesting them at the perfect moment means easy access to seeds for next year’s garden.
My first attempt ended with half the pods rotting on the stalk because I waited too long, but now I’ve got a foolproof system for collecting them at their prime.
The key is watching for the pods to turn from green to a dry, papery brown—usually in late summer or early fall, depending on your climate. Once they’re ready, they’ll open naturally, revealing rows of glossy black seeds inside.
I use clean scissors to snip the pods off the stalk (never pull, or you risk damaging the plant) and store them in a paper bag until I’m ready to extract the seeds. This method keeps them dry and prevents mold.
Germination is shockingly easy—just plant the seeds 1-2 inches deep in well-draining soil and keep them warm (70-80°F). Within 2-4 weeks, you’ll see those first bright green shoots pushing through the soil, and before you know it, you’ll have young canna lilies ready to transplant.
The best part? These homegrown plants often outperform nursery-bought ones because they’re perfectly adapted to your local growing conditions.
Even if you’re not ready to plant right away, storing the seeds in a cool, dry place lets you save them for up to a year—no special equipment needed. Just remember: patience is key.
The pods won’t open until they’re fully mature, and rushing the process can leave you with seeds that won’t sprout. Once you’ve mastered this, you’ll never buy canna lilies again.
📚 In This Guide
- What you need
- Instructions
- Tips and common mistakes
- Wrapping up and next steps
What you need
- ● Mature canna lily plants: Ensure they’ve produced seed pods (typically after flowering in late summer/fall). Quantity: 1–3 plants per project.
- ● Pruning shears or sharp scissors: For cleanly cutting seed pods. Specs: Heavy-duty blades (avoid dull tools to prevent crushing pods).
- ● Paper towels or newspaper: To line a tray for drying pods. Quantity: 2–3 sheets.
- ○ Small mesh bags or breathable containers: For storing dried pods (e.g., organza bags or paper envelopes). Optional: Label with plant variety.
- ● Spray bottle with water: To mist pods during drying (keeps humidity balanced).
- ● Pencil or marker: For labeling pods if saving seeds for future planting.
- ○ Gloves (optional): Protect hands from sap or thorns if handling prickly varieties.
- ● Patience: Seed pods take 4–6 weeks to fully dry and open naturally—resist the urge to force them!
- ● Sunny, dry location: A well-ventilated spot (e.g., porch, garage) with indirect sunlight.
- ● Knowledge of your canna variety: Some hybrids may not produce viable seeds. Research first if saving seeds for propagation.
How to harvest and collect canna lily seed pods naturally
Watch your canna lilies transform from showy blooms to seed producers—here's how to collect those pods without the usual twisting frustration.
🌱 Step 1: Identify Mature Seed Pods on Plants
After your canna lilies finish blooming, the spent flowers develop into seed pods that start as small, green bulges. These pods need time to mature fully—wait until they turn brown and papery before harvesting. A mature pod will feel dry and slightly crispy when touched, unlike the soft, green early stage.
I like to check my plants every 3-4 days during the late summer. The pods usually mature 6-8 weeks after flowering, so mark your calendar if you want to time it perfectly. Look for pods that are 1-2 inches long and have split slightly at the seams—that's your signal they're ready.
🌿 Step 2: Gently Remove Pods Without Damaging Stems
Use a small pair of pruning shears or your fingers to carefully twist the pod off the stem. Avoid pulling too hard—this can damage the plant and leave behind empty husks. A clean break means you've harvested correctly. Place the pods in a paper bag (not plastic) to allow airflow while preventing seeds from scattering.
Here's the thing—don't harvest pods that are still green or firm. Those seeds won't germinate well, and you'll end up with weak seedlings. Only collect pods that have fully dried on the plant. If you're unsure, tap the pod gently—if seeds rattle inside, it's ready.
⏰ Step 3: Dry and Open Pods to Extract Seeds
Spread the harvested pods in a single layer on a clean, dry surface in a warm, shaded spot for 3-5 days. The seeds inside will darken and shrink slightly as they finish drying. You'll know they're ready when the pods split open naturally—no twisting required.
Once fully dry, place each pod in a brown paper bag and seal it loosely. Shake the bag gently to release the seeds. The pods will open easily now, revealing 10-20 small, dark seeds per pod. Store the seeds in an airtight container in a cool, dry place until you're ready to plant them next spring.
☀️ Step 4: Store Seeds Properly for Next Season
Label your seed container with the variety and harvest date. Canna lily seeds can remain viable for 1-2 years if stored correctly. Keep them in a dark, dry place with temperatures between 50-60°F—a basement or seed storage box works perfectly.
Real talk: Don't refrigerate the seeds unless you're storing them long-term. The moisture in a fridge can cause mold. Instead, place them in a small jar with a desiccant packet to absorb any excess moisture. Check them once a year to ensure they haven't dried out completely or developed mold.
Tips & tricks for perfect canna lily seed pod harvesting
A few simple tricks will help you avoid common mistakes and make the whole process smoother than ever.
Timing Secret: Mark your calendar 6-8 weeks after your canna lilies finish blooming—that's when pods will be fully mature. I like to set reminders every 3-4 days during this window to check for readiness. The pods should be brown and papery, not green, and feel dry to the touch. If you harvest too early, the seeds won't germinate well, and you'll waste your time.
Gentle Harvesting Technique: When removing pods in Step 2, use a twisting motion rather than pulling straight up. This prevents damaging the plant's stem and ensures a clean break. A good test is to look for a small white ring where the pod separated—this means you did it right. If you see torn stems, you pulled too hard. Place pods immediately in a paper bag (never plastic) to keep seeds contained while allowing airflow.
Drying Strategy: For the 3-5 days of drying in Step 3, choose a spot with indirect sunlight—direct sun can over-dry the pods and make them brittle. A warm, shaded porch or covered patio works perfectly. Spread pods in a single layer on a clean towel or screen to prevent moisture buildup underneath. Once pods split open naturally, you'll know they're ready for seed extraction—no force needed.
Storage Wisdom: When storing seeds in Step 4, use a small jar with a desiccant packet to absorb any moisture that might develop over time. I like to add a tiny piece of chalk or silica gel packets (the kind that come with electronics) to keep seeds bone dry. Check your stored seeds once a year to make sure they haven't developed mold or dried out completely—this ensures maximum viability for up to 2 years.
Pro Tips for Canna Lily Seed Pods
- A few simple tricks will help you avoid common mistakes and make the whole process smoother than ever.
- Timing Secret: Mark your calendar 6-8 weeks after your canna lilies finish blooming—that's when pods will be fully ma...
- Gentle Harvesting Technique: When removing pods in Step 2, use a twisting motion rather than pulling straight up. Thi...
Frequently asked questions
Got questions about canna lily seed pods? You’re not alone! Here are some of the most common queries—and their answers—to help you navigate these fascinating (and low-maintenance) garden features.
Do canna lily seed pods open on their own?
Yes! Unlike some plants that require twisting or prying, canna lily seed pods naturally split open when mature—usually in late summer or early fall. No extra effort needed! Just let nature do its thing. If pods stay closed, they may need more time or warmth to trigger the process.
How long does it take for canna lily seed pods to mature?
Seed pods typically take 60–90 days to mature after flowering (depending on climate). In cooler regions, this may stretch to late fall. Watch for pods to turn brown and dry—they’ll eventually split open with a pop! If they don’t, check for pests or insufficient sunlight.
Can I harvest seeds from canna lily pods?
Once pods open, collect the seeds inside and let them dry for a few days. Store them in a paper bag in a cool, dry place. Pro tip: Label them with the date—canna lily seeds lose viability after 1–2 years.
What should I do if my canna lily pods rot or mold?
Rotting or moldy pods are often caused by overwatering or poor airflow. Trim affected pods immediately and reduce watering. Ensure your canna lilies are planted in well-draining soil. For prevention, space plants 2–3 feet apart to improve circulation.
Are canna lily seed pods safe for pets or kids?
While canna lily pods aren’t toxic, they’re not edible and can be a choking hazard for pets or small children. Keep an eye on curious critters! If ingested in small amounts, they’ll likely pass harmlessly, but monitor for any unusual reactions.
Wrapping up and next steps
Canna lily seed pods are a gardener’s dream—easy to grow, stunning to behold, and effortless to maintain! 🌱 Their natural ability to open and release seeds without twisting or fussing makes them a standout choice for adding tropical flair to your lawn or garden.
Whether you’re a seasoned green thumb or a curious beginner, these pods bring beauty and simplicity to your outdoor space.
Ready to give them a try? Start by gathering your materials, following the care tips, and watch your garden transform! Plant a few this season and enjoy the low-maintenance elegance of canna lilies—your future self (and your yard) will thank you. 🌸