
Lawn
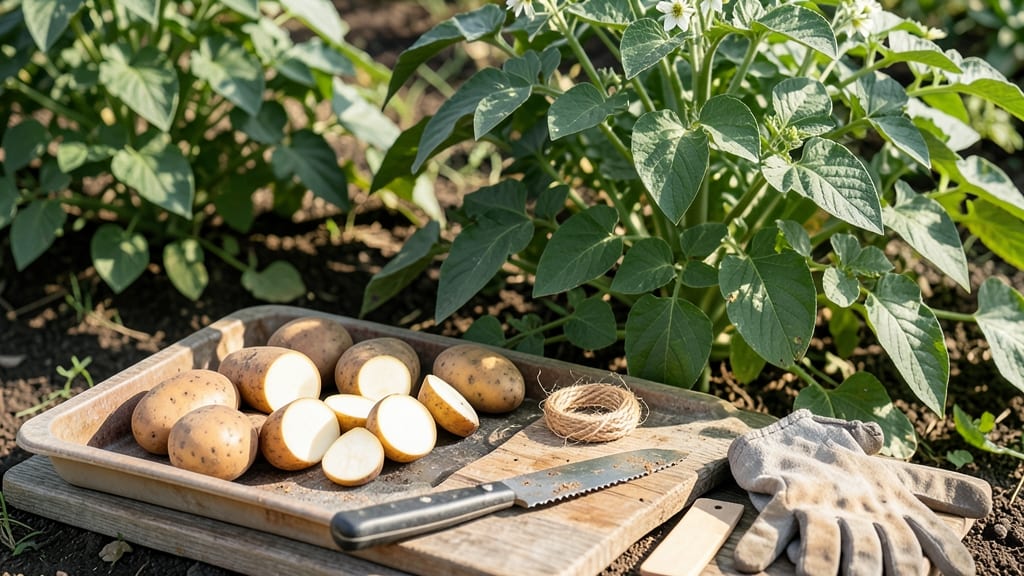
Cutting seed potatoes isn't just about slicing—it's about unlocking 3-4 times more harvest from each tuber. 🌱 I learned the hard way that rushing the process leads to weak sprouts and stunted plants, but when done right, your garden becomes a potato powerhouse.
The secret lies in precision cuts, proper healing, and patience—three steps most beginners skip entirely.
You'll need just three tools: a sharp knife (or a dedicated potato cutter), rubbing alcohol to sterilize, and a well-ventilated spot for curing. The key is making clean cuts—never tearing the potato—through the "eyes" (those little dimples) to create pieces with at least two strong sprouts each.
Let those cuts dry for 24-48 hours before planting, or you'll risk rot.
What you end up with is a garden bursting with uniform, sturdy plants that outperform store-bought potatoes by miles. The first harvest will be earlier, the yield heavier, and the flavor—well, let's just say your neighbors will ask for cuttings too.
This method works for any variety, from russets to reds, and even saves money by letting you grow from seed potatoes you'd normally toss.
Fair warning: don't overcrowd the cuts—each piece needs space to breathe. And if you're in a cooler climate, start chitting (pre-sprouting) indoors 6-8 weeks before last frost for a head start.
The payoff? A garden that feeds you all summer long, with potatoes so good they'll make you question store-bought ever again.
📚 In This Guide
- What you need
- Instructions
- Tips and common mistakes
- Wrapping up and next steps
What you need
- ● Seed potatoes: Choose certified disease-free, organic seed potatoes (2–3 oz each, or about the size of an egg). Aim for 5–10 potatoes depending on your garden space.
- ● Sharp knife or pruning shears: A clean, sterilized knife (or a dedicated potato cutter) to make precise cuts. Avoid dull blades—they crush tubers!
- ● Cutting board: A dedicated board (or a clean, flat surface) to protect your knife and keep things sanitary.
- ● Chitting tray or egg cartons: A shallow tray with drainage holes (or repurpose egg cartons) to hold cut potatoes. 1–2 trays should suffice for 5–10 potatoes.
- ● Potting mix or peat-free compost: Lightweight, well-draining soil (1–2 gallons) for planting after chitting.
- ● Spray bottle with water: To keep cut surfaces moist during chitting.
- ● Horticultural chalk or cinnamon: Dust cuts with chalk or cinnamon to prevent rot and speed up healing.
- ● Plant labels: Small tags or sticks to mark potato varieties if testing multiple types.
- ● Grow lights or sunny windowsill: For indoor chitting if natural light is limited (aim for 6–8 hours of light daily).
- ● Disinfectant (rubbing alcohol or bleach solution): To sterilize tools between cuts and prevent disease spread.
- ● Garden twine or clips: To secure egg cartons or trays in place if needed.
Step-by-Step instructions for cutting seed potatoes
Here's how to slice and chit potatoes for stronger, faster-growing plants—no guesswork involved.
✂️ Step 1: Select and Cut the Potatoes
Start with certified seed potatoes (not grocery store tubers) and let them sprout in a cool, bright spot for 2-3 weeks before cutting. Choose firm, disease-free potatoes with 2-5 strong sprouts—these will become your cuttings. Using a sharp knife, slice each potato into 2-3 inch chunks, ensuring each piece has at least 2-3 eyes (sprouts) and 1 healed cut surface to prevent rot.
Here's the thing—don't cut too close to the sprouts. Leave at least ½ inch of potato around each eye so the new growth has energy reserves. I like to make clean, angled cuts to maximize surface area for faster healing. Place the cut pieces on a paper towel-lined tray in a cool, dark spot (like a basement) for 1-2 days to let the wounds dry and form a protective callus.
🌱 Step 2: Chit the Potatoes for Vigorous Sprouts
After the cuts heal, move the potatoes to a bright, cool location (around 50-60°F) where they’ll receive indirect light. This is called chitting, and it encourages strong, uniform sprouts before planting. Place them eyes-up in a shallow tray or egg carton—this keeps them stable and prevents rot from sitting in moisture.
You’ll know they’re ready when the sprouts reach 1-2 inches tall and develop small green tips. This usually takes 3-4 weeks, but warmer temperatures speed it up. Don’t rush this step—weak, leggy sprouts mean poor transplant success. If you see mold or soft spots, toss those potatoes immediately and start fresh.
☀️ Step 3: Prepare for Planting
When the sprouts are 2-3 inches tall, it’s time to harden them off. Move the trays to a sunnier spot (like a south-facing windowsill) for 5-7 days to acclimate. This gradual light increase prevents shock when they go into the garden. You’ll notice the sprouts darken slightly and grow thicker—this means they’re toughening up.
Before planting, trim any sprouts longer than 3 inches back to 2 inches. This encourages bushier growth later. Also, soak the cut potatoes in a fungicide solution (like 1 part milk to 9 parts water) for 15 minutes to prevent early blight and scab. This is especially important if your garden has a history of fungal issues.
🪴 Step 4: Plant the Chitted Potatoes
Dig trenches or hills in your garden bed, spacing them 12-15 inches apart in rows 3 feet apart. Plant the potatoes eyes-up, with the longest sprout facing upward. Cover them with 3-4 inches of soil, leaving the top ½ inch exposed—this helps prevent soil-borne diseases from reaching the stem. Water lightly right after planting to settle the soil.
As the sprouts grow, add soil gradually to cover the stems up to the base of the leaves. This process, called hilling, encourages more tuber formation and protects against greening (toxic solanine buildup). When the flowers appear, your potatoes are about halfway done growing—keep watering deeply but avoid overwatering, which leads to rot.
Tips & tricks for perfect seed potato chitting
Here's what nobody tells you about getting your potato cuttings right from the start.
Precision Cutting: When slicing your seed potatoes into 2-3 inch chunks, use a serrated knife rather than a chef's knife—it gives you cleaner cuts and less crushing of the potato flesh. The angled cuts mentioned in Step 1 aren't just for looks; they create more surface area for faster callusing. After cutting, immediately place the pieces on paper towels in a single layer—don't stack them, or the bottom pieces will rot before they can heal. This 1-2 day healing period is non-negotiable for preventing disease.
Temperature Matters: While the instructions specify 50-60°F for chitting, I've found that 55°F is the sweet spot for most home environments. If your space runs warmer, place the trays on a bed of ice packs wrapped in towels to maintain the ideal temperature. Too warm, and you'll get leggy, weak sprouts that break easily when planting. Too cool, and the process drags out beyond the 3-4 week window. A simple thermometer check every few days keeps things on track.
Lighting Strategy: For Step 2's indirect light requirement, I recommend using fluorescent grow lights on a timer for 12 hours daily if natural light is insufficient. Position them 12 inches above the trays to prevent burning the sprouts. The small green tips you're waiting for in Step 2 are actually chlorophyll development, which signals the sprouts are ready for transplant. If you notice the sprouts turning yellow or stretching toward the light, they're not getting enough light—adjust your setup immediately.
Fungicide Hack: The 15-minute milk soak in Step 3 works wonders, but for extra protection against early blight, I add 1 teaspoon of cinnamon to the milk solution. Cinnamon has natural antifungal properties that complement the milk's benefits. After soaking, let the potatoes air dry completely before planting—this prevents moisture from getting trapped in the soil and causing rot. If you're planting in less-than-ideal conditions (like rainy weather), consider adding a light dusting of sulfur powder to the soil around each plant for additional protection.
Pro Tips for Cutting Seed Potatoes
- Here's what nobody tells you about getting your potato cuttings right from the start.
- Precision Cutting: When slicing your seed potatoes into 2-3 inch chunks, use a serrated knife rather than a chef's kn...
- Temperature Matters: While the instructions specify 50-60°F for chitting, I've found that 55°F is the sweet spot for ...
Frequently asked questions
Got questions about cutting seed potatoes?
You’re not alone! Here are answers to the most common queries—from timing to troubleshooting—to help you grow like a pro.
Why should I cut seed potatoes instead of planting whole?
Cutting seed potatoes lets you grow more plants from a single tuber while ensuring each cutting has strong sprouts (chits). This maximizes yield in small spaces or for gardeners with limited seed stock. Just ensure each piece has at least 1-2 eyes (sprout buds) to guarantee growth!
When is the best time to start cutting and chitting potatoes?
Begin cutting seed potatoes 4-6 weeks before your last frost date (typically February–March in most U.S. zones). Chit them in a cool, bright spot (50–60°F) until sprouts are 1–2 inches long. Plant them 2 weeks before the soil warms up (around 45°F) for a head start.
What if my cut potatoes turn black or mushy?
This usually means over-moisture or fungal rot. Let cut pieces dry completely for 1–2 days in a dark, dry place before chitting. Use a sharp knife (sterilized with rubbing alcohol) and avoid touching the cut edges. If mold appears, toss the piece—it won’t sprout.
Can I use store-bought potatoes as seed potatoes?
Technically yes, but certified seed potatoes are safer—they’re disease-free and bred for vigor. Store-bought potatoes may carry pathogens (like blight) or have been treated to prevent sprouting. If you must use them, chit them early and plant organically grown varieties like Yukon Gold or Red Pontiac.
What’s the best way to store cut seed potatoes before planting?
Keep them in a cool (40–50°F), dark, and humid place (like a paper bag with a damp towel) until planting. Avoid plastic bags—they trap moisture and rot. Check chits weekly; if sprouts grow too long (3+ inches), trim them back to 1–2 inches to prevent stress.
Pro Tip: Label your cuttings!
Use toothpicks and masking tape to mark varieties and cutting dates. This saves headaches later when distinguishing between, say, Russet and Fingerling plants in your garden. Trust us—your future self will thank you!
Wrapping up and next steps
Mastering the art of cutting seed potatoes with precision chitting is your secret weapon for a thriving garden! 🌱 By following these steps—selecting quality tubers, using sharp tools, and optimizing light and warmth—you’ll give your plants the strongest start possible. Now’s the time to roll up your sleeves and get growing!
Ready to take the next step? Plant your chitted potatoes in well-draining soil once the last frost has passed, and watch your hard work bloom into a bountiful harvest. Happy gardening! 🌿