
Lawn
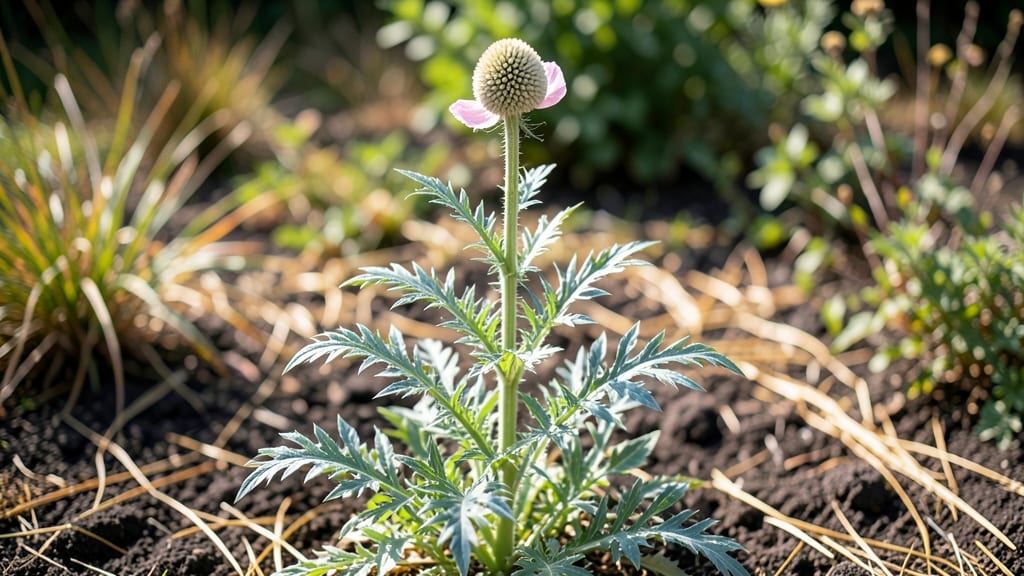
Growing bread seed poppies means harvesting those iconic black seeds without the frustrating twisty pods. 🌻 I’ve planted these delicate beauties for years, and once you master their quirks—like their finicky germination and love of open space—you’ll have a self-sustaining source of seeds for everything from poppy seed bread to bird feeders.
The secret starts with loose, well-draining soil (they hate soggy roots) and full sun—at least 6 hours daily. Scatter seeds in early spring or fall, barely covering them with soil, since they need light to germinate.
Space them 12-18 inches apart to prevent overcrowding, which leads to leggy stems and fewer seeds.
Water lightly after planting, then only when the soil feels dry to the touch—overwatering drowns their shallow roots. By midsummer, you’ll see those classic papery blooms, followed by the seed pods. When the pods turn brown and dry, simply shake them into a bag for your harvest. No twisting required!
Common challenges? Slugs love young seedlings, so use organic slug bait early on. And if your poppies flop over, try planting them near a fence or trellis for support. With these tips, you’ll go from seed to harvest in just two growing seasons—no green thumb needed.
📚 In This Guide
- What you need
- Instructions
- Tips and common mistakes
- Wrapping up and next steps
What you need
- ● Bread seed poppy seeds – 1 packet (approx. 1,000 seeds) (choose a variety like Papaver rhoeas or Papaver argemone for best results).
- ● Well-draining soil – 2-3 gallons (mix garden soil with sand or perlite for optimal drainage).
- ● Planting containers or garden bed – 6-inch pots (2-3) or a 4’x4’ garden plot (ensure they have drainage holes if using containers).
- ● Watering can or hose with a gentle spray nozzle – for consistent moisture without overwatering.
- ○ Fertilizer (optional but helpful) – Balanced 10-10-10 or low-nitrogen fertilizer (apply sparingly—poppies thrive in lean soil!).
- ○ Gloves – to protect your hands from prickly stems (optional but recommended!).
- ● Trowel or small shovel – for planting and transplanting seedlings.
- ● Pruning shears – to harvest pods once they’re dry (or use clean scissors in a pinch!).
- ● Sunny location – Full sun (6+ hours daily) is a must for healthy growth.
- ● Patience (most important!) – Poppies grow quickly but need time to mature (about 60-90 days to seed pods).
- ● Mulch (straw or shredded leaves) – to retain moisture and suppress weeds.
- ● Plant labels – if growing multiple varieties to keep track.
- ● Seed packet or notebook – to log planting dates and growth stages.
- ● Bird netting – if local birds are eager to snack on your poppy blooms!
How to grow bread seed poppies for easy seed collection
Skip the tangled mess—these poppies grow pods that open naturally, making seed harvesting a breeze.
🌱 Step 1: Choose the Right Location and Soil
Bread seed poppies thrive in full sun (at least 6 hours daily) and well-draining soil. I always test my soil first—these plants hate soggy roots. Mix in a handful of coarse sand or perlite if your garden soil feels heavy when squeezed. The ideal spot is open and airy, so avoid crowded borders where stems might rub against each other.
Poppies are drought-tolerant once established, but young seedlings need consistent moisture. Water lightly after planting, then only when the top 1-2 inches of soil feel dry. Overwatering at this stage causes rot before the plants even get a chance to grow.
🌱 Step 2: Plant Seeds Directly in the Garden
Scatter seeds ¼ inch deep in early spring after the last frost date. I like to plant them in groups of 5-10 seeds, spaced 6 inches apart—this mimics their natural clustering and makes seed collection easier later. Press them gently into the soil (they need light to germinate, so don’t bury them deeply).
Keep the soil evenly moist until germination, which usually takes 7-14 days. You’ll see tiny green sprouts first—wait until they’re 1-2 inches tall before thinning to your desired spacing. If you planted too many, snip the extras at the soil line with scissors to avoid disturbing the roots of the ones you’re keeping.
☀️ Step 3: Provide Minimal Care for Healthy Growth
Once established, bread seed poppies are low-maintenance. I water them once a week unless we have a heatwave, then I bump it to every 3-4 days. The key is letting the soil dry between waterings—this prevents fungal issues and encourages strong stems that support those heavy seed pods.
No fertilizer is needed unless your soil is very poor. In fact, too much nitrogen makes poppies grow lush foliage but fewer flowers. If your plants look leggy or pale, a light application of 5-10-10 fertilizer (half-strength) once during the growing season can help—but I usually skip this step entirely since they’re so adaptable.
⏰ Step 4: Harvest Seed Pods at Peak Ripeness
The magic happens in late summer when the pods turn from green to golden-brown and start splitting open on their own. This is the twist-free advantage—no need to wrestle with stubborn stems. I harvest pods in the morning after the dew dries but before the sun gets too hot, which can cause them to open prematurely.
Gently twist the pod to release seeds into a paper bag. If some pods resist, leave them on the plant—they’ll open naturally when fully dry. Store seeds in a cool, dry place until ready to plant. You’ll get hundreds of seeds per plant, so a few plants provide more than enough for next year’s garden.
🌿 Step 5: Deadhead and Prepare for Next Season
After seed collection, cut back the stems to 2-3 inches tall to keep the garden tidy. Poppies self-seed readily, so you’ll likely have volunteers popping up in future seasons. If you want to control where they grow, collect all the fallen seeds in late fall and store them for intentional planting next year.
I always mark poppy beds with small stakes so I remember where they are—these plants have a way of disappearing under summer growth. With minimal effort, you’ll have a reliable source of seeds for years to come, plus beautiful black-and-white blooms that attract pollinators all season.
Tips & tricks for perfect bread seed poppy cultivation
These little-known insights will help you grow poppies that practically harvest themselves—no tangled stems in sight.
Sunlight Strategy: While the instructions mention full sun, I've found that poppies actually thrive with at least 8 hours of direct sunlight for maximum pod production. In my experience, morning sun (6 hours) plus afternoon shade works, but you'll get fewer pods than with full sun exposure all day. Position your plants where they'll get the most light possible—this is especially important in cooler climates where sunlight is less intense.
Thinning Technique: When thinning seedlings to 1-2 inches tall, I use a pair of clean scissors to snip at the soil line rather than pulling. This prevents disturbing the roots of the plants you're keeping. I also recommend thinning on a cloudy day—seedlings are less stressed and recover faster. The goal is to leave the strongest plants spaced 6 inches apart, which gives them room to develop those sturdy stems that support heavy seed pods.
Watering Wisdom: The instructions mention watering when the top 1-2 inches of soil feel dry, but I've learned to check soil moisture at different times of day. Early morning is the best time to water because it gives the soil time to dry out during the day, reducing the risk of fungal issues. In hot weather, I water in the evening instead to prevent evaporation. Remember that poppies are drought-tolerant once established, so don't overdo it—especially after the plants reach 6 inches tall.
Harvesting Hack: For the easiest seed collection, wait until pods are completely dry and starting to split open on their own. I've found that harvesting in the morning after dew has dried but before the sun gets too hot gives me the best results. If you're short on time, you can harvest slightly earlier and finish drying pods indoors on a paper towel. Just be patient—rushing the drying process can lead to seeds that won't germinate properly.
Pro Tips for Bread Seed Poppies
- These little-known insights will help you grow poppies that practically harvest themselves—no tangled stems in sight.
- Sunlight Strategy: While the instructions mention full sun, I've found that poppies actually thrive with at least 8 h...
- Thinning Technique: When thinning seedlings to 1-2 inches tall, I use a pair of clean scissors to snip at the soil li...
Frequently asked questions
Got questions about growing bread seed poppies? You’re not alone! Here are answers to the most common queries to help you master these twist-free pods for easy seed collection.
When is the best time to plant bread seed poppies?
Plant seeds in early spring (after the last frost) or late summer for fall blooms. They thrive in cool weather and may bolt (go to seed) in hot climates—so avoid planting in peak summer heat. For lawn integration, sow seeds when grass is actively growing but not drought-stressed.
How long does it take for bread seed poppies to produce pods?
From seed to pod, expect 8–12 weeks in ideal conditions. Early spring plantings often yield pods by mid-summer, while fall plantings may take slightly longer. Patience pays off—pods ripen gradually, so check plants weekly for twist-free harvests!
Can I grow bread seed poppies in containers or small spaces?
They’re perfect for pots, window boxes, or even small garden beds. Use well-draining soil and containers at least 6–8 inches deep. Just ensure they get full sun (6+ hours/day) and space plants 6–12 inches apart to prevent overcrowding.
Will bread seed poppies attract pests or bees?
They’re generally pest-resistant but may draw beneficial pollinators like bees and butterflies—great for gardens! Avoid planting near food crops if you’re concerned about bees. For lawns, their low profile minimizes interference with mowing.
What if my pods don’t twist open naturally?
Twist-free pods are a hallmark of bread seed poppies, but dry conditions or humidity can delay opening. Try gently tapping pods over a bowl or using a paper bag to catch seeds. If pods stay closed, they may need 1–2 extra weeks of drying time in a warm, dry place.
Are there alternatives if I can’t find bread seed poppies?
Try corn poppies (Papaver rhoeas) or California poppies (Eschscholzia californica) for similar ease of seed collection. Just note: corn poppies have twisting pods, while California poppies produce seeds differently. Bread seed poppies remain the easiest for twist-free harvests!
Wrapping up and next steps
Bread seed poppies are a game-changer for gardeners and eco-conscious lawn lovers! 🌱 Their twist-free pods make seed collection a breeze, reducing waste and adding beauty to your outdoor space.
Whether you're aiming for a pollinator-friendly lawn or simply want an easy way to harvest seeds, these poppies deliver both sustainability and simplicity.
Ready to give it a try? Start small—plant a few seeds in a corner of your lawn or garden this season and watch them transform your space into a vibrant, low-maintenance haven. Happy gardening! 🌸