
Lawn
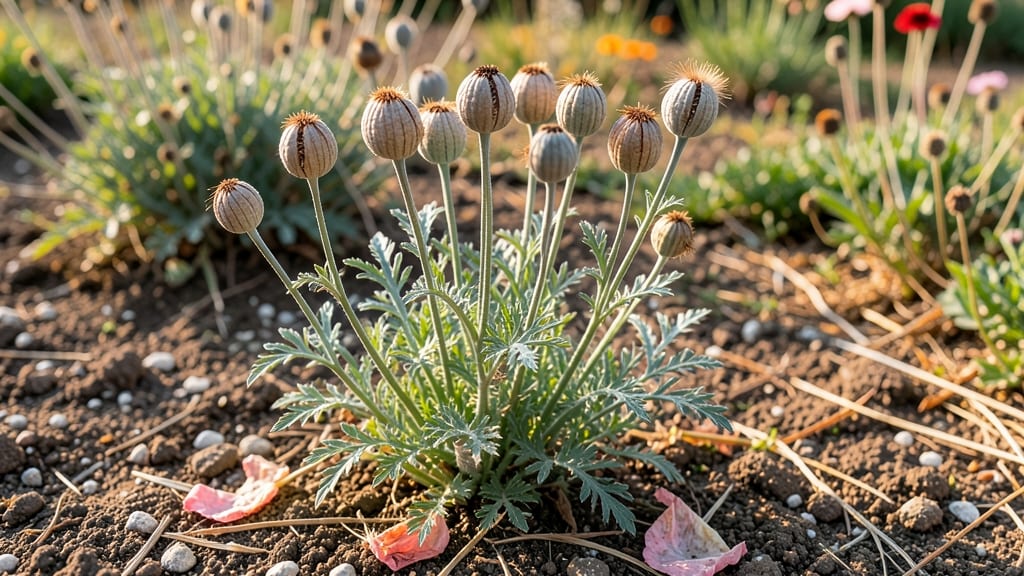
Cold-stressed poppy blooms transform into next year’s harvest when you save those dry seed pods. 🌸 I’ve learned the hard way that skipping this step means losing heirloom varieties—and the delicate, papery pods hold more than just seeds. They’re time capsules of next season’s garden magic.
The key moment arrives when pods turn from green to a crisp, papery brown—usually 3-4 weeks after blooms fade. Snip them off cleanly with pruners or scissors, leaving the stems intact for drying.
You’ll need a dry, dark spot (like a cardboard box with holes) or a warm oven set to 150°F for 1-2 hours to speed things up.
Once fully dry, the pods will rattle with seeds inside. Store them in paper envelopes in a cool, dark place—viability lasts 3-5 years if kept dry. These aren’t just for replanting; they make stunning dried arrangements or even rustic holiday decor.
Pro tip: Label each variety with a toothpick and marker before storing—next spring, you’ll thank yourself when those familiar blooms return. The secret to cold-hardy poppies? Start with seeds you’ve saved yourself.
📚 In This Guide
- What you need
- Instructions
- Tips and common mistakes
- Wrapping up and next steps
What you need
- ● Poppy seeds: Choose heirloom or open-pollinated varieties (e.g., Papaver rhoeas or Papaver somniferum for culinary use). Buy 1–2 packets (500–1,000 seeds) for a small garden patch.
- ● Well-draining soil: A mix of 50% garden soil + 50% compost or sand (poppies hate soggy roots!). Test pH—ideal range: 6.0–7.5.
- ● Sunlight: A full-sun spot (6+ hours daily)—poppies thrive in open, airy spaces.
- ● Watering can or hose: With a gentle spray nozzle to avoid disturbing seeds.
- ○ Gloves (optional but recommended): Poppy sap can irritate skin—wear nitrile or cotton gloves when handling plants.
- ● Pruning shears: For deadheading spent blooms (encourages more pods!). Choose sharp, bypass-pruners.
- ○ Seed-starting tray (optional): If sowing indoors, use biodegradable pots or a tray with drainage holes.
- ○ Row cover or mesh (optional): To protect seedlings from pests like slugs or birds.
- ● Patience! 😉 Poppies grow fast but short-lived—plan for a 2–3 month harvest window.
- ● Overcrowding: Space seeds 6–12 inches apart—poppies need room to grow.
- ● Fertilizer: Poppies hate rich soil—skip the nitrogen-heavy mixes!
- ● Cold frames (for direct sowing): Poppies need cold stratification—sow outdoors in fall or early spring.
How to grow and preserve dry poppy seed pods for next year’s garden
Here’s how I transform delicate poppy blooms into striking dried pods that’ll self-sow next spring.
🌱 Step 1: Select and Harvest Mature Poppy Blooms
Wait until poppy flowers fully open but haven’t started wilting—this is when their pods form best. I look for blooms with bright, unfaded petals that drop naturally by midday. Use clean, sharp scissors to cut stems at a 45-degree angle, leaving about 2 inches of stem attached. This helps the pods stay attached during drying.
Harvest on a dry morning after dew has evaporated. Wet stems encourage mold during drying. I gather pods in small batches and lay them flat on newspaper-lined trays to prevent knocking them together. Too much handling now can damage the delicate seed heads before they fully mature.
☀️ Step 2: Dry the Pods Properly for Long-Term Preservation
Place harvested poppies in a well-ventilated, dry location with indirect sunlight—a shady windowsill or drying rack works perfectly. Avoid direct sun, which can bleach the pods prematurely. I prop open the trays slightly to improve airflow, as stagnant air traps moisture and causes rot.
Drying takes 2-4 weeks, depending on humidity. You’ll know they’re ready when the pods turn papery and crisp, and the stems snap easily when bent. If pods feel damp or develop mold spots, move them to a drier location immediately. Once fully dry, store them in brown paper bags in a cool, dark place.
⏰ Step 3: Cold-Stress Pods for Next Year’s Natural Sowing
To encourage natural germination next spring, poppy pods need a cold period to break dormancy. Place dried pods in a paper bag with a handful of dry sand (this mimics winter soil conditions). Store the bag in the refrigerator’s crisper drawer for 4-6 weeks. Check periodically—they should feel lightweight and dry but not brittle.
After cold treatment, remove pods and plant them directly in garden beds in early spring. Scatter them lightly over prepared soil and barely cover with a ¼-inch layer of compost. Poppies self-sow beautifully, so you’ll likely see volunteers popping up in unexpected spots—just thin them to 6-12 inches apart for healthy growth.
🌿 Step 4: Maintain Pods Until Natural Germination
Once planted, water lightly to keep soil moist but not soggy. Poppy seeds germinate best in cool temperatures (50-60°F) and may take 2-4 weeks to sprout. Avoid overwatering—poppies hate wet feet and will rot if soil stays saturated. I mark planting spots with small garden flags to avoid disturbing them during weeding.
Let the first true leaves grow to 2-3 inches before thinning. At this stage, you’ll see lacy, fern-like foliage that’s unmistakable. Pull weak seedlings at the base, leaving the strongest plants. With proper care, you’ll have vibrant poppies blooming by midsummer, ready to repeat the cycle.
Tips & tricks for perfectly preserved poppy seed pods
Here's what I learned after years of trial and error with these delicate blooms.
Harvesting Timing: The best time to harvest is when petals have fully opened but haven't started wilting—this is usually between 10 AM and noon. I've found that harvesting at this exact moment ensures the pods will form properly. Look for petals that naturally drop by midday as a clear sign they're ready. The 2-inch stem length is crucial—it provides stability during drying while allowing proper airflow around the pod.
Drying Environment: For the 2-4 week drying period, I've had the most success using a combination of indirect sunlight and gentle airflow. A shady windowsill with a small fan blowing across the trays works wonders. The key is to maintain consistent airflow without creating drafts that could damage the delicate pods. If you notice any mold spots developing during this time, immediately move them to a drier location—mold spreads quickly in humid conditions.
Cold Treatment: The 4-6 week cold treatment in the refrigerator's crisper drawer is non-negotiable for breaking dormancy. I've tried shorter periods and found that anything less than 4 weeks often results in poor germination rates. The dry sand mimics natural winter conditions perfectly—it absorbs any excess moisture while allowing airflow. Check periodically by gently squeezing a pod; it should feel lightweight but not brittle.
Planting Preparation: When preparing to plant in early spring, I always mix the cold-treated pods with a little extra compost before scattering. This gives them a head start with nutrients right when they need it most. The ¼-inch compost layer is perfect—just enough to cover the seeds without burying them too deeply. Marking planting spots with small flags helps me avoid disturbing the delicate seedlings during weeding.
Pro Tips for Dry Poppy Seed Pods
- Here's what I learned after years of trial and error with these delicate blooms.
- Harvesting Timing: The best time to harvest is when petals have fully opened but haven't started wilting—this is usua...
- Drying Environment: For the 2-4 week drying period, I've had the most success using a combination of indirect sunligh...
Frequently asked questions
Got questions about dry poppy seed pods?
You’re not alone! Here are answers to the most common queries—whether you’re a gardener, chef, or just curious about these delicate blooms.
Why are my poppy pods staying dry and not opening?
Poppy pods dry naturally as part of their life cycle, but if they’re too slow to open, check moisture levels. Overwatering can delay drying, while hot, dry weather speeds it up. Once fully dry, pods will crack open with a pop! (Hence the name!) If they’re still sealed, give them a few more weeks or gently tap them to encourage release.
How long does it take for poppy seed pods to dry completely?
Drying time varies by climate, but most poppy pods take 2–4 weeks after blooming to fully mature. In warm, dry conditions, they may dry in as little as 10 days. Harvest them on a sunny day when pods are crispy to the touch and seeds rattle inside. Patience is key—rushing can leave seeds damp and prone to mold.
Can I save dry poppy seed pods for next year’s garden?
Collect pods, let them dry indoors for a few days, then store them in a paper bag or envelope in a cool, dark place. Label with the year and variety. Poppy seeds retain viability for 2–3 years if kept dry. Pro tip: Plant them shallowly (just barely covered) in well-draining soil—they need light to germinate!
Are the seeds inside dry poppy pods safe to eat?
Yes! Once pods are fully dry and seeds are released, they’re edible and commonly used in baking (think: bagels, muffins, or sprinkled on salads). However, always ensure pods are completely dry—moisture can cause mold. If you’re harvesting for culinary use, wear gloves, as some people may have mild allergies to poppy seeds.
What should I do if my poppy pods are moldy or rotting?
Mold or rot usually means excess moisture during drying. If you spot fuzzy growth, discard the pods immediately—moldy seeds can contaminate your harvest. To prevent this, harvest pods when they’re fully dry, store them in a well-ventilated container, and avoid humid environments. If caught early, you might salvage some seeds by drying them further in a warm, sunny spot.
What can I do with poppy pods if I don’t want to plant them?
Poppy pods add whimsical charm to dried flower arrangements, wreaths, or even as rustic decor. Their papery texture and unique shape make them a favorite in boho-style crafts. For a creative twist, crush dried pods to release seeds for art projects or sprinkle them on winter gardens for early spring color!
Wrapping up and next steps
Dry poppy seed pods aren’t just a stunning addition to your garden—they’re a promise of next year’s vibrant blooms and a chance to connect with nature’s quiet beauty. 🌸 By mastering their care, you’re setting the stage for effortless, cold-hardy growth and a bountiful harvest.
Ready to embrace the magic? Start small this season: plant a few pods now, observe their resilience, and soon, your garden will be alive with rustling seed heads and cheerful flowers.
- Next step: Share your progress with fellow gardeners—join a local group or online forum to swap tips and inspire others!
- Pro tip: Sketch your garden layout with poppy pods marked in—it’s a fun way to plan for next year’s showstopper displays. ✨