
Lawn
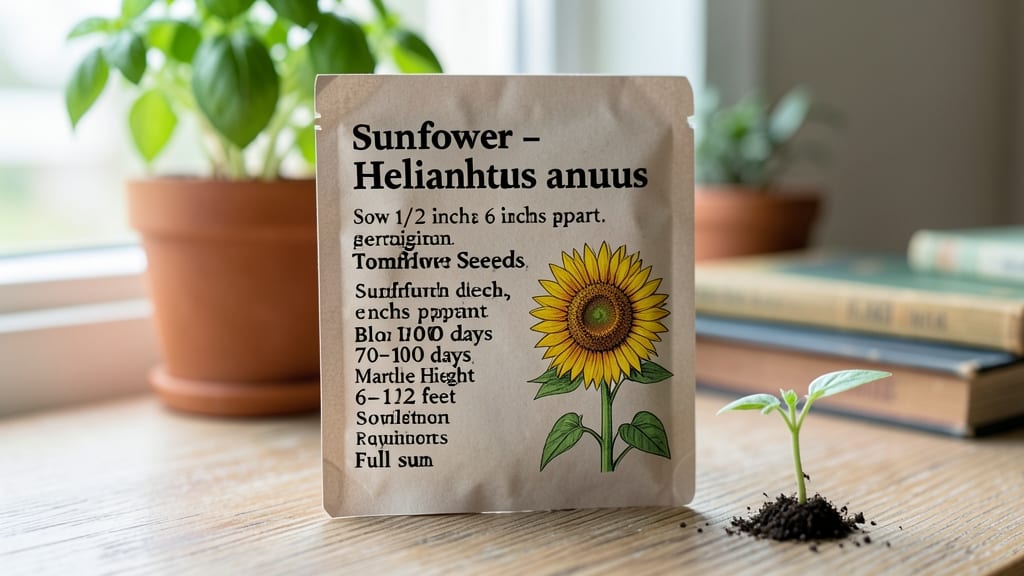
The back of a seed packet holds the secret to your garden's success—no green thumb required. 🌱 These tiny instructions tell you exactly when, where, and how to plant, plus what to expect once those seeds sprout.
Ignore them, and you might end up with leggy tomatoes or sad herbs that never thrive. That little chart reveals planting depth (how deep to drop seeds), spacing (how far apart to place them), and sunlight needs (full sun vs. partial shade).
For example, tomatoes want 1/4-inch deep and 18-24 inches apart, while basil thrives in 1/8-inch depth and 6-12 inches apart. Soil type and care tips—like watering frequency—are in there too. What’s magical? These instructions adapt to your climate.
In hot zones, you might need deeper watering; in cooler areas, extend the growing season with row covers. The packet’s advice isn’t set in stone—it’s a starting point for your garden’s unique conditions.
Start here, tweak as you go, and watch those seeds turn into the lush, productive plants you’ve always dreamed of. Every packet is a mini gardening manual—use it!
📚 In This Guide
- What you need
- Instructions
- Tips and common mistakes
- Wrapping up and next steps
What you need
- ● Seed packet: Your chosen grass or plant seeds (check the back for planting depth and spacing specs!)
- ● Soil: 1–2 bags of topsoil (1–2 cubic yards for a 500 sq. ft. area) or loamy soil (pH 6.0–7.5 for most grasses)
- ○ Optional: Compost (1–2 inches mixed into topsoil for nutrients)
- ● Water: Garden hose with adjustable nozzle or watering can (with 1–2 gallons capacity)
- ● Rake: Bow rake (for leveling soil) or hand rake (for small areas)
- ● Garden gloves: A pair to protect your hands from dirt and sharp edges
- ● Seed spreader: Broadcast or drop spreader (for even distribution, especially for large lawns)
- ● Soil tester kit: To check pH and adjust with lime or sulfur if needed
- ● Straw or peat moss: Light mulch (¼ inch thick) to retain moisture while seeds germinate
- ● Knee pads: For comfort during long planting sessions
- ● Notebook/pencil: To jot down planting dates, varieties, and care notes from the seed packet!
How to use the back of a seed packet like a pro
That tiny space holds all the secrets to growing your plants right—here's how to unlock them.
🌱 Step 1: Decode the Planting Basics
Start with the maturity date—this tells you how long until harvest. For tomatoes marked "60 days", count backward from your first frost date to plant. The spacing requirements (like "18 inches apart") prevent overcrowding, so mark your garden grid with sticks or string before planting.
Look for sunlight needs too—"full sun" means 6+ hours daily, while "partial shade" means 3-6 hours. I always check my garden's sun patterns first: if your spot gets only 4 hours, skip sun-loving varieties. The hardiness zone tells you when to plant outdoors—match it to your local zone or use the last frost date as your guide.
☀️ Step 2: Understand Growth Habits and Care
Check for growth type—"bush", "vining", or "tall"—to plan trellises or supports. A vining tomato needs 6-foot stakes, while a bush variety stays compact. The soil preferences (like "well-drained") tell you to avoid heavy clay or add compost if needed.
Watering clues appear too—"keep soil moist" means 1 inch per week, while "drought-tolerant" means water deeply but infrequently. I always jot these notes on my planting map to avoid overwatering (a killer for seedlings). The fertilizer recommendations (like "low-nitrogen") help you pick the right feed—too much nitrogen makes plants leafy but fruitless.
✂️ Step 3: Plan for Harvest and Maintenance
The harvest tips (like "pick when fully red") save you guesswork. For peppers, it might say "pick when glossy"—that's your cue. Succession planting notes (like "sow every 2 weeks") let you stretch your harvest season by staggering plantings.
Pest/disease warnings (like "watch for aphids") help you prepare. I keep neem oil on hand for aphid-prone plants and add row covers for cabbage moths. The storage tips (like "keep in fridge") ensure your harvest lasts longer—no more sad, wilted veggies in the crisper.
📝 Step 4: Organize Your Garden Like a Pro
Transfer key info to a planting chart with columns for variety, spacing, sunlight, and harvest date. I use colored pencils: red for sun-lovers, blue for shade, and green for herbs. This visual map prevents overplanting and makes rotations easier next year.
Label everything—even if you think you’ll remember, you won’t. I write the variety name and planting date on popsicle sticks and tuck them into the soil. Pro tip: Add a color-coded tag for sun/shade needs so you can rearrange plants if your garden layout changes.
⏰ Step 5: Adjust for Your Local Conditions
Compare the packet’s ideal conditions to your reality. If it says "plant after frost" but your zone has late springs, start seeds indoors 6-8 weeks early. For heat-sensitive crops (like lettuce), use shade cloth in summer or plant in partial shade spots.
Soil amendments might be needed—if the packet says "sandy soil", add compost to improve drainage. I test my soil pH too: blueberries need acidic soil (pH 4.5-5.5), while tomatoes thrive at 6.0-6.8. Adjust with lime or sulfur if needed. The packet’s notes are your garden’s cheat sheet—use them!
Tips & tricks for mastering your seed packet guide
This pocket-sized guide is your secret weapon—here's how to make every inch count for a thriving garden.
Sunlight Savvy: Those 3-6 hours of "partial shade" can be tricky. I always test my garden spots with a sun tracker app for a week before planting. If your spot gets only 4 hours, consider shade-tolerant varieties like lettuce or spinach instead of sun-lovers. Morning sun (before 10am) is gentler than afternoon heat, so position delicate plants accordingly.
Harvest Timing Trick: The "pick when fully red" or "pick when glossy" cues are your harvest goldmine. For tomatoes, I check for color change from green to pink at the bottom first—this happens about 2-3 days before full ripeness. For peppers, that glossy sheen means peak sweetness. Use a small notepad to track when you planted each variety so you know exactly when to start checking.
Soil Secrets: When the packet says "well-drained," it's not just about drainage—it's about texture. Amend heavy clay soil with compost to create that perfect crumbly texture. For sandy soil, mix in peat moss or coconut coir to retain moisture. I always do a simple squeeze test: if soil forms a tight ball when squeezed, it's too compact; if it crumbles instantly, it's too dry. Aim for something in between.
Pest-Proofing: That "watch for aphids" warning doesn't mean you're doomed. I keep a spray bottle of soapy water (1 tsp mild dish soap per quart of water) ready for quick treatment. For cabbage moths, I use floating row covers—just drape them over seedlings like a lightweight blanket. The key is prevention: healthy plants with proper spacing resist pests better than crowded, stressed ones.
Pro Tips for Back Of A Seed Packet
- This pocket-sized guide is your secret weapon—here's how to make every inch count for a thriving garden.
- Sunlight Savvy: Those 3-6 hours of "partial shade" can be tricky.
- Harvest Timing Trick: The "pick when fully red" or "pick when glossy" cues are your harvest goldmine.
Frequently asked questions
Got questions about the tiny treasure trove of info on the back of a seed packet You’re not alone! Here are the answers to the most common queries—no green thumb required.
What’s the best way to read the planting depth and spacing?
The numbers on the packet (like “plant ¼” deep, 12” apart”) are your golden rules. Use a ruler or your finger as a guide—most seeds need light coverage (just press them in gently). Spacing ensures airflow and room to grow. Pro tip: Draw a grid in the soil with a stick if you’re planting in rows!
Why does it say “days to maturity” but my plant isn’t growing yet?
“Days to maturity” is the total time from planting to harvest (e.g., 60 days for tomatoes). Slow starts are normal—focus on soil warmth, sunlight, and patience! Cool weather or poor soil? Check the packet’s notes for ideal temps or adjust your expectations for heirloom varieties (they often take longer).
Can I plant seeds from a packet that’s been open for a year?
Most seeds lose viability after 1–2 years, but check the packet for a “best by” date. Store unopened packets in a cool, dry place (like your fridge) to extend freshness. For old seeds, do a “float test”: Drop a few in water—if they sink, they’re likely still good!
What if my seeds don’t germinate? Did I mess up?
Not always! Seeds need moisture, warmth, and darkness to sprout. Double-check:
- Did you plant them too deep?
- Was the soil dry or cold?
- Did you use fresh seeds?
How do I use the packet info for container gardening?
Container rules: Check the “spacing” and divide by your pot’s width (e.g., 12” apart in a 12” pot = 1 plant). For depth, ensure roots have room—most veggies need at least 6–12” of soil. Packets often list “container-friendly” varieties—prioritize those for small spaces!
Wrapping up and next steps
The back of a seed packet is your secret weapon for a thriving garden—packed with expert advice, planting tips, and care instructions tailored just for your plants. 🌱 Whether you're a beginner or a seasoned gardener, these details save time, reduce guesswork, and help you grow healthier, happier plants with confidence.
Ready to turn your green thumb dreams into reality? Start small—pick one packet, follow the guide, and watch your garden flourish! Then, expand your skills by experimenting with new varieties or sharing your harvest with neighbors. Happy planting! 🌿