
Planting
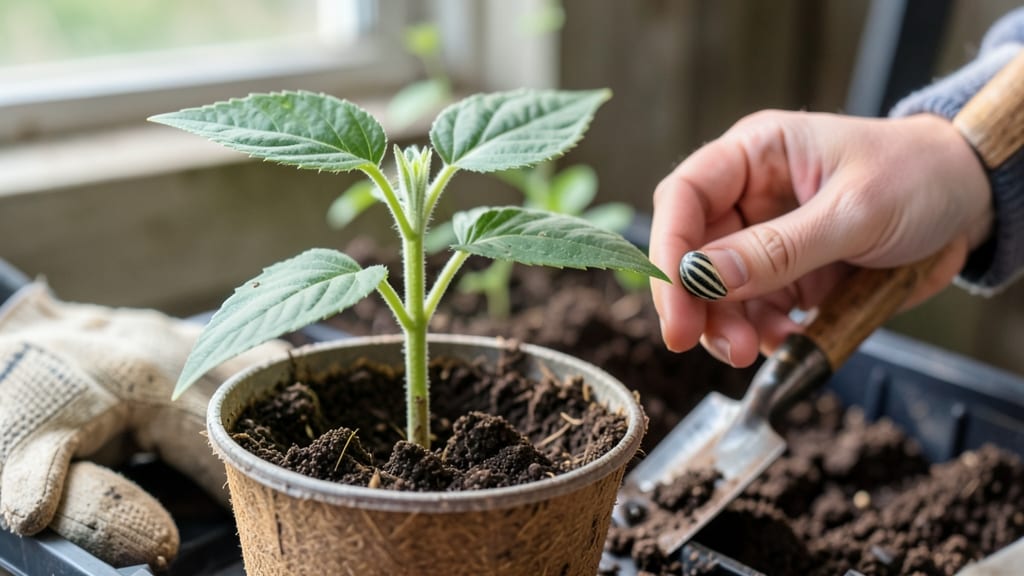
A little seed for me to sow is all it takes to start a gardening journey that feels like magic. 🌱 I remember the first time I watched a tiny seed crack open—it changed how I saw growth forever.
That moment of green breaking through soil is the reason we garden: to witness life begin from something so small.
The secret to reliable germination isn’t complicated—just three essentials: fresh seeds, warm soil, and patience. You’ll need a container with drainage, quality seed-starting mix, and a spray bottle for gentle watering. Most seeds need light to germinate, but a few (like beans) prefer darkness—always check the packet.
The depth is usually twice the seed’s width, and keeping the soil consistently moist (not soggy) is key.
Within days, you’ll see the first signs of life—tiny sprouts reaching for sunlight. That’s when the real fun begins: watching them grow into plants that feed you, beautify your space, or both.
The joy of nurturing something from seed to harvest is unmatched, and you’ll feel that satisfaction every time you see progress.
Common mistakes like overwatering or planting too deep can derail germination, but don’t let that scare you off. Even experienced gardeners lose seeds sometimes—it’s part of the learning process. With these basics, you’ll set yourself up for success, no matter what you’re sowing.
📚 In This Guide
- What you need
- Instructions
- Tips and common mistakes
- Wrapping up and next steps
What you need
- ● Seeds: 3–5 seeds of your choice (e.g., basil, marigolds, or sunflowers—fast-growing and beginner-friendly!)
- ● Seed-starting mix: 1 small bag (2–3 quarts) of sterile, lightweight potting soil (avoid garden soil—it’s too dense!)
- ● Containers: 3–5 small pots (3–4 inches deep) or
- ● A seed tray with individual cells (6–12 cavities)
- ● Watering can or spray bottle: With a fine mist nozzle (to avoid displacing seeds)
- ○ Plastic wrap or humidity dome: To retain moisture (optional but helpful for humidity-loving seeds)
- ○ Gloves (optional): To keep your hands clean while handling soil
- ● Plant labels: Popsicle sticks or tags + a marker (track your seeds!
- ○ Grow lights (optional): LED bulb (12–15 watts) or a full-spectrum light for 12–16 hours/day if natural light is limited
- ○ Thermometer (optional): To monitor soil temperature (ideal: 65–75°F for most seeds)
- ● A warm, bright spot (e.g., south-facing window, under grow lights, or a seedling heat mat for cold climates)
- ● Patience! Germination times vary (3 days to 3 weeks—check your seed packet!)
- ● Consistency: Seeds thrive on routine watering and light exposure
Instructions: the foolproof method for germinating any seed
Here's how I've turned even the trickiest seeds into thriving sprouts—no green thumb required.
🌱 Step 1: Prepare Your Seeds for Maximum Germination Power
Start by giving your seeds a head start. For most seeds, soak them in lukewarm water for 4-12 hours—larger seeds like beans need the full time, while tiny seeds like lettuce only need 2-4 hours. This softens the outer coating and jumpstarts hydration. I use a shallow dish with a damp paper towel to prevent seeds from floating away.
After soaking, drain the water and let the seeds sit in a warm, dark place for another 24 hours. You'll know they're ready when they look slightly plump and firm to the touch. This pre-treatment cuts germination time in half and ensures stronger seedlings. Skip this for seeds labeled "pre-treated" or "scarified"—they're already primed.
🪴 Step 2: Set Up Your Germination Station
Fill your seed-starting containers with moistened seed-starting mix (not garden soil) to about 1 inch below the rim. Press gently to settle, but don't compact—you want air pockets for roots to explore. I like to use a spray bottle to mist the soil until it's damp but not soggy; water droplets on the surface will slow germination.
Create a mini greenhouse effect by covering the containers with clear plastic wrap or a humidity dome. Place them in a warm spot (70-80°F)—a seedling heat mat works wonders if you're in a cooler climate. Check daily for condensation; if the plastic fogs up, your humidity is perfect. This warm, moist environment mimics spring soil conditions and speeds up sprouting.
💧 Step 3: Plant and Monitor for First Signs of Life
Plant your prepped seeds at the correct depth—usually twice the seed's diameter. Tiny seeds go just beneath the surface, while larger seeds need ½ inch of coverage. I use a toothpick to make small holes and drop seeds in one at a time; overcrowding leads to weak, leggy seedlings later. Gently press the soil around each seed to ensure good contact.
Keep the soil consistently moist but never waterlogged. The key is to maintain even moisture without drowning the seeds—think of a wrung-out sponge. Place a small tray underneath to catch any drips. Germination can take anywhere from 3 days to 3 weeks, depending on the seed type. Watch for the first tiny shoot to break through the soil; this is your signal that everything is working.
☀️ Step 4: Transition to Light and Care
The moment you see the first true leaves (not the initial seed leaves), remove any covering and move your seedlings to bright, indirect light. A south-facing window or grow light works best. If seedlings stretch toward the light, they're not getting enough intensity—adjust your setup within 4 inches of the plants. Strong seedlings will have thick stems and dark green leaves; weak ones will look pale and spindly.
Water from the bottom now—place the container in ½ inch of water for 10-15 minutes to encourage deep root growth. This method prevents damping-off disease and gives you better control over moisture. After watering, let the soil dry slightly between sessions; you'll know it's time when the top inch feels dry to the touch.
Tips & tricks for perfect seed germination
Here's what nobody tells you—these little details make all the difference between sprouts and disappointment.
Soaking Secrets: For Step 1, use a glass jar instead of a shallow dish—it's easier to see seed progress and prevents them from floating away. After your 4-12 hour soak, give the seeds a quick rinse under lukewarm water to remove any water-soluble inhibitors that might still be on their coats. This extra step can shave days off your germination timeline, especially for stubborn seeds like chard or kale.
Temperature Matters: That 70-80°F range in Step 2 is your sweet spot, but don't panic if your kitchen runs cooler. If you're below 65°F, try placing your germination station on top of your fridge (not inside) for gentle warmth. For tropical seeds like beans, a warm spot like above your oven (with door closed) can work wonders. Just avoid direct heat sources that might dry out your setup.
Planting Precision: In Step 3, when planting seeds twice their diameter deep, use a toothpick to make holes—it gives you better control than just pressing seeds into soil. For seeds smaller than 1/8 inch, you can actually press them gently onto the surface rather than burying them. The key is to make sure each seed has direct contact with the moist soil; this is what triggers the root growth that breaks through first.
Light Transition: The moment you see those first true leaves in Step 4, remove the covering gradually over 2-3 days rather than all at once. This helps seedlings adjust to the light without getting sunburned. If you're using a grow light, start with 12 hours of light per day and increase to 14-16 hours as seedlings grow—this mimics natural daylight extensions and prevents leggy growth.
Pro Tips for A Little Seed For Me To Sow
- Here's what nobody tells you—these little details make all the difference between sprouts and disappointment.
- Soaking Secrets: For Step 1, use a glass jar instead of a shallow dish—it's easier to see seed progress and prevents ...
- Temperature Matters: That 70-80°F range in Step 2 is your sweet spot, but don't panic if your kitchen runs cooler. If...
Frequently asked questions
Got questions about germinating your first seeds?
You’re not alone! Here are answers to the most common ones—so you can grow with confidence.
What’s the easiest seed to start with for beginners?
Start with fast-growing, forgiving seeds like radishes, beans, or lettuce. They germinate quickly (3–7 days) and tolerate minor mistakes. Avoid picky plants like parsley or carrots until you’ve mastered the basics!
How long should I wait before giving up on germination?
Most seeds sprout within 7–14 days—but some take longer (e.g., peppers or okra may need 20+ days). If nothing emerges after 3 weeks, the seed is likely dead. Try again with fresh seeds!
What’s the best way to water seeds without drowning them?
Use a spray bottle or misting can for gentle, even moisture. Water just enough to keep soil damp (like a wrung-out sponge). Overwatering suffocates seeds—consistency is key, not volume!
Can I use regular potting soil, or do I need something special?
Start with seed-starting mix (light, sterile, and fluffy). Avoid garden soil—it’s too dense and may harbor pests/diseases. Mix in perlite or vermiculite (10%) to improve drainage.
What if my seeds sprout but the seedlings look weak or leggy?
Leggy seedlings need more light! Move them to a sunny windowsill or use a grow light (12–16 hours/day). Avoid fertilizing early—focus on light first. Rotate trays daily for even growth!
Wrapping up and next steps
You’ve got everything you need to turn that little seed into a thriving plant—now it’s time to trust the process! 🌱 Remember, patience and consistency are your best tools, and every gardener started exactly where you are today.
Take that first step: plant your seed, nurture it daily, and watch life grow from something as small as a grain of hope.
Ready to dive deeper? Start with one seed, track its progress, and soon you’ll be ready to expand your green thumb’s reach. Happy growing! 🌿