
Lawn
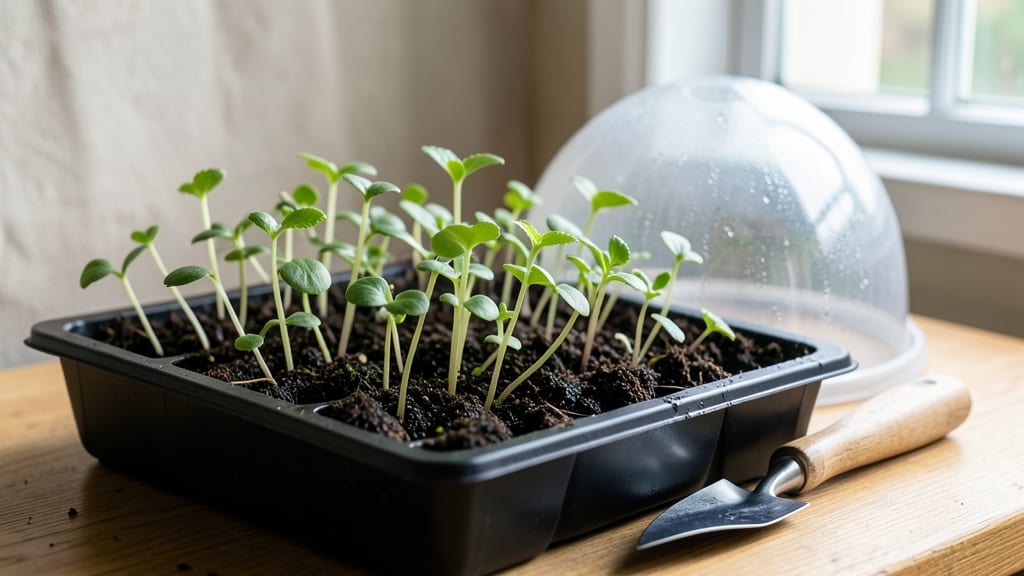
Those tiny zinnia seed sprouts you just planted could turn into a vibrant summer border—if you give them the right start. 🌱 The secret isn't just patience; it's mimicking their natural cold period, which tricks them into growing strong and true.
I've watched weak, leggy seedlings turn into sturdy, bushy plants just by adjusting the soil temperature for a few weeks first.
You'll need a flat tray, well-draining seed-starting mix, and a cool spot (like a garage or fridge) for the first 7-10 days. The key is keeping the soil consistently moist but never soggy—zinnia sprouts hate dampness almost as much as they love sun.
Most gardeners overwater at this stage, which leads to that dreaded damping-off fungus that wipes out seedlings overnight.
By the time you see those first true leaves (not the initial seed leaves), your sprouts will be ready for brighter light and regular watering. They'll grow 2-3 inches tall in just two weeks if everything's right, with thick stems that can handle transplanting without breaking.
The payoff? Blooms that start appearing in as little as 60 days from sowing.
This method works for both direct sowing in spring and early fall starts, making it perfect for gardeners in zones 3-10. The same principles apply whether you're growing in a sunny windowsill or a greenhouse—just adjust your light source accordingly. Let's get those sprouts thriving!
📚 In This Guide
- What you need
- Instructions
- Tips and common mistakes
- Wrapping up and next steps
What you need
- ● Zinnia seeds: 1–2 packets (choose heirloom or hybrid varieties like 'Benary’s Giant' or 'Profusion').
- ● Cold stratification setup: 1 plastic bag (resealable, quart-sized) or a damp paper towel
- ● 1 small container (e.g., a yogurt cup or muffin tin) for seed placement
- ● Growing medium: 1–2 seed-starting trays (biodegradable or plastic, 72-cell size) or small pots (3–4 inches deep).
- ● Potting mix: 1 bag (1–2 cubic feet) of sterile, seed-starting mix (look for "peat-based" or "cocopeat" blends).
- ● Watering tool: Spray bottle (for gentle moisture) or a watering can with a fine rose.
- ● Grow lights (LED or fluorescent) for indoor seedlings—1–2 bulbs per tray.
- ○ Heat mat (optional for faster germination, set to 70–75°F).
- ● Plant labels (to track varieties) + a pencil.
- ● Humidity dome (clear plastic cover) to retain moisture.
- ● Fertilizer: Balanced liquid fertilizer (5-5-5 or 10-10-10) for post-sprout care.
Step-by-step instructions for cold stratifying zinnia seeds
Here's how to break dormancy and get those zinnia seeds sprouting like clockwork.
🌱 Step 1: Prepare the Seeds for Cold Treatment
Zinnia seeds have a natural dormancy period that cold stratification mimics. Start by placing your seeds in a quart-sized resealable plastic bag—just enough room to shake them gently. Add 2 tablespoons of dampened potting mix (about the consistency of a wrung-out sponge) to the bag, then seal it tightly.
Shake the bag gently to coat the seeds evenly with the moist mix. This prevents clumping and ensures each seed gets equal exposure to moisture and cold. Place the bag in the bottom drawer of your refrigerator where temperatures stay consistently between 34-40°F. The cold period should last 2-4 weeks—this is where the magic happens.
⏰ Step 2: Monitor and Rotate the Seeds Weekly
Check the bag every 7 days to ensure the mix hasn’t dried out. If it feels dry to the touch, add 1 teaspoon of water and reseal the bag. This prevents mold while keeping seeds hydrated. You’ll see nothing dramatic yet—just a slight softening of the seed coats—but trust the process.
Rotate the bag a quarter turn each week so all seeds experience uniform cold exposure. Uneven treatment can lead to patchy germination later. After 2 weeks, you can gently press a few seeds between your fingers—they’ll feel slightly softer than when you started, signaling dormancy is breaking.
☀️ Step 3: Test for Germination Readiness
After 3 weeks, remove the bag from the fridge and let it sit at room temperature for 24 hours. This gradual temperature shift prevents shock. Fill biodegradable seed-starting pots (3-4 inches deep) with sterile seed-starting mix—fill to 1 inch below the rim and tap gently to settle.
Plant 2-3 seeds per pot at a depth of ¼ inch, pressing lightly but not compacting. The reason for shallow planting is that zinnias need light to trigger germination, and burying too deep delays sprouting. Water gently with a spray bottle until the soil looks uniformly damp—not soggy, not dry.
💧 Step 4: Provide Warmth and Light for Sprouting
Place the pots in a warm location (around 70-75°F) with bright, indirect light—a south-facing windowsill works well. You’ll see the first tiny green sprouts in 7-14 days, depending on your home’s humidity. If your space runs cooler, germination may take up to 2 weeks.
Once sprouts emerge, remove the weakest seedling in each pot to avoid overcrowding. Thin carefully with scissors to avoid disturbing roots. Keep the soil evenly moist—not wet, not dry—by watering at the base when the top ½ inch feels dry. Avoid wetting the leaves to prevent fungal issues.
🌿 Step 5: Transition to Growing Conditions
After true leaves (the second set after the initial sprouts) appear, move the seedlings to a sunny windowsill or under grow lights for 12-14 hours daily. Zinnias need full sun to thrive, but young plants can scorch in direct midday light. Gradually increase exposure over 3-5 days to harden them off.
You’ll know they’re ready for transplant when they’ve grown 2-3 inches tall and have 3-4 sets of leaves. At this stage, they’ll tolerate cooler outdoor temperatures and are primed for planting in well-draining soil with full sun exposure. Pinch back the tips after planting to encourage bushier growth.
Tips & tricks for perfect zinnia seed sprouts
Here's what I've learned after years of growing zinnias—these small tweaks make all the difference between patchy sprouts and lush, reliable blooms.
Cold Treatment Consistency: The refrigerator's bottom drawer is ideal because it maintains a stable 34-40°F range without temperature fluctuations. Avoid the door where temps can swing wildly. If your fridge runs hotter, place the bag on a shelf instead—just check it more often. The 2-4 week window is crucial: shorter than 2 weeks may not break dormancy fully, while longer than 4 weeks risks mold.
Moisture Balance: That "wrung-out sponge" consistency for the potting mix is key—too wet creates mold, too dry halts germination. Test by squeezing: water should drip out slowly, not pool. After adding the 1 teaspoon of water weekly, reseal immediately to prevent evaporation. I've found using a spray bottle to mist the mix before sealing helps maintain even moisture without over-saturating.
Light Exposure: Zinnias need light to germinate, so shallow planting (¼ inch) is non-negotiable. If your windowsill isn't bright enough, supplement with a 12-14 hour grow light. I place mine just 6 inches above seedlings—close enough for light, far enough to avoid heat stress. The true leaves stage is when you can safely increase sun exposure, but start gradual to avoid shocking tender sprouts.
Pro Tips for Zinnia Seed Sprouts
- Here's what I've learned after years of growing zinnias—these small tweaks make all the difference between patchy spr...
- Cold Treatment Consistency: The refrigerator's bottom drawer is ideal because it maintains a stable 34-40°F range wit...
- Moisture Balance: That "wrung-out sponge" consistency for the potting mix is key—too wet creates mold, too dry halts ...
Frequently asked questions
Got questions about growing zinnia seed sprouts? You’re not alone! Here are answers to the most common concerns—whether you're a beginner or just want to troubleshoot your garden game.
How long does cold stratification take for zinnia seeds?
Cold stratification for zinnia seeds typically takes 2–4 weeks in the fridge. Place damp seeds in a sealed bag with moist paper towels, then store them in the vegetable crisper (not the freezer). Once sprouts appear (usually within 3–5 days of removing from cold), plant them outdoors after the last frost. Patience pays off with stronger, more reliable blooms!
What’s the fastest way to sprout zinnia seeds without cold stratification?
If you’re in a hurry, skip stratification and soak seeds overnight in warm water, then plant them 1/4 inch deep in warm, moist soil. Keep the soil 70–75°F and maintain consistent moisture—sprouts may appear in 7–14 days. For best results, use a heat mat or place pots in a sunny window. Just note: cold-stratified seeds often germinate 20% faster and grow more vigorously!
Why aren’t my zinnia seeds sprouting after cold stratification?
Don’t panic! Try these fixes:
- Check moisture: Seeds need consistent dampness—not soggy. Re-moisten paper towels if dry.
- Test temperature: If sprouts still refuse to appear after 2 weeks, try alternating warm/cold cycles (e.g., fridge for 3 days, then room temp for 2).
- Viability check: If seeds stay hard after 4 weeks, they may be old. Test a few by scratching the shell—if it’s brittle or discolored, replace them!
Can I plant zinnia sprouts directly outside, or should I start indoors?
Zinnia sprouts are tender and thrive indoors for 2–3 weeks before transplanting. Start seeds in biodegradable pots (like peat pellets) to avoid root disturbance. Once seedlings have 2–3 true leaves and night temps stay above 50°F, transplant them 12–18 inches apart in full sun. Harden off gradually by exposing them to outdoor conditions for 1–2 hours daily before the big move!
What’s the best companion plant for zinnia sprouts?
Zinnias love companion plants that repel pests and improve growth. Try pairing them with:
- Marigolds: Deter nematodes and aphids.
- Basil or Oregano: Boosts flavor if you’re growing edible zinnias (like ‘Benary’s Giant’).
- Nasturtiums: Acts as a trap crop for pests like squash bugs.
Wrapping up and next steps
Growing zinnia seed sprouts with cold stratification is a game-changer for vibrant blooms—especially if you’ve struggled with inconsistent germination before! 🌱 By mimicking winter’s chill, you’ll unlock faster, stronger starts and a more reliable harvest.
Whether you’re a first-time gardener or a seasoned green thumb, this method proves that patience and a little science can turn tiny seeds into stunning summer displays.
Ready to dive in? Start with a small batch—test your setup, tweak as needed, and soon you’ll be sharing your thriving zinnias with neighbors. Happy planting! 🌸