
Lawn
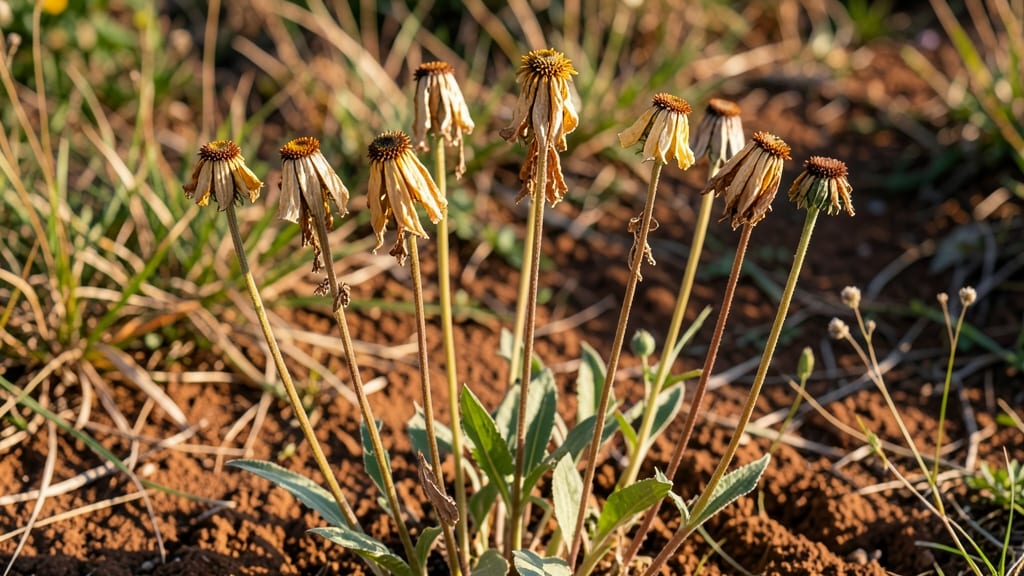
Those papery zinnia seed heads are nature's way of packaging next year's blooms—and drying them directly on the stem is the simplest way to save them without waste. 🌻 I used to toss them after the flowers faded, but now I leave them be until they turn crisp and brown, letting the plants do all the work.
The process takes just a few weeks, and you end up with seeds that germinate as reliably as store-bought ones—plus, you get to choose exactly which zinnias return to your garden.
You'll know they're ready when the seed heads feel light and brittle, almost like dried paper. A gentle squeeze should release seeds easily, though some stubborn ones need a quick flick of the wrist to break them open.
Harvest on a dry day to avoid mold—wet seed heads are the main reason seeds fail to store properly. Once collected, spread them out on a tray or paper towel to finish drying before storing in an envelope labeled with the variety and date.
The payoff is twofold: you'll have fresh zinnias blooming earlier next season, and you'll cut down on plastic packaging waste. These seeds stay viable for 2-3 years if stored in a cool, dark place, so you're basically creating a self-replenishing flower supply.
Plus, the dried seed heads make stunning winter arrangements—no need to toss them after all.
Troubleshooting is simple: if your seed heads develop mold, harvest them early and dry them indoors with a fan. Poor germination? Try soaking seeds overnight before planting. And for those who love crafts, the dried heads can be used in potpourri or wreaths—just another reason to keep them around.
Ready to turn last year's flowers into next year's garden?
📚 In This Guide
- What you need
- Instructions
- Tips and common mistakes
- Wrapping up and next steps
What you need
- ● Zinnia plants – Healthy, fully bloomed zinnia flowers (preferably Zinnia elegans or Zinnia angustifolia for best seed viability).
- ● Clean, sharp scissors or pruning shears – For harvesting stems (sterilize with rubbing alcohol if reusing).
- ● Brown paper bags or breathable mesh bags – 1 per 5–10 stems (or a single large bag for bulk drying).
- ● Drying location – A dry, well-ventilated spot (e.g., garage, shed, or indoor rack) with no direct sunlight.
- ● Small paper envelopes or seed-saving packets – 1 per zinnia variety (label with the plant name + year).
- ● Pencil or marker – For labeling seed packets.
- ● Drying rack or hanging twine – To elevate stems for faster airflow (e.g., a wooden ladder or embroidery hoop).
- ● Fan or dehumidifier – Speeds up drying in humid climates.
- ● Magnifying glass – For gently separating seeds from chaff (if you’re feeling fancy!).
- ● Glass jar with lid – For short-term seed storage before transferring to envelopes.
How to harvest zinnia seed heads for next year's garden
Skip the guesswork—here's the simple, zero-waste method I use every fall.
🌿 Step 1: Select Healthy Seed Heads at Peak Ripeness
Wait until the zinnia blooms have faded completely and the flower heads turn into dry, papery structures. The perfect time is when you can see the seeds inside but the head hasn't yet scattered them. Gently squeeze a head—if seeds rattle inside but don't fall out, it's ready.
Cut the stems with clean pruners about 6 inches below the seed head. This gives you room to work without losing the head. I always harvest on a dry morning after the dew has evaporated—wet seed heads take forever to dry properly. Remove any damaged or moldy heads immediately to prevent spoilage.
🪴 Step 2: Bundle Stems for Air-Drying
Gather 4-6 stems at a time and tie them together with twine or a rubber band, leaving the seed heads exposed. Hang the bundles upside down in a dry, well-ventilated area. I use the rafters in my garage or a porch with partial shade—direct sunlight will bleach the seed heads, but full shade can encourage mold.
The goal is gentle airflow around the heads. If you're short on space, lay stems flat on a screen or mesh tray in a single layer. Check weekly for signs of moisture—if any stems feel damp, move the location immediately. Proper drying takes 2-4 weeks, depending on humidity levels.
☀️ Step 3: Monitor and Store Until Ready for Planting
When the seed heads are completely dry, they'll crumble easily when rubbed between your fingers. The stems should also snap cleanly at the base. At this point, gently break apart the dried heads and remove any remaining chaff or debris by hand or with a fine sieve.
Store seeds in a cool, dark place in a sealed container like a glass jar or envelope. Label with the variety and harvest date—zinnia seeds remain viable for 2-3 years when stored properly. I keep mine in the fridge to extend their shelf life even further.
⏰ Step 4: Test Germination Before Full Planting
Before sowing all your saved seeds, do a quick germination test. Place 5-10 seeds between damp paper towels in a sealed plastic bag. Keep them in a warm spot (70-75°F) and check daily. You should see sprouts in 7-14 days—if germination rates are below 50%, store the remaining seeds in the freezer for another year.
Once you confirm good germination, you're ready to plant. Direct-sow seeds in spring after the last frost when soil temperatures reach 60°F. Press seeds just below the soil surface—zinnia seeds need light to germinate, so don't bury them deeply. Thin seedlings to 12-18 inches apart for healthy growth.
Tips & tricks for perfect zinnia seed head preservation
Here's what nobody tells you about harvesting zinnia seeds that actually works.
Timing is Everything: The 2-4 week drying period can feel like an eternity, but don't rush it! Humidity is your enemy here. If your climate is particularly damp, consider using a small fan on low setting near your drying location to circulate air without creating drafts. I've found that placing a desiccant packet in the drying area helps absorb excess moisture, especially in basements or garages where humidity can build up. The goal is to dry the seed heads completely—any lingering moisture will cause mold or rot.
Harvesting Hack: In Step 1, when you're checking for seed readiness by gently squeezing the heads, pay attention to the color of the seed heads. They should turn a light tan or beige when fully mature. Dark brown or black heads might be overripe and could have already released some seeds. Also, harvest on a dry morning after dew has evaporated—this prevents moisture from getting trapped in the seed heads during the drying process, which can lead to spoilage.
Storage Wisdom: When storing your seeds in Step 3, don't just rely on room temperature storage. I've had better luck keeping seeds in the fridge for up to 5 years—yes, that long! Use small, airtight containers like those used for spices, and label them with the year and variety. The cold, dark environment of the fridge slows down seed degradation and preserves viability. For even longer storage, consider placing containers in the freezer, though this is typically only necessary for heirloom varieties you want to preserve for decades.
Germination Test Tip: During your germination test in Step 4, keep the paper towels consistently moist but not soaking wet. I use a spray bottle to mist them lightly every other day. The seeds need moisture to germinate, but too much water can cause rot. Place the sealed bag in a warm spot—near a sunny window or on top of the fridge works well. If you don't see sprouts within 14 days, it's likely your seeds have lost viability and should be discarded.
Pro Tips for Zinnia Seed Heads
- Here's what nobody tells you about harvesting zinnia seeds that actually works.
- Timing is Everything: The 2-4 week drying period can feel like an eternity, but don't rush it! Humidity is your enemy...
- Harvesting Hack: In Step 1, when you're checking for seed readiness by gently squeezing the heads, pay attention to t...
Frequently asked questions
about drying zinnia seed heads directly on stems—here’s what you need to know!How long does it take for zinnia seed heads to fully dry on the stems?
With proper airflow and warmth (60–70°F), zinnia seed heads typically dry in 2–4 weeks. Hang them in a dry, shaded spot or place them in a paper bag with holes for faster drying. Patience is key—rush it, and seeds may not store well!
Can I dry zinnia seed heads indoors instead of outside?
Yes! Indoors works well if you provide good ventilation (like a fan or open window) to prevent mold. Avoid humid areas (e.g., bathrooms) and keep them in a bright, dry spot. A mesh bag or hanging bundle speeds up the process.
What’s the best way to store dried zinnia seed heads?
Once fully dry, store seed heads in paper envelopes or breathable fabric bags in a cool, dark place (like a pantry). Label them with the variety and date—seeds stay viable for 1–3 years if kept dry. Avoid plastic to prevent moisture buildup!
Why are bugs or mold appearing on my drying seed heads?
Bugs or mold usually mean too much humidity. Move your seed heads to a drier location, increase airflow, or try a dehumidifier. If mold appears, discard the batch—it can ruin seeds. Prevent pests by choosing healthy, pest-free stems before drying.
Can I use dried zinnia seed heads for anything other than planting?
Beyond seeds, dried zinnia heads make gorgeous floral arrangements, natural confetti for weddings, or even rustic potpourri. Just ensure they’re completely dry first to avoid mold. Bonus: Their papery texture adds texture to crafts!
Wrapping up and next steps
Zinnia seed heads are nature’s gift—easy to collect, eco-friendly, and perfect for zero-waste gardening! By drying them directly on the stem, you’re saving time, reducing waste, and preparing for next year’s vibrant blooms.
Whether you’re a seasoned gardener or just starting out, this simple method makes seed saving effortless and rewarding.
Ready to grow your own zinnias next season? Grab a pair of scissors, head to your garden, and start collecting those seed heads today—your future garden (and the planet) will thank you! 🌱💚