
Lawn
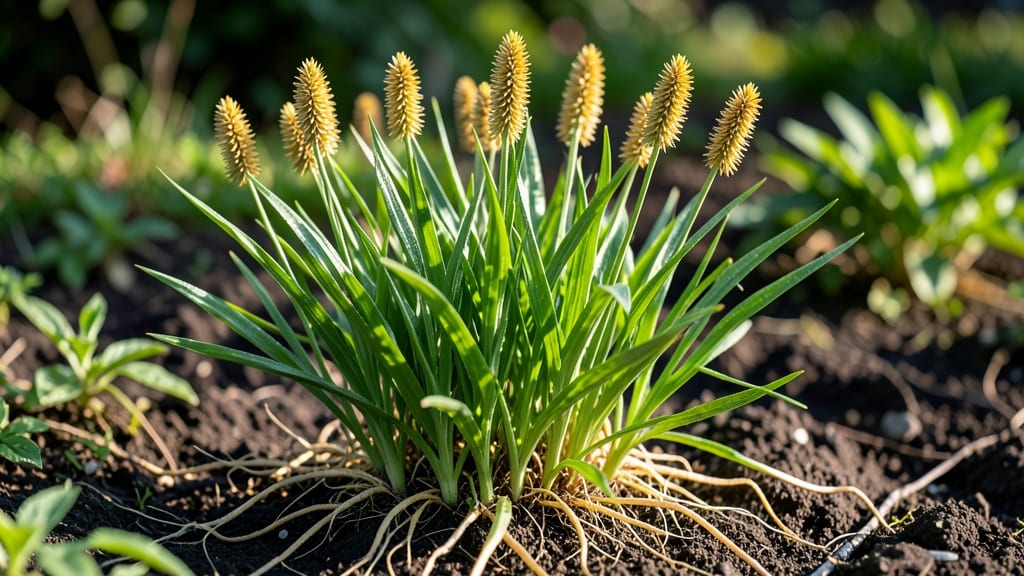
Twisting yellow nutsedge seed heads only spreads the problem—here’s how to extract viable seeds without breaking them apart. 🌱 This persistent weed thrives by sending out tubers and seed heads, but a sharp, controlled cut prevents fragments from sprouting elsewhere in your lawn or garden.
You’ll need a clean, sharp knife or pruners, gloves, and a sealed container with rubbing alcohol for disinfecting tools between cuts. The key is timing: remove seed heads before they turn brown and brittle, when they’re still greenish and firm.
This method works best in late summer through early fall, when seed heads are mature but haven’t released yet.
With a single precise cut just below the seed head, you’ll collect intact seeds for study or disposal—no twists, no snaps, just clean removal. The tubers remain undisturbed in the soil, reducing the risk of spreading fragments that can regrow.
This approach minimizes soil disturbance while giving you control over the seed heads.
For stubborn infestations, follow up with 3 inches of mulch or pre-emergent herbicide in spring to block new tubers from sprouting. The twist-free method isn’t just about seed collection—it’s the first step in breaking nutsedge’s cycle of persistence. Start here, and your lawn will stay cleaner longer.
📚 In This Guide
- What you need
- Instructions
- Tips and common mistakes
- Wrapping up and next steps
What you need
- ● Yellow nutsedge seed heads – Freshly harvested (preferably still moist for easier seed removal). Aim for at least 5-10 heads for a good yield.
- ● Sharp pruning shears or scissors – To snip seed heads cleanly from the stalks. Bonus: Small, precision scissors work best for delicate stems.
- ● Paper towels or parchment paper – For drying seeds post-extraction. Use 2-3 sheets per batch.
- ● Small bowl or container – To collect seeds. A wide, shallow dish (6+ inches) prevents spills.
- ○ Fine-tooth comb or soft-bristle brush – For gently dislodging seeds from the seed head. Optional: A toothpick for stubborn seeds.
- ● Plastic bag or airtight container – For seed storage. Label it! (Seeds stay viable for 1-2 years if stored dry and cool.)
- ● Hand lens or magnifying glass – To spot tiny seeds you might miss with the naked eye.
- ● Rubbing alcohol (70% isopropyl) – For sterilizing tools if working with multiple batches.
- ● Seed viability test kit – To check if your extracted seeds are ready for planting.
- ● Notebook & pen – To track seed head sources, extraction dates, or germination notes.
Twist-free method for extracting viable seeds from yellow nutsedge
Here's how to harvest seeds without damaging the delicate seed heads or compromising viability.
🌱 Step 1: Identify and Harvest Mature Seed Heads
Wait until the yellow nutsedge seed heads turn a golden-brown color—this signals full maturity and maximum seed viability. Use clean, sharp pruning shears to cut the entire seed head at the base, including the small stem. Harvest on a dry morning when humidity is low to prevent mold formation during extraction.
Place the cut seed heads in a paper bag immediately after harvesting. The paper allows airflow while preventing seeds from scattering. If you harvest in wet conditions, spread the seed heads on a clean towel to dry for 24 hours before processing. This step ensures you capture seeds at peak readiness without premature germination.
🪴 Step 2: Prepare for Seed Extraction
Lay a clean white towel or paper towel on a flat, stable surface. The light color helps you spot seeds more easily during extraction. Gather a small bowl or container to collect the seeds, and have a fine-mesh strainer ready for cleaning. Avoid using plastic containers—they can generate static electricity that attracts dust and debris.
Fluff the seed heads gently by rubbing them between your palms. This loosens the seeds without crushing them. You’ll see small, triangular nutsedge seeds begin to separate naturally. Work in small batches to avoid overhandling, which can damage the delicate seed coats and reduce viability.
✂️ Step 3: Extract Seeds Using the Twist-Free Technique
Hold the seed head firmly but gently between your thumb and forefinger. Use your other hand to carefully pull apart the seed head’s outer bracts—avoid twisting, as this can snap the seed stalks. Instead, apply slow, steady pressure while separating the layers. You’ll hear a faint pop as the seeds release, signaling successful extraction.
Empty the extracted seeds onto the towel or paper towel. Use the fine-mesh strainer to separate any remaining plant debris, including small bract fragments or dust. Discard the empty seed heads and bracts in a sealed bag to prevent accidental reseeding in your garden. This method preserves seed integrity while maximizing yield.
💧 Step 4: Clean and Store Seeds for Long-Term Viability
Spread the cleaned seeds evenly on the towel or paper towel in a single layer. Let them air-dry for 24 to 48 hours in a well-ventilated area, away from direct sunlight. Proper drying prevents mold and maintains seed viability. Stir the seeds gently every few hours to ensure even drying.
Once completely dry, transfer the seeds to a labeled paper envelope or small glass jar. Store them in a cool, dark place—such as a refrigerator or seed vault—where temperatures stay between 40-50°F. Label the container with the harvest date and variety. Under these conditions, yellow nutsedge seeds can remain viable for up to three years, though germination rates decline after the first year.
⏰ Step 5: Test Germination Before Long-Term Storage
Before storing a large batch of seeds, conduct a quick germination test. Moisten a paper towel and place a small sample of seeds (about 20-30) in a sealed plastic bag with the towel. Keep the bag in a warm, dark place (70-75°F) and check for sprouts in 7-10 days. If fewer than 50% of seeds germinate, consider using them immediately for planting or discarding the batch.
This test ensures you’re storing only the highest-quality seeds. If germination rates are strong, proceed with long-term storage. If you plan to use the seeds within a year, skip the germination test—fresh seeds typically perform well without additional testing. Store the remaining seeds in the same conditions for future use.
Tips & tricks for perfect seed extraction from yellow nutsedge
Mastering this delicate process means paying attention to small details that preserve viability and maximize yield.
Timing is Everything: The 24-hour drying period after wet harvests is non-negotiable—this prevents mold while maintaining seed integrity. If you're harvesting multiple batches, spread them out rather than processing all at once. The seeds need proper airflow to dry evenly, and crowding can trap moisture. I've ruined batches by rushing this step, so trust the process.
Surface Selection Matters: That clean white towel isn't just for aesthetics—it creates contrast that helps you spot every tiny seed during extraction. I recommend using a light-colored cotton towel rather than paper towels, as paper can tear when you're carefully separating those delicate bracts. The contrast makes it easier to see when you've missed any seeds during the straining process.
Temperature Control: Maintain those storage temperatures between 40-50°F precisely. I keep my seeds in the crisper drawer of my refrigerator where temps stay consistently around 42°F. The slight variation from the 50°F upper limit won't harm viability but gives you that extra buffer against temperature fluctuations that could trigger premature germination.
Pro Tips for Yellow Nutsedge Seed Head
- Mastering this delicate process means paying attention to small details that preserve viability and maximize yield.
- Timing is Everything: The 24-hour drying period after wet harvests is non-negotiable—this prevents mold while maintaining seed integrity.
- Surface Selection Matters: That clean white towel isn't just for aesthetics—it creates contrast that helps you spot every tiny seed during extraction.
Frequently asked questions
Got questions about harvesting yellow nutsedge seed heads? You’re not alone!
Here are the most common concerns—and clear, actionable answers to help you succeed.
When is the best time to harvest yellow nutsedge seed heads?
The ideal time is when the seed heads turn golden-brown and begin to dry out (usually late summer to early fall). Harvesting too early means immature seeds, while waiting too long risks seed loss from wind or wildlife. Aim for peak dryness—just before they shatter open!
Why won’t my seed heads open to release the seeds?
Seed heads often resist opening due to high humidity or improper drying. Try these fixes:
- Spread heads in a well-ventilated, dry area (like a mesh bag or paper towel).
- Gently rub or tap the heads to encourage separation.
- Use a food dehydrator (set to 95°F) for 12–24 hours if humidity is stubborn.
Are there natural alternatives to hand-harvesting nutsedge seeds?
Yes! If manual extraction feels tedious, try:
- Vacuuming: Use a shop vac with a fine mesh bag to suck up dried seed heads.
- Screening: Shake heads over a 1/4-inch mesh screen to catch seeds.
- Mulching: Lay down cardboard or black plastic over infested areas to smother regrowth (prevents seed spread).
How do I store harvested yellow nutsedge seeds long-term?
Seeds need cool, dry conditions to stay viable. Store them in:
- A sealed airtight container (like a mason jar) with a desiccant packet.
- A refrigerator (up to 6 months) or freezer (1+ year) for maximum longevity.
- Avoid moisture—condensation ruins seeds faster than heat!
Can I use yellow nutsedge seeds for anything other than lawn control?
While not edible, nutsedge seeds have niche uses:
- Wildlife habitat: Birds and small mammals eat the seeds—great for eco-friendly gardens!
- Natural dye: Dried seed heads can create earthy yellow/green hues for crafts.
- Composting: Crush seeds and add to compost piles (they break down quickly).
Pro tip: If you’re not using them for control, wear gloves—sap can irritate skin!
Wrapping up and next steps
Mastering the twist-free extraction of yellow nutsedge seed heads is your first line of defense against this stubborn lawn invader! 🌱 By following the right techniques—like using sharp tools, drying seeds properly, and storing them securely—you’ll gain control over its spread while preserving seed viability. Now’s your chance to turn this challenge into a win for your green space!
Ready to take action? Start by inspecting your lawn for seed heads this week—early detection is key! Share your progress or tips with fellow gardeners to help others stay ahead of nutsedge. 🌟