
Propagation
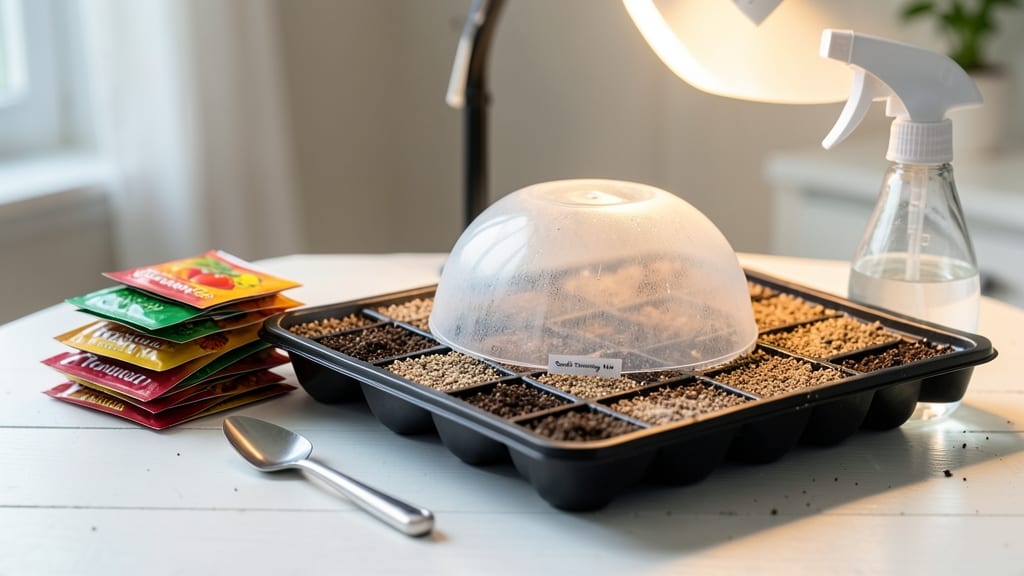
What soil to use for seed starting means the difference between fast, vigorous sprouts and slow, stunted roots that never reach their potential. ✨ The secret to fast germination lies in a lightweight loam mix that lets air and water move freely—no compacted dirt that smothers tiny sprouts before they even stand a chance. Most pre-mixed seed-starting soils are designed for this exact purpose, but the key is sterilized, peat-based blends with perlite or vermiculite. These ingredients prevent damping-off (the fungal disease that turns seedlings to mush) while keeping roots loose enough to grow. I’ve wasted entire trays of seeds on cheap potting soil that packed down like concrete—don’t make that mistake. You’ll see seeds pop in 3-7 days with the right mix, and seedlings develop strong roots that handle transplanting without shock. The texture should feel like a damp sponge, not a brick. For herbs and tiny seeds like lettuce, add a pinch of sand to improve drainage even more. Homemade mixes work too—just combine equal parts peat moss, perlite, and coconut coir. The goal is speed and stability, not perfection. Now let’s get those seeds sprouting!
📚 In This Guide
- What you need
- Instructions
- Tips and common mistakes
- Wrapping up and next steps
What you need
- ● Seed-starting soil mix: 1–2 gallons of a lightweight, sterile mix designed for seed starting (look for labels like "seed-starting mix" or "organic potting soil"). Avoid garden soil—it’s too dense and may harbor pathogens.
- ● Containers: Small pots (2–4 inches deep), seed trays, or even recycled containers (like yogurt cups) with drainage holes. Pro tip: 💡 Use clear plastic containers to monitor moisture levels!
- ● Drainage material: Small pebbles, perlite, or broken pottery pieces to place at the bottom of containers (1/4 inch layer).
- ● Spray bottle: For gentle watering (avoid over-saturating seeds!).
- ● Plant labels: Toilette paper rolls or seedling tags (write plant names with a waterproof marker).
- ○ Heat mat (optional): For warm-season seeds like peppers or tomatoes (70–85°F range).
- ○ Grow lights (optional): LED or fluorescent lights (12–16 hours/day) if natural light is limited.
- ● A clean, well-lit workspace (near a sunny window or under grow lights).
- ● Access to water (room-temperature, preferably filtered or rainwater).
- ● Patience! Seeds need consistent care—think of it as nurturing tiny green babies. 🌱
Step-by-Step guide to choosing the perfect soil for seed starting
Here's how to pick a lightweight loam that gives seedlings the fast, strong start they need.
🌱 Step 1: Understand What Seedlings Need From Soil
Seedlings demand three things from their soil: lightweight texture to prevent root suffocation, high drainage to avoid rot, and sterility to block fungal diseases. Regular garden soil is too dense—it compacts easily and blocks young roots from pushing through. I always check for fine, crumbly consistency when testing soil; it should feel like damp coffee grounds, not wet sand.
The key is air pockets—seedlings need oxygen to develop strong roots. A good seed-starting mix holds water but releases it quickly, so roots never sit in soggy conditions. You'll know you've got the right mix when a handful pressed gently crumbles apart instead of forming a solid clump.
🌿 Step 2: Compare Commercial Seed-Starting Mixes
Look for bags labeled "seed-starting mix" or "seedling mix"—these are formulated specifically for fast germination. The best options contain 50-70% peat moss or coconut coir (for moisture retention) combined with perlite or vermiculite (for aeration). I avoid mixes with garden soil or compost, since they can introduce pathogens that kill delicate seedlings.
Check the ingredients list for sterilized components—this means the mix has been heat-treated to kill weed seeds and fungal spores. A good mix should feel lightweight when scooped; if it feels heavy or gritty, it's not ideal. Brands like FoxFarm, Black Gold, and Espoma all make reliable options that deliver fast root growth within 7-10 days of planting.
💧 Step 3: Test Your Mix Before Planting
Fill a small container with your chosen mix and add water until it's evenly moist but not dripping. Press it gently—if it holds its shape but still crumbles when poked, you're good. If it stays clumped, add 10-20% perlite to improve aeration. I like to test mixes in 2-inch pots first, since they mimic the root environment of real seedlings.
Watch how water drains: it should flow through in 10-15 seconds, not pool at the bottom. Slow drainage means the mix is too dense, while water running through instantly means it lacks moisture retention. The perfect mix balances these two—holding enough water for roots but never staying soggy. This ensures seedlings get consistent moisture without the risk of rot.
✂️ Step 4: Avoid Common Soil Mistakes
Never use garden soil, potting mix, or compost straight from the yard—these compact and block root growth. I've seen beginners swear by "homemade" mixes of soil and sand, but this creates a waterlogged, airless environment that drowns seeds. Even "light" potting mixes often contain too much soil for seed starting.
Skip the sterilization step only if you're using a pre-made, sterilized mix. If you're blending your own, bake the components at 200°F for 30 minutes to kill pathogens. Real talk: damping-off disease (the gray mold that collapses seedlings overnight) comes from contaminated soil, not poor watering. Sterility is non-negotiable for fast, healthy starts.
☀️ Step 5: Store and Reuse Mix Properly
Keep unused seed-starting mix in a sealed container to prevent moisture loss and contamination. I store mine in ziplock bags with a few holes punched in the top—this lets air circulate while keeping out pests. Used mix can be sterilized and reused for shallow-rooted seeds like lettuce or basil, but I never risk it with high-value crops like tomatoes or peppers.
Add 1 tablespoon of worm castings per gallon of mix if you're reusing it—this replenishes nutrients lost during germination. Just don't overdo it; too much organic matter can heat up and kill seeds as it breaks down. The goal is to preserve the lightweight, sterile properties that make the mix ideal for starting seeds in the first place.
Tips & tricks for perfect seed starting soil
Common pitfalls—and how to sidestep every one when choosing your seed-starting medium.
Texture Test: The crumbly test in Step 1 is your best friend. Press a handful of moistened mix—it should hold its shape but still break apart easily. If it forms a solid clump, add 10-20% perlite to lighten it up. I've ruined batches by skipping this step, thinking the mix was fine until seeds refused to germinate. That's when I learned to trust the crumble test over guesswork.
Sterility is Non-Negotiable: If you're blending your own mix, that 200°F for 30 minutes sterilization in Step 4 isn't optional—it's your shield against damping-off disease. I've seen entire seed trays collapse overnight from contaminated soil. For peace of mind, I always sterilize homemade mixes, even if they contain pre-sterilized components. The extra effort prevents heartbreak later.
Drainage Timing Matters: The 10-15 seconds drainage window in Step 3 is your target. Too slow? Your roots will suffocate. Too fast? Your seeds will dry out. I test mixes in 2-inch pots first because they mimic real seedling conditions perfectly. This small step saves you from buying bags of unusable mix that won't work for your specific setup.
Reuse with Caution: When reusing mix in Step 5, remember that 1 tablespoon of worm castings per gallon is the maximum. I've learned the hard way that adding too much organic matter can create a steam bath that kills seeds. The goal is to refresh nutrients without compromising the lightweight, sterile properties that make seed-starting mix special in the first place.
Pro Tips for What Soil To Use For Seed Starting
- Common pitfalls—and how to sidestep every one when choosing your seed-starting medium.
- Texture Test: The crumbly test in Step 1 is your best friend.
- Sterility is Non-Negotiable: If you're blending your own mix, that 200°F for 30 minutes sterilization in Step 4 isn't optional—it's your shield against damping-off disease.
Frequently asked questions
Got questions about seed-starting soil? You’re not alone! Here are answers to the most common queries to help you grow confidently:
What’s the best soil mix for seed starting?
A lightweight, sterile seed-starting mix (like 50% peat moss or coconut coir + 50% perlite/vermiculite) is ideal. Avoid garden soil—it’s too dense and may harbor pests or diseases. Pre-mixed blends from garden centers work great for beginners!
Can I reuse last year’s seed-starting soil?
Not recommended! Old soil can harbor fungal pathogens or pests. Sterilize it by baking at 200°F (93°C) for 30 minutes or replace it entirely. Fresh soil ensures healthier seedlings and better germination rates.
What’s a budget-friendly alternative to store-bought mixes?
DIY a simple blend: mix 1 part compost (sterilized) with 2 parts perlite or coarse sand. Add a handful of worm castings for nutrients. Test moisture retention—it should feel like a damp sponge, not muddy!
How do I know if my soil is too wet or dry for seeds?
Press a handful gently—if water drips out, it’s too wet (risk of rot). If it crumbles like dust, add water. Ideal soil should hold moisture but not feel soggy. Use your finger to check: top inch should dry slightly between waterings.
Why are my seeds rotting even with “good” soil?
Overwatering or poor drainage are top culprits. Ensure pots have drainage holes and use a sterile mix. Water from the bottom (place trays under pots) to avoid fungal issues. Thin seedlings promptly to reduce competition for moisture.
Wrapping up and next steps
Choosing the right soil for seed starting can make all the difference in giving your seedlings a strong, healthy start! 🌱 A lightweight, well-draining loam mix—often combined with perlite or vermiculite—provides the perfect balance of nutrients, aeration, and moisture retention.
Don’t overcomplicate it: focus on sterility, consistency, and drainage to set your little sprouts up for success.
Now that you’re armed with the knowledge, it’s time to roll up your sleeves and get planting! 🌿 Start small with a few trays, experiment with different seed types, and watch your green thumbs grow. Happy gardening!