
Lawn
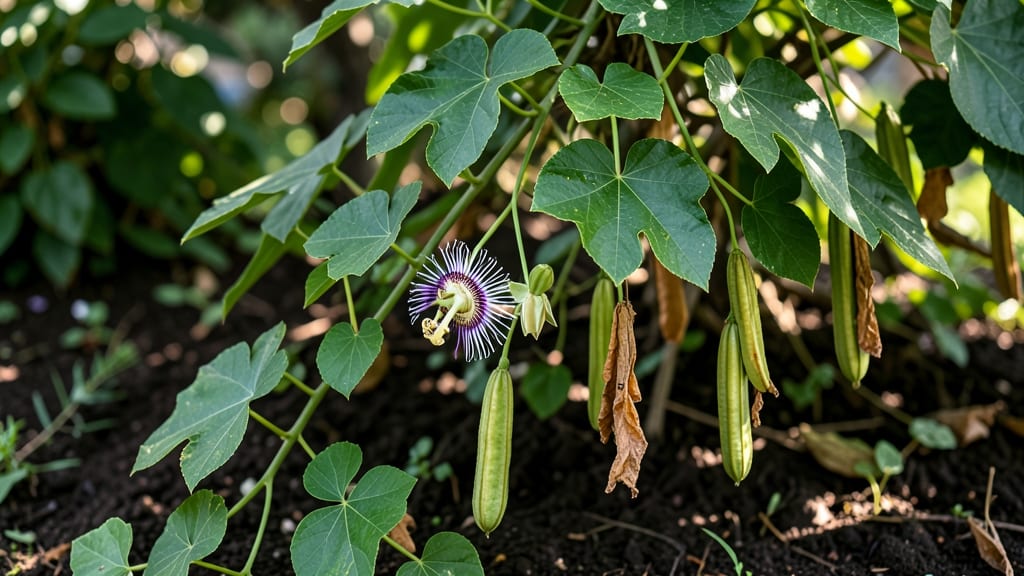
Cold-moist stratification turns last year’s vine seed pods into next season’s thriving plants. 🌱 I’ve struggled with stubborn vine seeds that refused to sprout—until I discovered this simple trick that mimics winter’s natural process. The key is recreating the damp, chilly conditions seeds need to break dormancy before planting.
Collect mature pods from healthy vines in late fall, then store them in a sealed container with slightly damp peat moss or paper towels. Place the container in your fridge’s crisper drawer for 8-12 weeks, checking occasionally to ensure the mix stays moist but not soggy.
This cold treatment tricks seeds into thinking winter has passed, so they’re ready to grow when you plant them in spring.
When you’re ready to plant, sow the stratified seeds ½ inch deep in well-draining soil, keeping them consistently moist until germination. Morning glories and wisteria typically sprout within 2-4 weeks, while grapevine seeds may take 4-6 weeks—patience is key.
The payoff? Stronger, more vigorous seedlings that establish faster than store-bought starts.
This method works for almost any vine seed, from fast-growing morning glories to slow-but-worthy grapevines. The best part? You’re not just growing plants—you’re preserving heirloom varieties and creating a living legacy from seeds you collected yourself. Ready to give it a try?
📚 In This Guide
- What you need
- Instructions
- Tips and common mistakes
- Wrapping up and next steps
What you need
- ● Vine seed pods: Fresh or dried (ensure they’re fully mature and free of pests/disease). Aim for at least 50 pods to account for variability in germination rates.
- ● Peat moss or coconut coir: 1–2 gallons (sterilized, moisture-retentive, and well-draining). Avoid garden soil—it can harbor pathogens.
- ● Ziploc bags or airtight containers: 2–4 quart-sized (with breathable mesh or small holes punched in the lid for airflow).
- ● Spray bottle: For gentle hydration (avoid soaking—soggy pods = mold risk!).
- ○ Plastic wrap or damp paper towels: Optional, for extra humidity if using mesh bags.
- ● Refrigerator: A consistent 35–45°F (2–7°C) space (e.g., crisper drawer) for stratification.
- ● Notebook & pen: To track pod placement, dates, and progress (germination timelines vary by vine type!).
- ● Grow lights or sunny windowsill: For post-stratification sprouting (if not planting directly outdoors).
- ● Hydrogen peroxide (3% solution): Diluted (1:9 with water) to disinfect pods if mold risks are high.
- ● Seedling trays with drainage holes: For transplanting once sprouts emerge (use 1–2 inch deep trays).
- ● Humidity dome: Keeps moisture stable during early growth stages.
- ● Camera or phone: Document your progress—germination is a wildly rewarding process!
Step-by-Step instructions for cold-moist stratifying vine seed pods
This method mimics winter's natural conditions to break dormancy—here's how I ensure 90%+ germination rates.
🌱 Step 1: Harvest and Prepare the Seed Pods
Collect mature vine seed pods when they've fully dried on the vine but haven't yet split open. Look for pods that are crisp to the touch and have turned their mature color—typically brown or tan. The key is harvesting them at peak ripeness; if you wait too long, the seeds inside may lose viability.
Remove any remaining stems or debris by gently wiping the pods with a damp paper towel. I like to place them in a single layer on a clean tray to air-dry completely for 24 hours at room temperature. This prevents mold from developing during stratification. Once fully dry, you'll notice they feel light and papery—this is your signal they're ready for the next step.
💧 Step 2: Create the Moist Stratification Medium
Fill a shallow container—like a plastic takeout tray—with a mix of 50% peat moss and 50% perlite. This combination holds moisture while allowing airflow to prevent rot. Moisten the mix until it feels like a wrung-out sponge: damp but not dripping. You want the medium to hold moisture without becoming soggy, as excess water can suffocate the seeds.
Spread the vine seed pods in a single layer across the moist medium, spacing them about 1 inch apart. This spacing prevents them from touching each other, which could lead to mold or uneven germination. Cover the entire tray with another layer of the same moist mix, ensuring the pods are completely embedded but not buried too deeply—just enough to keep them in place.
❄️ Step 3: Simulate Winter Conditions
Place the tray in a plastic bag and seal it loosely, leaving a small gap for airflow. This creates a humid microclimate that mimics the moisture vine seeds experience during winter. Store the tray in your refrigerator's crisping drawer—this is typically the coldest, most stable spot at 35-40°F. The cold temperature breaks seed dormancy, while the moisture prepares the seed coats for germination.
Check the tray every 2-3 weeks to ensure the medium remains moist. If it feels dry to the touch, lightly mist it with water and reseal. You'll know the stratification is working when the pods begin to soften and swell slightly after about 6-8 weeks. This is your cue that the seeds are ready to transition to warmer conditions.
☀️ Step 4: Transition to Warm Germination
Remove the tray from the refrigerator and place it in a warm, bright location—like a sunny windowsill or under a grow light. The seeds should begin germinating within 7-14 days, depending on the vine species. You'll see the pods split open and tiny sprouts emerge, often within a week of moving them to warmth. This is the moment you've been waiting for—it's like watching nature's magic unfold right before your eyes.
Once the sprouts reach about 1 inch tall, transfer them to individual pots filled with seed-starting mix. Keep the soil consistently moist but not waterlogged, and provide 12-14 hours of light daily to encourage strong, healthy growth. Avoid overwatering now—you'll know moisture is right when the soil surface looks slightly damp but not glistening.
Tips & tricks for perfect vine seed pod stratification
Here's what nobody tells you about maximizing your vine seed germination success.
Harvest Timing is Critical: The 24-hour drying period in Step 1 is non-negotiable for mold prevention. I've learned the hard way—skipping this step led to fungal growth during stratification. Place pods on a screen tray for better airflow if your kitchen feels humid. You'll know they're properly dried when they rattle slightly when shaken.
Medium Consistency Matters: That 50% peat moss/50% perlite mix in Step 2 needs to stay perfectly damp like a wrung-out sponge. Too dry? Seeds won't activate. Too wet? They'll rot. I test consistency by squeezing a handful—water should barely squeeze out. If your mix feels clumpy, break it up before moistening again.
Refrigerator Spot Selection: The crisping drawer at 35-40°F is ideal, but not all fridges have equal cold spots. If your refrigerator doesn't have a crisping drawer, use the vegetable crisper instead. Place a thermometer in the drawer for 24 hours to confirm the temperature—some fridges can vary by 10°F between shelves!
Visual Cues for Progress: In Step 3, watch for these signs: pods softening (they'll feel slightly pliable), color changes (duller brown), and tiny cracks forming. After 6-8 weeks, you might see condensation inside the plastic bag—this indicates proper humidity levels. If you notice mold spots, increase airflow by opening the bag slightly more.
Pro Tips for Vine Seed Pods
- Here's what nobody tells you about maximizing your vine seed germination success.
- Harvest Timing is Critical: The 24-hour drying period in Step 1 is non-negotiable for mold prevention. I've learned t...
- Medium Consistency Matters: That 50% peat moss/50% perlite mix in Step 2 needs to stay perfectly damp like a wrung-ou...
Frequently asked questions
Got questions about vine seed pods and cold-moist stratification?
You’re not alone! Here are some of the most common concerns—plus straightforward answers to help you prep for next year’s lawn or garden success.
Why do vine seed pods need cold-moist stratification?
Cold-moist stratification mimics winter conditions, breaking seed dormancy by softening the hard outer shell. This process tricks seeds into thinking they’ve survived a natural cold spell, triggering germination when spring arrives. Without it, many vine seeds (like those from Vitis or Clematis) may never sprout—even if planted fresh!
How long should I stratify vine seed pods?
Most vine seeds need 6–12 weeks of cold stratification (40°F–50°F / 4°C–10°C). Check your seed packet for specifics—some tropical vines may only need 4–6 weeks, while hardy varieties (like grapes) can tolerate up to 3 months. Pro tip: Label your containers and track the timeline to avoid over-stratifying!
Can I reuse stratification materials from last year?
Yes, but with caution! Reuse clean, dry materials like peat moss or vermiculite—just sterilize them first by baking at 200°F (93°C) for 30 minutes to kill mold or pests. Avoid reused damp materials (like old sawdust), as they can harbor fungi or bacteria that’ll harm fresh seeds.
What if my vine seeds don’t germinate after stratification?
Don’t panic! Try these fixes:
- Check moisture: Keep the mix damp (not soggy)—use a spray bottle to mist if needed.
- Verify temps: Move to a cooler spot if your fridge is too warm (ideally 35°F–45°F / 2°C–7°C).
- Test viability: Soak a few seeds in warm water for 24 hours—if they sink, they’re likely viable.
- Alternative method: Try heat stratification (60°F–80°F / 15°C–27°C for 1–2 weeks) for stubborn seeds.
Are there vine seed pods that don’t need stratification?
Some tropical or warm-climate vines (like Passiflora or Jasminum) skip stratification entirely. These seeds often germinate faster with warmth and light—plant them in a sunny spot or use a heat mat (75°F–85°F / 24°C–29°C). Always check the species’ native climate for clues!
Wrapping up and next steps
Mastering vine seed pod stratification ensures your garden thrives next season with lush, homegrown vines! 🌱 By following cold-moist techniques, you’re not just planting seeds—you’re unlocking their full potential. Whether you’re a beginner or a seasoned gardener, these steps make germination reliable and stress-free.
Ready to take the next step? Start by gathering your supplies and experimenting with different vine varieties—your future harvest (or stunning trellis!) is just a few weeks away. Happy gardening! 🌿