
Lawn
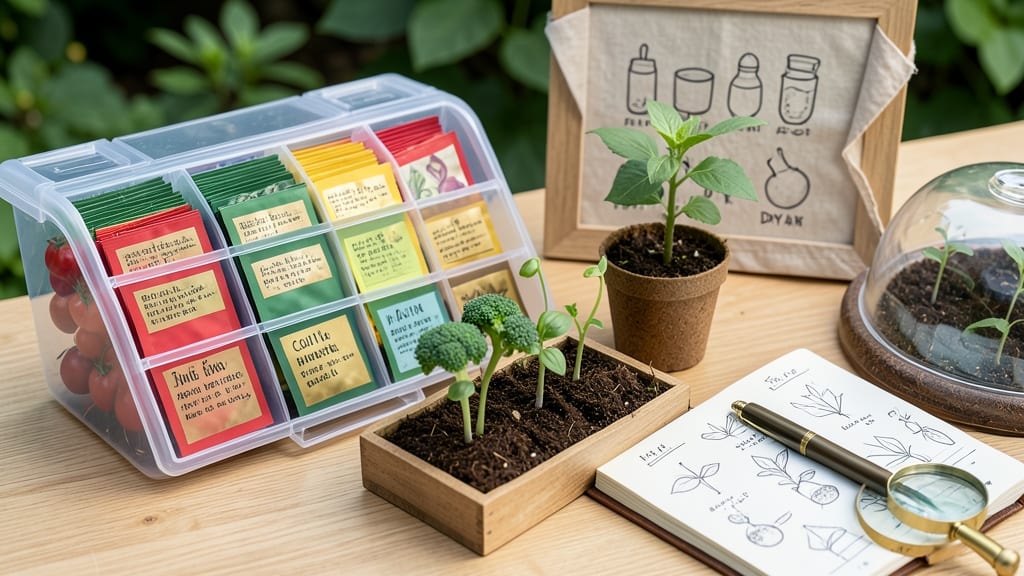
My vegetable seed vault kit saved me from buying seeds every spring—and it keeps my favorite heirloom varieties alive for years. 🌱 The kit’s airtight containers and humidity control create the perfect environment to extend seed life, so you’re not stuck with store-bought options that disappear after one season.
Inside, you’ll find everything from desiccant packets to clear labels, making it easy to organize seeds by type, maturity date, and planting zone. Most seeds stay viable for 5-10 years with proper storage, but some, like tomatoes and peppers, thrive even longer.
The kit also doubles as a planning tool—just glance at last year’s seeds to decide what to grow again.
You’ll start by drying seeds completely before storing them in the sealed containers, then label everything with the variety, date, and germination notes. The result? A self-sustaining garden library that cuts costs, preserves biodiversity, and lets you experiment with rare seeds without risk.
Works for home gardeners, homesteaders, or anyone tired of repurchasing seeds. Here’s how to set yours up for long-term success—and why it’s a game-changer for sustainable growing.
📚 In This Guide
- What you need
- Instructions
- Tips and common mistakes
- Wrapping up and next steps
What you need
- ● Air-tight storage containers: 5–10 glass jars with tight-sealing lids (e.g., mason jars, 8–16 oz) or resealable mylar bags with oxygen absorbers
- ● Desiccant packets: 5–10 silica gel packets (2–3 g each) to absorb moisture
- ● Permanent markers or labels: For labeling seed varieties and dates
- ○ Fine-mesh strainer or sifter: (Optional but helpful for cleaning seeds)
- ● Paper envelopes or seed packets: 50–100 small, breathable envelopes (for bulk seeds)
- ● Digital scale: (0.1g precision) for measuring seed quantities
- ● Oven or food dehydrator: For drying seeds (if not already dry)
- ○ Vacuum sealer: (Optional) for extra-long-term protection
- ● Notebook or spreadsheet: To track seed varieties, germination rates, and storage dates
- ○ Humidity indicator cards: (Optional) to monitor storage conditions
Instructions: building your long-term vegetable seed vault
Here's how I preserve seeds for decades—no fancy equipment, just smart storage and patience.
🪴 Step 1: Harvest and Dry Seeds Properly
Wait until plants produce fully mature seeds—usually when pods turn brown or flowers fade completely. For tomatoes, let them stay on the vine until wrinkled; for beans, harvest when they rattle inside the pod. Cut stems and hang seed heads upside-down in paper bags for 2-3 weeks in a dry, dark place. This mimics natural drying and prevents mold.
Check daily for moisture. If seeds feel damp when pinched, extend drying time. Once completely dry, remove seeds from pods by hand or gently rub between fingers. Store only clean, dry seeds—any moisture will ruin your entire collection.
⏰ Step 2: Test Viability Before Storage
Not all seeds survive long-term storage. For each variety, take 10 seeds and plant them in moist paper towels. Seal in a plastic bag and keep at 70°F for 5-7 days. Check daily for sprouts—if 80% germinate, your seeds are viable for storage. If fewer sprout, store smaller quantities or source fresh seeds.
This step saves heartbreak later. I always label test batches by variety and date—some seeds like peppers lose viability faster than others. Discard any variety with 50% or lower germination.
🌱 Step 3: Package Seeds for Maximum Longevity
Use airtight containers like glass jars with rubber seals or Mylar bags with oxygen absorbers. For each variety, add 1-2 silica gel packets (the kind that changes color when moist) to absorb any residual humidity. Label each container with the plant name, harvest year, and germination test results.
Store containers in a cool, dark place***—ideally 32-41°F and 20-40% humidity. A refrigerator's crisper drawer works well, but avoid temperature fluctuations. Never store seeds in the freezer—frost crystals damage seed coats.
📅 Step 4: Rotate and Refresh Your Collection
Check seed viability every 2-3 years by repeating the germination test. Some seeds like onions and leeks last only 1 year, while others like beans and peas stay viable for 5+ years. Replace old seeds with fresh purchases when germination drops below 70%.
Here's the thing—older seeds don't always lose viability completely. They may just take longer to sprout. I always plant a few extra seeds from older batches to account for slower germination. Keep a log of which varieties perform best over time.
Tips & tricks for perfect long-term seed preservation
Took me years to perfect these tricks—here's how I ensure seeds stay viable for decades without fancy equipment.
Drying Precision: The 2-3 week drying period in Step 1 is non-negotiable, but here's the secret: place your paper bags in a location with consistent airflow—like a pantry with a small fan running on low. This prevents uneven drying and mold growth. I also weigh my seeds before and after drying to confirm moisture loss (they should feel light as feathers). If you live in a humid climate, extend drying to 4 weeks—moisture is the silent killer of seed vaults.
Viability Test Hack: In Step 2, when testing germination, I use a clear plastic bag instead of a sealed one. This lets me monitor progress without opening it daily. Place the bag in a bright spot (not direct sunlight) and mark sprouting seeds with a toothpick to track exactly which varieties perform best. The 70°F temperature is ideal—any hotter and seeds may overheat; cooler and germination slows dramatically.
Container Upgrade: While glass jars work perfectly, I've found that vacuum-sealed Mylar bags with oxygen absorbers last even longer—some of my heirloom tomato seeds from 2015 are still viable! For extra protection, I wrap the jar lids with aluminum foil before sealing. This creates a secondary moisture barrier that's especially helpful in humid climates. Label the foil with the same information as your container.
Storage Location Strategy: Your refrigerator's crisper drawer is perfect, but here's the pro move: place containers on a shelf above the vegetable bins where humidity levels are more stable. I also avoid the door shelves—temperature fluctuates wildly there every time you open the fridge. For long-term storage beyond 5 years, consider a dedicated seed storage box in your basement or root cellar, where temperatures stay between 32-41°F year-round.
Pro Tips for Vegetable Seed Vault Kit
- Took me years to perfect these tricks—here's how I ensure seeds stay viable for decades without fancy equipment.
- Drying Precision: The 2-3 week drying period in Step 1 is non-negotiable, but here's the secret: place your paper bag...
- Viability Test Hack: In Step 2, when testing germination, I use a clear plastic bag instead of a sealed one. This let...
Frequently asked questions
What’s the best time to start preserving seeds with a seed vault kit?
Ideally, begin after harvest when seeds are fully mature but still fresh (e.g., late summer/early fall for most veggies). For heirloom or rare varieties, preserve seeds within 2–3 weeks of drying to maintain viability. Pro tip: Label seeds immediately with the variety and date to avoid confusion!
How long can seeds stay viable in a seed vault kit?
With proper storage (cool, dark, dry conditions), most seeds last 3–5 years. Some, like beans or peas, may stay viable for 5+ years, while delicate varieties (e.g., lettuce) last 1–2 years. Check humidity levels—keep them below 40% to prevent mold or spoilage.
Can I use regular paper envelopes instead of the kit’s moisture barriers?
While possible, specialized seed vault kits use Mylar bags or vacuum-sealed pouches to block oxygen and moisture—critical for long-term storage. Paper envelopes work short-term but risk contamination or poor germination. For budget-friendly alternatives, try glass jars with silica gel as a backup.
What if my seeds sprout mold or smell bad after storage?
Discard them immediately! Mold or off smells signal moisture exposure or spoilage. To prevent this:
- Store seeds in airtight containers (like the kit’s included pouches).
- Avoid refrigeration—consistent room temp (60–70°F) is best.
- Use food-grade desiccants (e.g., rice or silica packets) to absorb excess humidity.
Are there seeds I shouldn’t preserve at home?
Yes! Avoid preserving:
- Hybrid seeds (e.g., F1 varieties)—they won’t grow true to type.
- Seeds from diseased plants (risk spreading pathogens).
- Very small seeds (e.g., carrots or onions), which are harder to store long-term.
Wrapping up and next steps
Building your own vegetable seed vault kit is a rewarding way to preserve heirloom varieties and ensure a thriving garden for seasons to come! 🌱 With the right materials and a little patience, you’ll safeguard biodiversity while gaining the satisfaction of self-sufficiency.
Ready to take the next step? Start by gathering your supplies, then dive into the process—your future harvests will thank you!
Got questions? Check our FAQs or explore more seed-saving tips to keep your garden flourishing year after year!