
Propagation
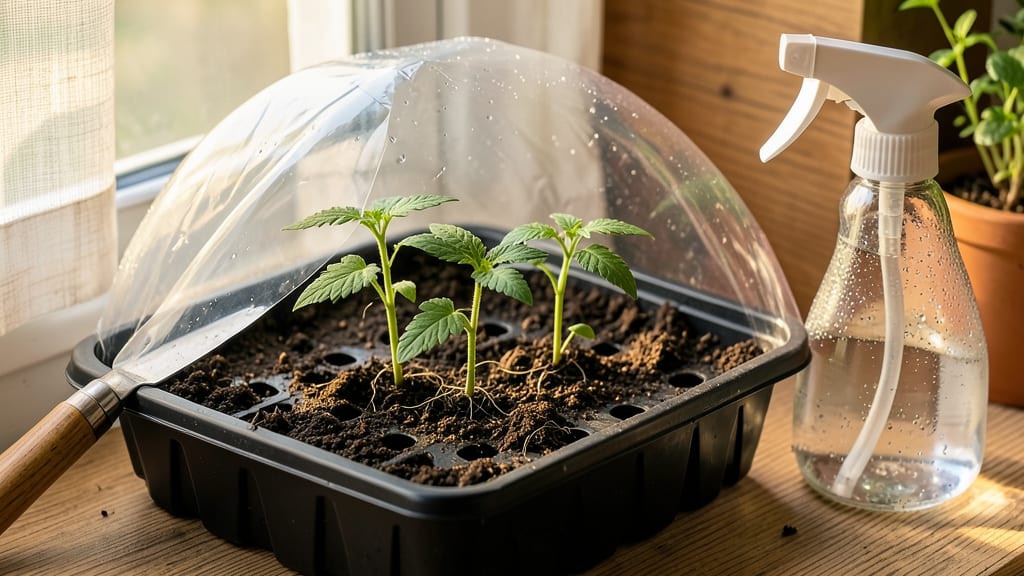
Tomato seed germination starts with the right conditions—warmth, moisture, and patience. 🌱 I learned the hard way that rushing or skipping steps leads to weak seedlings or worse, those twisted pods that make seeds unusable. The key is mimicking the tropical climate tomatoes love, even in your basement or kitchen.
You'll need just three simple tools: a seed-starting tray, a spray bottle, and a heat mat (or sunny windowsill). Keep the soil consistently moist but never soggy—think damp sponge, not swamp. Most seeds sprout within 7-14 days if you keep temps between 75-85°F.
Once those first green hooks appear, resist the urge to move them to light too soon. Weak stems snap easily. Start with 12-14 hours of gentle light and gradually increase as they grow. The payoff? Sturdy seedlings ready for transplanting in 4-6 weeks.
This method works for heirlooms, hybrids, and even those tricky cherry varieties. The secret? Consistency. Skip the shortcuts, and you'll save seeds that grow into plants just like their parents—no genetic surprises included.
📚 In This Guide
- What you need
- Instructions
- Tips and common mistakes
- Wrapping up and next steps
What you need
- ● Tomato seeds: Fresh, high-quality seeds (preferably from heirloom or open-pollinated varieties). Aim for 10–20 seeds per batch.
- ● Germination medium: Seed-starting mix (sterilized, peat-based or coconut coir blend, 2–3 cups)
- ● OR paper towels (for quick-sprouting method, 2–4 sheets)
- ● Containers: Seed trays or small pots (with drainage holes, 3–6 inches deep)
- ● OR biodegradable peat pots (2–3 inches)
- ● Watering can or spray bottle: With a fine mist setting to avoid disturbing seeds.
- ○ Plastic wrap or dome: To create a humid microenvironment (optional but helpful for faster germination).
- ○ Heat source (optional but recommended): Seedling heat mat (70–85°F range)
- ● OR warm spot near a sunny window or under grow lights.
- ● Grow lights: LED or fluorescent (12–16 hours/day) for consistent light once sprouts emerge.
- ● Fertilizer: Balanced, water-soluble seedling fertilizer (diluted to ¼ strength) after true leaves appear.
- ● Humidity dome: Clear plastic cloche to retain moisture during germination.
- ● Labeling system: Toothpicks + masking tape or seedling labels to track varieties.
- ● Fungicide: Organic spray (e.g., neem oil or hydrogen peroxide solution) to prevent damping-off.
Step-by-Step instructions for germinating tomato seeds properly
Here's how to break the twisting pod curse and get strong, viable tomato seedlings every time.
🌱 Step 1: Select and Prepare Healthy Tomato Pods
Choose fully ripe, disease-free tomato pods from your healthiest plants. The best seeds come from fully mature fruit—look for deep color and slightly soft texture. Avoid pods that show signs of cracking, mold, or pest damage, as these seeds often carry pathogens that reduce germination rates.
Cut the pod open lengthwise with clean scissors, then scoop out the gel-like interior into a bowl. Add 1 cup of warm water to the bowl and let the mixture ferment for 3-5 days at room temperature. You'll see bubbles form and the good seeds will sink while empty or bad seeds float to the top. Skim off any debris daily—this prevents mold from taking hold.
💧 Step 2: Clean and Dry the Seeds Thoroughly
After fermentation, pour the mixture through a fine-mesh strainer to separate seeds from pulp. Rinse the seeds under cool water until the water runs clear—this removes residual gel that can inhibit germination. Place the seeds on a clean paper towel and pat them dry completely. Moisture during storage leads to mold, so ensure they're bone dry before proceeding.
Spread the seeds in a single layer on the paper towel and let them air dry for 24-48 hours in a well-ventilated area. You'll know they're ready when they feel light and crisp to the touch. Store them in a labeled envelope or small container until you're ready to sow—properly dried seeds stay viable for 4-5 years when kept in a cool, dark place.
☀️ Step 3: Sow Seeds at Optimal Depth and Temperature
Fill small seed-starting trays or individual pots with a sterile seed-starting mix and moisten it until damp but not soggy. Press the soil down gently to remove air pockets, then plant seeds ¼ inch deep—any deeper and they'll struggle to emerge. I like to use a toothpick to create small holes for precision placement.
Cover the trays with a clear plastic dome or plastic wrap to retain moisture and warmth. Place them in a location that maintains a consistent 75-85°F temperature—this is critical for germination. A seedling heat mat works wonders if your home runs cooler. Expect sprouts to appear in 7-14 days, though some varieties may take longer. Keep the soil consistently moist but never waterlogged during this period.
🌿 Step 4: Provide Light and Prevent Leggy Growth
The moment seedlings emerge, remove the plastic cover immediately to prevent damping-off disease. Position them under a grow light or in the brightest window you have, ensuring they receive 14-16 hours of light daily. Without enough light, seedlings stretch toward the source (called "leggy"), becoming weak and prone to breaking.
Keep the grow light 2-4 inches above the seedlings and raise it as they grow to maintain that distance. Healthy seedlings have dark green leaves and thick stems. If you notice leaves turning yellow or stems elongating excessively, your light source is too far away. Rotate the trays daily so plants grow straight rather than leaning toward one side.
⏰ Step 5: Harden Off and Transplant Carefully
Two weeks before your last frost date, begin hardening off seedlings by placing them outside in a sheltered spot for 1-2 hours the first day. Gradually increase their outdoor time by 1 hour daily until they can spend the full day outside. This process helps them adjust to wind, sun, and temperature fluctuations without shock.
Transplant seedlings into the garden after all danger of frost has passed and soil temperatures reach 60°F or warmer. Choose an overcast day to reduce transplant shock. Water deeply at the base of each plant to encourage root establishment. Avoid fertilizing immediately—newly transplanted seedlings need time to recover before they can utilize nutrients effectively.
Tips & tricks for perfect tomato seed germination
A few simple strategies can transform your seed-saving success rate from frustrating to foolproof.
Fermentation Precision: During the 3-5 day fermentation in Step 1, place your bowl in a spot where the temperature stays consistently warm (around 75-80°F). I've found that using a small electric cooler with a seedling heat mat inside creates ideal conditions—especially helpful if your kitchen runs cool. The bubbles should be active by day 2, but if you see mold forming (fuzzy white or black spots), discard the batch immediately and start fresh with clean pods.
Seed Drying Strategy: For the 24-48 hour drying period in Step 2, I recommend using a mesh screen or fine wire rack placed over a fan on low setting. This creates gentle airflow that speeds up drying without creating dust. The seeds are ready when they feel crisp between your fingers—this prevents mold during storage. I've had the best luck with seeds dried to this exact crispness lasting 5+ years in my seed vault.
Lighting Hack: When providing the 14-16 hours of light in Step 4, position your grow lights just 2-3 inches above the seedlings initially. As they grow, raise the lights gradually to maintain this distance. I've found that using a simple timer for your grow lights eliminates guesswork—set it to turn on at 6am and off at 8pm for consistent light exposure. This prevents the leggy growth that's so common when light cycles are inconsistent.
Transplant Timing: For the hardening off process in Step 5, I've developed a simple checklist: start with 1-2 hours on day 1, then add 1 hour each subsequent day. By day 7, your seedlings should be ready for full sun exposure. The key is watching for signs of stress—if leaves curl or wilt during hardening, they're not ready for the next step. I always transplant on an overcast morning to give them their best chance at survival.
Pro Tips for Tomato Seed Germination
- A few simple strategies can transform your seed-saving success rate from frustrating to foolproof.
- Fermentation Precision: During the 3-5 day fermentation in Step 1, place your bowl in a spot where the temperature st...
- Seed Drying Strategy: For the 24-48 hour drying period in Step 2, I recommend using a mesh screen or fine wire rack p...
Frequently asked questions
Got questions about tomato seed germination?
You’re not alone! Here are some of the most common concerns—and their solutions—to help you grow strong, healthy tomato plants from seed.
How long does it take for tomato seeds to germinate?
Tomato seeds typically sprout in 5–14 days at 70–85°F (21–29°C). Warmth speeds things up—place seeds near a sunny window or use a heat mat. If your soil stays cool (<60°F/15°C), germination can stall for weeks. Pro tip: Keep the soil consistently moist (not soggy) to avoid delays.
Why aren’t my tomato seeds sprouting?
Common culprits include old seeds (viability drops after 4–5 years), cold soil, or improper planting. Try these fixes:
- Test viability: Soak seeds in water for 24 hours—floaters are likely dead.
- Warmth boost: Place seeds on a paper towel over a warm (not hot) radiator.
- Replant deeper: Seeds need ¼ inch (6mm) of soil coverage to germinate.
Can I germinate tomato seeds without soil?
Use the paper towel method for faster results:
- Moisten a paper towel and place seeds 1 inch apart.
- Fold the towel and put it in a sealed plastic bag.
- Store in a warm, dark spot (like a fridge with the light off).
- Check daily—once sprouts appear (3–7 days), transplant to soil.
How do I prevent damping-off disease in germinating seeds?
Damping-off (a fungal infection) causes seedlings to wilt and collapse. Prevent it with these steps:
- Sterilize containers: Wash trays with a 10% bleach solution (rinse well).
- Use fresh potting mix: Avoid garden soil—opt for seed-starting mix with perlite.
- Space seeds: Overcrowding traps moisture; thin to ½ inch apart.
- Bottom-water: Add water to the tray (not directly on seeds) to reduce surface dampness.
What’s the best time to start tomato seeds indoors?
Timing depends on your climate and last frost date:
Region
Start Indoors
Transplant Outdoors
Cool climates (Zone 3–5)
6–8 weeks before last frost (e.g., late winter)
After soil warms to 55°F (13°C) (mid-to-late spring).
Warm climates (Zone 8–10)
8–10 weeks before summer heat (early spring).
Transplant in early spring to avoid bolting.
Wrapping up and next steps
Mastering tomato seed germination is a rewarding journey that ensures healthy, twist-free pods and thriving plants! By following proper techniques—like fermenting seeds, drying them correctly, and storing them in ideal conditions—you’ll boost viability and save seeds like a pro. 🌱
Now that you’re armed with the know-how, it’s time to put it into action. Start with a few heirloom varieties, experiment with different drying methods, and track your success. Happy growing—and may your next harvest be full of plump, perfect tomatoes!