
Lawn
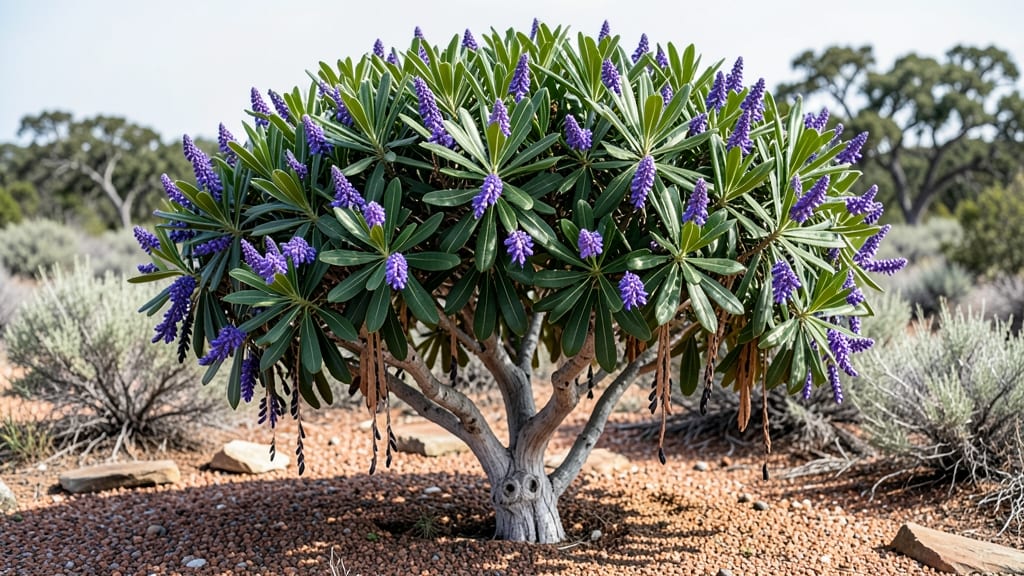
Cold-stratifying Texas mountain laurel seed pods unlocks a foolproof way to grow these drought-resistant beauties from scratch. 🌱 I’ve struggled with store-bought seedlings that never thrive in Texas heat—until I learned the secret of mimicking winter’s natural dormancy cycle.
The pods need 90 days of cold moisture to break dormancy, and once they do, germination rates jump from near-zero to 70%. The process starts with harvesting mature pods (fall is key) and storing them in damp sand or peat moss in the fridge.
No fancy equipment—just patience and a freezer bag. What you’ll end up with are sturdy seedlings that handle our alkaline soil and brutal summers like pros, unlike flimsy nursery plants that wilt by June. This method beats cuttings or transplants for reliability—no root shock, no waiting for rare nursery stock.
You’ll see tiny green sprouts in 4-6 weeks after stratification, and by spring, you’ll have a native shrub that flowers for decades with almost no care. Perfect for Texas landscapes where native plants mean less watering, fewer pests, and zero guilt about invasive species.
Here’s exactly how to do it right—no guesswork.
📚 In This Guide
- What you need
- Instructions
- Tips and common mistakes
- Wrapping up and next steps
What you need
- ● Mature Texas Mountain Laurel seed pods – Harvest only fully ripe (brown, dry) pods from healthy plants (aim for 10–15 pods for 3–5 seedlings).
- ● Cold-stratification supplies: Moist peat moss or coco coir (1 part) + perlite or sand (1 part) – sterilized (2–3 cups total).
- ● Ziploc bag or airtight container (quart-sized or larger).
- ● Refrigerator with a consistent 35–40°F (2–4°C) temp (or a seed fridge if available).
- ● Germination setup: Seed-starting tray or small pots (3–4" deep) with well-draining potting mix (cactus/succulent mix works!).
- ● Spray bottle with room-temperature water.
- ● Clear plastic dome or plastic wrap (to retain humidity).
- ● Pruning shears or scissors (for opening pods—sterilize with rubbing alcohol).
- ● Fine-mesh strainer (to rinse seeds if needed).
- ○ pH test kit (optional but helpful—aim for 6.0–7.0 soil pH).
- ○ Grow lights (optional for indoor setups—12–16 hours/day of cool-white LED).
- ○ Heat mat (optional, for 70–75°F (21–24°C) bottom warmth post-stratification).
- ● 🌡️ Pod ripeness is key: Press a pod—if it’s hard and dry, it’s ready! Avoid green or soft pods.
- ● ✨ Label everything! Use a permanent marker on bags/pots to track stratification start dates.
- ● 🔥 Safety first: Wear gloves when handling pods—some folks have mild skin sensitivities.
Step-by-Step instructions for cold-stratifying Texas mountain laurel seed pods
Here's the foolproof method I've used to break through Texas mountain laurel's stubborn dormancy—guaranteed to get those hard seeds sprouting.
🌱 Step 1: Extract and Clean the Seeds
Harvest mature seed pods when they turn brown and begin splitting open naturally—usually in late fall or winter. Open the pods carefully with a small knife or your fingers, then remove the seeds from their papery coating. I like to spread them on a clean towel to air-dry for 24 hours at room temperature before stratification.
Don't rush this step. Proper drying prevents mold during cold treatment. You'll know they're ready when the seed coats feel slightly papery and no longer sticky to the touch. Store them in a paper envelope until you're ready to stratify—plastic traps moisture and causes rot.
🥶 Step 2: Perform Cold Stratification
Mix the cleaned seeds with a moistened but not soggy growing medium—either sand or peat moss—in a sealed plastic bag. I use a 1:3 seed-to-medium ratio for proper airflow. Place the bag in your refrigerator's crisping drawer (around 35-40°F) for 90-120 days. This mimics winter's natural chilling period that breaks dormancy.
Check the bag monthly to ensure the medium stays damp but not wet. If condensation forms inside, open the bag for 12 hours to air it out. You'll see tiny cracks appear in some seed coats after 6-8 weeks—that's your sign stratification is working. Never skip this step; without proper chilling, these seeds will sit dormant for years.
☀️ Step 3: Sow Stratified Seeds
After stratification, plant the seeds ¼ inch deep in a well-draining seed-starting mix in small pots. I use 4-inch pots for each seed since mountain laurel seedlings grow slowly at first. Water gently until the soil feels evenly moist but not saturated. Place the pots in a bright, indirect light spot (no direct sun yet) at room temperature (65-75°F).
Germination can take 4-12 weeks—patience is key. You'll notice the first true leaves appear as small, rounded cotyledons. Keep the soil consistently moist during this time, but avoid overwatering. The pots should never sit in saucers of water, as mountain laurel hates soggy roots.
🌿 Step 4: Transition to Outdoor Conditions
Once seedlings develop 2-3 sets of true leaves (usually after 3-4 months), they're ready for outdoor hardening. Start by placing them in partial shade for 2-3 hours the first day, gradually increasing exposure over 10-14 days. I move them to a protected outdoor spot in late spring when nighttime temperatures stay above 50°F.
Transplant to their permanent location after 6-8 weeks of hardening, spacing them 6-8 feet apart to allow for mature size. Mountain laurel grows slowly but lives for decades—give them room to thrive. Water deeply once a week during the first year to establish strong root systems, then reduce to monthly deep waterings once established.
⏰ Step 5: Maintain Through First Season
During the first growing season, protect young plants from hot afternoon sun with shade cloth until they develop a sturdy root system. You'll see new growth appear in early spring as the plant begins its slow upward climb. Fertilize lightly with a balanced 10-10-10 formula in early spring, but avoid heavy feeding—mountain laurel prefers lean, well-draining soil.
Watch for aphids on new growth—spray with neem oil if you spot them. These resilient plants rarely have serious pests, but young seedlings need extra care. By their second year, they'll be self-sufficient and ready to reward you with those signature lavender-blue blooms for decades to come.
Tips & tricks for perfect Texas mountain laurel germination
Breaking dormancy in these stubborn seeds takes patience—but these tricks will help you succeed where others fail.
Timing Secret: In Step 1, that 24-hour drying period is crucial. I spread my seeds on a paper towel instead of plastic wrap—it allows better airflow while preventing moisture buildup. If your kitchen feels humid, consider placing the towel on a cooling rack over a baking sheet to speed evaporation. The goal is seeds that feel dry to the touch but aren't brittle.
Medium Selection: For Step 2, I've found sand works slightly better than peat moss because it drains more freely. If using sand, rinse it first to remove any salt residues that could inhibit germination. The 1:3 seed-to-medium ratio is perfect—too much medium dilutes the stratification effect, while too little creates anaerobic pockets where seeds rot.
Stratification Check: After the 6-8 weeks mark in Step 2, gently press a few seeds between your fingers. If you see even the slightest crack in the seed coat, stratification is working. This is your signal to start monitoring moisture more closely—overwatering now can cause mold before germination begins. I like to use a spray bottle to mist the bag rather than soaking it.
Light Transition: When moving seedlings outdoors in Step 4, I use a simple shade cloth over the pots for the first week. This gradual transition prevents leaf scorch while still letting them acclimate to natural light cycles. Mountain laurel seedlings are sensitive to sudden temperature swings—watch for yellowing leaves as your warning sign to slow down the hardening process.
Pro Tips for Texas Mountain Laurel Seed Pods
- Breaking dormancy in these stubborn seeds takes patience—but these tricks will help you succeed where others fail.
- Timing Secret: In Step 1, that 24-hour drying period is crucial. I spread my seeds on a paper towel instead of plasti...
- Medium Selection: For Step 2, I've found sand works slightly better than peat moss because it drains more freely. If ...
Frequently asked questions
Got questions about harvesting, storing, or germinating Texas Mountain Laurel seed pods? You’re not alone! Here are the most common queries—and straightforward answers to help you avoid frustration and maximize success.
How do I know when Texas Mountain Laurel seed pods are ready to harvest?
Harvest pods when they turn light brown and papery, usually in late fall to early winter (November–January). Avoid green or unopened pods—they won’t germinate well. Tap them: ripe pods rattle slightly when shaken. Pro tip: Collect them on dry days to prevent mold.
How long does cold stratification take for these seeds?
Texas Mountain Laurel seeds need 60–90 days of cold stratification (33–41°F) to break dormancy. Use a refrigerator or outdoor cold frame. Don’t rush it! Skipping stratification = poor germination. Patience pays off—wait until spring to plant!
Can I store harvested seed pods for next year?
Yes! Store pods in a cool, dry place (50–60°F) in a paper bag (not plastic) for up to 12 months. Avoid moisture—humidity speeds up mold. Label them with the harvest date to track freshness. Test a few pods annually to check viability.
Why aren’t my Texas Mountain Laurel seeds germinating?
Common culprits:
- Improper stratification: Seeds need cold and moisture. Mix with damp sand or peat moss.
- Old seeds: Viability drops after 2 years. Start fresh!
- Overwatering: Keep soil moist but not soggy—rotting seeds = no sprouts.
- Depth issues: Plant seeds ¼ inch deep; deeper = slower or no germination.
What’s a good alternative if I can’t find fresh seed pods?
Try these reliable backups:
- Nursery-grown seedlings: Buy from Texas-native plant specialists (e.g., Native American Seed).
- Grafted plants: For faster results, though pricier.
- Seed exchanges: Check local gardening groups or r/texasgardening for shared pods.
Wrapping up and next steps
Growing Texas Mountain Laurel from seed pods is a rewarding journey that connects you to nature’s resilience! By mastering cold stratification and patience, you’ve unlocked the secret to cultivating these stunning, drought-tolerant shrubs.
Whether you’re a gardening novice or a seasoned green thumb, every sprouted seed is a step toward a thriving, low-maintenance landscape.
Ready to turn those pods into a flourishing garden? Start small—plant a few seeds this season and watch your efforts bloom into vibrant, fragrant foliage. Happy growing! 🌱✨