
Lawn
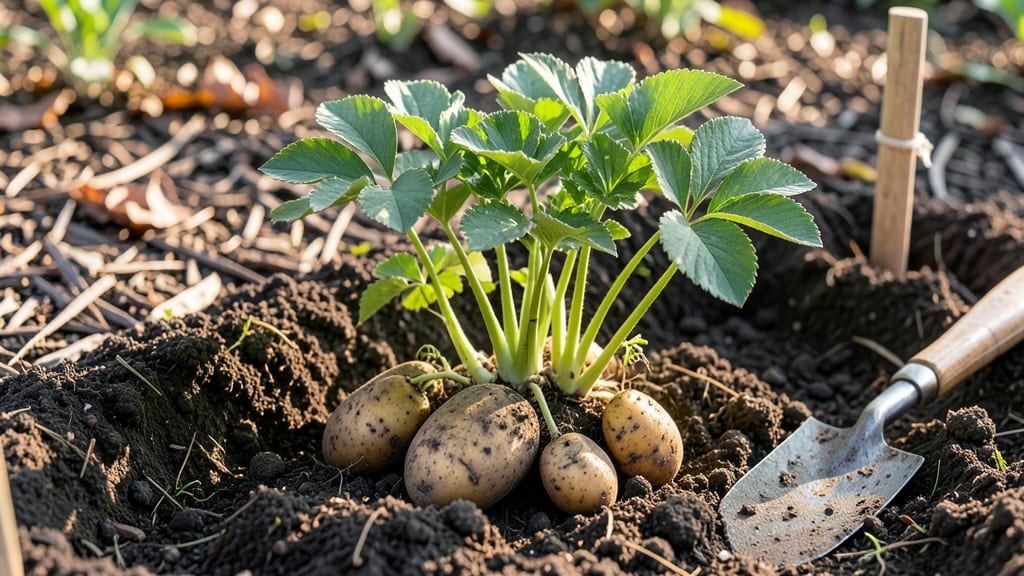
Sprouting seed potatoes gives you a head start on the growing season, but doing it wrong can leave you with weak, twisty plants. 🌱 I’ve grown thousands of potatoes this way, and the cold-start method—keeping them in the dark until planting—produces bushier, more productive tubers than any other approach.
The secret isn’t just light and warmth; it’s timing and patience.
You’ll need certified seed potatoes (not grocery store ones), a cool, dark spot for 4-6 weeks of sprouting, and a sunny garden bed ready by planting time. The key is letting those little sprouts grow 1-2 inches before exposing them to light—this prevents the "twisty stem" problem that ruins harvests.
Most gardeners rush this step and end up with leggy, weak plants that struggle to produce.
By following this method, you’ll see earlier emergence in spring and bigger yields by harvest time. The plants establish faster, resist disease better, and produce tubers that stay clean and blemish-free. No more digging up misshapen potatoes or dealing with hollow hearts—just consistent, high-quality harvests every season.
Works for both indoor and outdoor sprouting, whether you’re in a small backyard or a raised bed. Once you master this, you’ll never go back to buying seed potatoes from the store again. Here’s exactly how to do it right.
📚 In This Guide
- What you need
- Instructions
- Tips and common mistakes
- Wrapping up and next steps
What you need
- ● Seed potatoes: 5–10 lbs (adjust based on space) – Choose certified organic or disease-resistant varieties like Yukon Gold or Red Pontiac.
- ● Shallow container: A 10"x20" wooden box, plastic tray, or even a repurposed storage tote (with drainage holes).
- ● Potting soil: 2–3 bags of well-draining, seed-starting mix (avoid garden soil—it compacts too easily!).
- ● Drainage layer: Small pebbles, perlite, or crushed gravel (1–2 inches at the bottom of your container).
- ● Spray bottle (for gentle watering).
- ○ Gloves (optional but handy for handling soil and potatoes).
- ○ Thermometer (optional, to monitor soil temps—ideal range: 45–65°F).
- ○ Row cover or plastic wrap (optional, to retain moisture during cold starts).
- ● A cool, dark space (like a basement or garage) for pre-sprouting (if using the cold-start method).
- ● Sunlight access: A south-facing window or grow lights (12+ hours/day once sprouts emerge).
- ● Patience! Sprouts take 4–6 weeks to reach planting size.
Step-by-Step instructions for sprouting seed potatoes
Here's my battle-tested method for getting strong, uniform sprouts ready for planting—no green waste or weak tubers.
🌱 Step 1: Select and Prepare Your Seed Potatoes
Choose certified disease-free seed potatoes with at least 2-3 eyes each. Avoid potatoes with green skin (they contain solanine, a toxin) or those that feel soft or shriveled. I like to work with 4-6 medium potatoes for a standard garden bed—this gives me enough plants without overcrowding later.
Cut larger potatoes into 2-ounce chunks, ensuring each piece has at least one eye. Let the cut pieces sit uncovered at room temperature for 24 hours—this allows the cut surfaces to callus over slightly, reducing rot risk when planted. Store them in a cool, dark place (like a basement or pantry) where they'll stay dormant until you're ready to start sprouting.
🪴 Step 2: Create a Sprouting Environment
Fill a shallow container (like a 9x13-inch baking pan or a 6-inch-deep tray) with 2-3 inches of moistened peat moss or coconut coir. This lightweight medium holds moisture without compacting like soil. I avoid regular potting mix because it can harbor diseases that weaken young sprouts.
Space the potato pieces 2-3 inches apart with the eyes facing upward. Gently press them into the medium so they stay in place but don't bury them deeply—just enough so the eyes are covered with about ½ inch of material. This shallow placement encourages strong, straight sprouts instead of leggy growth.
☀️ Step 3: Provide Indirect Light and Controlled Warmth
Place the container in a location with bright, indirect light—think 60-70°F and 12 hours of daylight (a north-facing windowsill or under grow lights on a timer). Direct sunlight at this stage will cause the potatoes to turn green, which makes them bitter and less suitable for planting. You'll know the light is right when the sprouts grow sturdy and white, not elongated or pale.
Keep the medium consistently moist but never soggy. I use a spray bottle to mist the surface every 2-3 days, checking that the top inch feels damp but not dripping. Overwatering here leads to rot, while underwatering causes the sprouts to dry out and die back. After 3-4 weeks, you should see 1-2 inch-long sprouts with small root hairs forming at the base.
⏰ Step 4: Harden Off and Prepare for Planting
When the sprouts reach 1-2 inches in height and have visible root hairs, it's time to harden them off. Move the container to a cooler spot (50-60°F) for 5-7 days to mimic outdoor conditions. This gradual temperature shift prevents transplant shock when you eventually plant them in the garden. During this time, reduce watering to every 3-4 days—the roots will be tougher and better equipped to handle real soil.
The moment the soil in your garden warms to 45°F or above (use your finger to check—it should feel like a warm bath, not cold), your sprouted potatoes are ready to plant. Dig holes 4-6 inches deep, space them 12-18 inches apart, and place them in with the sprouts facing upward. Cover lightly with soil, leaving the top of the potato exposed until it develops roots.
🌿 Step 5: Monitor and Support Early Growth
After planting, water deeply to settle the soil around the roots. For the first 2 weeks, keep the soil evenly moist—stick your finger 1 inch down and water when it feels dry. Avoid overhead watering, which can spread disease. You'll see the first true leaves emerge in 7-10 days, signaling that the plant is established and ready for regular care.
As the plants grow, mound soil around the stems in stages—every 2 weeks until the hill reaches 8-10 inches high. This technique, called "hilling," encourages more tuber formation and prevents the potatoes from turning green when exposed to light. By mid-season, you'll have a bushy, twist-free plant with a bounty of harvest-ready potatoes beneath the soil.
Tips & tricks for perfect sprouting seed potatoes
Here's what I learned after years of trial and error—these small tweaks make all the difference between weak sprouts and vigorous, twist-free plants.
Selection is Everything: When choosing seed potatoes, look for firm ones with fleshy, not shriveled skin. The eyes should be deep and well-formed, not superficial. I've found that Yukon Golds and Red Pontiacs sprout particularly well with this method. Avoid potatoes with any green areas—they contain solanine, which can inhibit sprouting and make the potatoes toxic. The 24-hour callusing step in Step 1 is non-negotiable; it's what prevents rot when you eventually plant them.
The Lighting Secret: That bright, indirect light requirement in Step 3 isn't just about avoiding green potatoes—it's about creating the perfect environment for uniform growth. If you notice your sprouts turning pale or leggy after 2 weeks, they're getting too much light. Move them farther from the window or reduce grow light intensity. The ideal setup is a north-facing window or grow lights on a 12-hour timer—this mimics natural daylight cycles and prevents the plants from stretching toward light sources.
Medium Matters: While peat moss or coconut coir works beautifully, you can also use a mix of 50% perlite and 50% vermiculite for excellent drainage. The key is avoiding regular potting soil—it compacts too easily and can harbor diseases that weaken young sprouts. When arranging your potatoes in Step 2, make sure the eyes face upward—this ensures the sprouts grow straight rather than twisting. If you notice any pieces shifting during the 3-4 week growth period, gently press them back into place without burying them deeper.
Harden Off Like a Pro: The 5-7 day hardening off period in Step 4 is where most beginners make mistakes. Start by moving your container to a shadier spot indoors for the first 2 days, then gradually introduce it to cooler outdoor conditions. On day 5, place it outside during the day and bring it in at night if temperatures drop below 50°F. This slow acclimation prevents transplant shock when you eventually plant them. You'll know they're ready when the sprouts look sturdy and slightly darker green—signs they've toughened up.
Pro Tips for Sprouting Seed Potatoes
- Here's what I learned after years of trial and error—these small tweaks make all the difference between weak sprouts ...
- Selection is Everything: When choosing seed potatoes, look for firm ones with fleshy, not shriveled skin. The eyes sh...
- The Lighting Secret: That bright, indirect light requirement in Step 3 isn't just about avoiding green potatoes—it's ...
Frequently asked questions
Got questions about sprouting seed potatoes? You’re not alone! Here are some of the most common queries—and their straightforward answers—to help you grow like a pro.
How long do seed potatoes need to sprout before planting?
Seed potatoes should sprout 2–4 inches of healthy, firm shoots (about 3–6 weeks in a cool, dark place). Plant them once sprouts are 1–2 inches long—this ensures strong roots and a head start on growth. Over-sprouting can weaken tubers, so avoid letting them get leggy!
What if my seed potatoes don’t sprout at all?
Don’t panic! Try these fixes:
- Check moisture: Keep them in a humid environment (like a damp paper towel or tray with pebbles).
- Warmth matters: Store them in a 50–60°F spot (like a basement or garage).
- Test viability: Cut one open—if it’s firm, white, and free of rot, it’s still good. Soft or mushy? Toss it.
Can I use store-bought potatoes as seed potatoes?
Technically yes, but it’s risky! Store-bought potatoes are often treated to prevent sprouting or exposed to disease. For best results, buy certified seed potatoes from a nursery. If you’re using grocery-store spuds, chit (sprout) them first and plant only organic, untreated varieties.
What’s the best way to plant sprouted seed potatoes?
Plant them eyes-up (sprouts facing skyward) in 6-inch-deep holes, spacing them 12–15 inches apart in rows 3 feet apart. Cover with 2–3 inches of soil, leaving sprouts exposed. As they grow, hill soil around the stems to encourage more tubers and prevent greening.
Why are my sprouted potatoes turning green or rubbery?
Green spots mean toxic solanine (from sunlight exposure)—dig them up and plant in shady soil immediately. Rubbery sprouts could signal rot or disease. Check for soft spots, mold, or foul smells. If affected, discard the potato and sterilize tools to prevent spread.
Wrapping up and next steps
Sprouting seed potatoes using the cold-start method is a game-changer for gardeners seeking bushier plants and twist-free harvests—without the hassle of early chitting! With just a few simple steps, you’ve unlocked the secret to healthier tubers and a more productive garden. 🌱
Now that you’re armed with the know-how, why not try it this season? Start small with a few seed potatoes, experiment with timing, and watch your harvest thrive. Happy gardening—your future spuds are counting on you! 🥔✨