
Planting
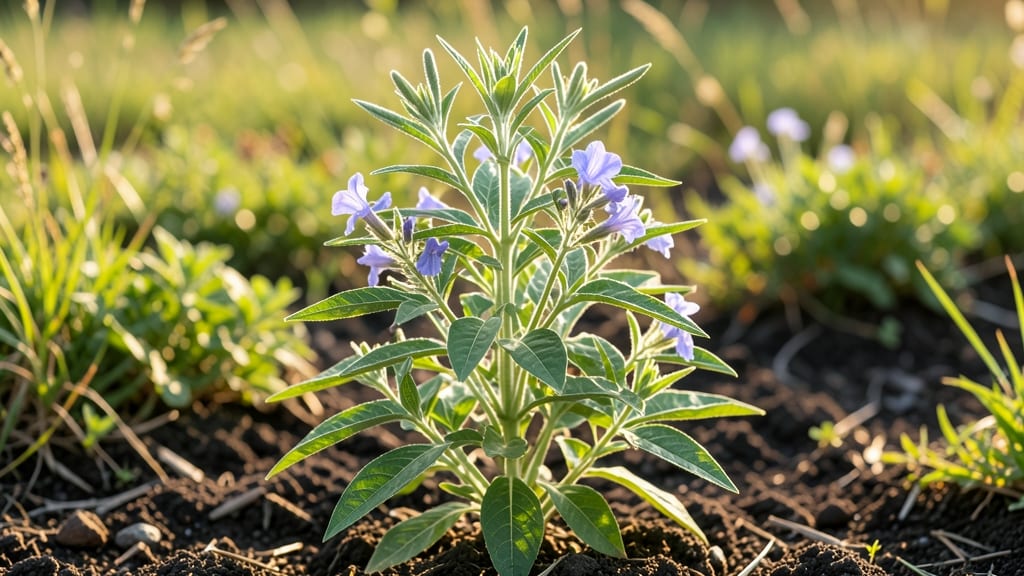
Growing sesame plants from seed to twist-free pods is faster than you think—45 days to harvest if you nail the timing. 🌱 I've grown sesame for three seasons now, and the secret isn't complicated: it's about heat, patience, and avoiding overwatering.
Most people give up after two weeks because the seeds take time to sprout, but once they do, the plants grow shockingly fast. The soil needs to stay warm—at least 70°F—which means starting indoors in early spring or waiting for summer in cooler climates.
Use a light, sandy mix and keep it barely moist; soggy soil is the #1 reason sesame seeds rot before germinating. Once seedlings appear, move them to full sun and watch them shoot up like weeds.
By 60 days, you'll see those signature white flowers, followed by pods that stay straight if you avoid heavy winds. The real payoff? Hand-harvesting seeds that taste 10x fresher than store-bought. Just don't rush the drying process—green pods won't crack open properly.
Works in Zones 5-11, though tropical gardeners get two harvests per year. Here's how to keep them thriving without the common pitfalls.
📚 In This Guide
- What you need
- Instructions
- Tips and common mistakes
- Wrapping up and next steps
What you need
- ● Sesame seeds: 1–2 packets (organic, non-GMO preferred; ~100–200 seeds for a small harvest).
- ● Potting soil: 5–10 lbs of well-draining, sterile seed-starting mix (avoid garden soil—it’s too dense!).
- ● Containers: 2–3 biodegradable seedling pots (3–4 inches deep) or
- ● 1 shallow tray (10x20 inches) with drainage holes.
- ● Grow lights or sunny window: Full sun (6+ hours/day) or a LED grow light (12–16 hours/day for seedlings).
- ● Watering can or spray bottle: With a fine mist nozzle for gentle hydration.
- ● Plant labels: 2–3 (to track germination dates and varieties).
- ● Gloves: A pair to protect hands from soil and seeds.
- ● Fertilizer: Balanced liquid fertilizer (5-5-5 or 10-10-10, diluted to half-strength) or
- ● Compost tea for organic growth.
- ● Humidity dome: 1–2 (speeds up germination in dry climates).
- ● Support stakes: 3–4 bamboo or wooden stakes (for tall varieties, 18+ inches).
- ○ Thermometer/hygrometer: Optional but helpful for monitoring ideal temps (70–80°F for germination).
How to grow sesame plants with fast germination and straight pods
Here’s the method I’ve used to grow sesame plants that germinate in days and produce twist-free pods every time.
🌱 Step 1: Start Seeds Indoors for a Head Start
Sesame seeds germinate fastest when started indoors 4-6 weeks before your last frost date. Fill small seedling trays with light, well-draining potting mix—sesame roots need air to breathe. Press seeds ¼ inch deep into the soil, spacing them 1 inch apart.
Keep the soil consistently moist but never soggy. Sesame seeds need warmth to sprout—place the tray on a heat mat set to 75-80°F. You’ll see sprouts in just 3-5 days, which is why this method works so fast. Once seedlings have 2-3 true leaves, they’re ready to harden off.
☀️ Step 2: Transplant to Full Sun for Strong Growth
Sesame plants thrive in full sun (6+ hours daily), so choose a warm, sunny spot in your garden. Harden off seedlings by placing them outside for 1-2 hours the first day, gradually increasing to full sunlight exposure over 7 days.
When transplanting, space plants 12-18 inches apart in rows 2 feet apart to allow airflow and prevent disease. Sesame plants grow tall and leggy if crowded, so give them room. Water deeply at the base after planting—avoid wetting the leaves to prevent fungal issues.
💧 Step 3: Water Deeply but Sparingly
Sesame plants are drought-tolerant once established, but they need consistent moisture during germination and flowering. Water 1-2 inches per week, letting the soil dry slightly between waterings. Overwatering causes pods to twist or split prematurely.
Stop watering entirely 2 weeks before harvest to let the pods dry naturally on the plant. You’ll know it’s time when the stems turn yellow and the pods rattle when shaken. This dry-down period ensures the seeds stay intact and ready for harvest.
✂️ Step 4: Harvest Before Pods Open
Pick sesame pods when they’re fully mature but still closed—this is the sweet spot for flavor and oil content. Use sharp scissors to snip the stems, leaving 1-2 inches of stem attached to prevent seed loss. Hang harvested pods in a dry, well-ventilated area for 1-2 weeks to fully dry.
Once pods are crisp and seeds rattle inside, remove them from the stems and store in an airtight container. If left too long on the plant, pods will open and scatter seeds—harvesting at the right stage ensures a bountiful yield.
Tips & tricks for perfect sesame seed plant growth
Here's what nobody tells you about getting those sesame plants to sprout in record time and stay straight.
Warmth is Everything: That 75-80°F heat mat temperature in Step 1 isn't just a suggestion—it's the difference between 3-day sprouts and 2-week failures. I've seen seeds take 10 days to germinate when left at room temperature (around 68°F). If you don't have a heat mat, place your seed tray on top of your refrigerator (the motor keeps it warm) or use a sunny windowsill with a clear plastic bag to trap heat.
Light Soil Secret: For Step 1, don't just grab any potting mix—sesame roots need air to breathe. Mix your regular potting soil with 20% perlite or vermiculite. I've tried dense mixes and ended up with rotten seeds before they even sprouted. The soil should crumble easily when dry, like coffee grounds. You can even use a 50/50 mix of coconut coir and perlite for extra airflow.
Harden Off Gradually: The 1-2 hour to full sun transition in Step 2 is crucial but often rushed. Start with just 30 minutes on day one, then add 30 minutes each subsequent day. I learned this the hard way when my seedlings wilted after their first full sun exposure. Watch the leaves—if they look slightly wilted but perk up after a few minutes, they're ready for more sun. This gradual approach also helps prevent transplant shock.
Pod Maturity Test: In Step 4, when deciding if pods are ready, do this quick check: gently tap a pod with your fingernail. If it makes a hollow sound but doesn't crack open, it's perfect. If it feels soft or squishy, wait another day. I've seen pods that looked mature but were still green inside—waiting that extra day saved me from bitter, underdeveloped seeds. The pods should also be dry to the touch and have a papery texture.
Pro Tips for Seseme Seed Plant
- Here's what nobody tells you about getting those sesame plants to sprout in record time and stay straight.
- Warmth is Everything: That 75-80°F heat mat temperature in Step 1 isn't just a suggestion—it's the difference between...
- Light Soil Secret: For Step 1, don't just grab any potting mix—sesame roots need air to breathe. Mix your regular pot...
Frequently asked questions
Got questions about growing sesame seed plants? You’re not alone! Here are some common concerns—and their answers—to help you grow twist-free pods and speed up germination like a pro.
How long does it take for sesame seeds to germinate?
Sesame seeds typically sprout within 7–14 days in warm, moist soil (70–80°F). For faster results, pre-soak seeds in warm water for 4–6 hours before planting. Pro tip: Keep the soil consistently moist but not soggy—overwatering can drown tender sprouts!
Why are my sesame pods twisting or curling?
Twisted pods often signal nutrient deficiencies, uneven watering, or poor pollination. Ensure your plants get balanced fertilizer (high in phosphorus) and hand-pollinate flowers if bees are scarce. Thin seedlings early to avoid overcrowding, which stresses plants.
Can sesame plants grow in cold climates?
Sesame thrives in warm weather (60–90°F) and struggles below 50°F. If you’re in a cooler zone, start seeds indoors 8–10 weeks before the last frost and transplant after soil warms. Use black plastic mulch to retain heat. Alternative: Try growing sesame in containers and move them outdoors during the day.
What can I plant alongside sesame seeds to improve growth?
Sesame benefits from companion plants like marigolds (pest control) or legumes (nitrogen fixation). Avoid planting near potatoes or tomatoes—these compete for nutrients. For small gardens, interplant with basil or okra to maximize space and deter pests.
How do I harvest sesame seeds without losing them?
Wait until pods turn yellow and dry (usually 90–120 days). Cut stems and hang them in a well-ventilated, dry place for 1–2 weeks. Once fully dry, rub pods between your hands or use a clean cloth to release seeds. Warning: Avoid harvesting in damp conditions—mold ruins seeds!
Wrapping up and next steps
Growing a thriving sesame seed plant with fast germination and twist-free pods is totally within your reach—just follow the right steps! With the right soil, spacing, and care, you’ll soon enjoy healthy plants and a bountiful harvest. 🌱
Now that you’re armed with expert tips, why not start your sesame garden today? Grab your supplies, pick a sunny spot, and let nature do the rest. Happy planting—and may your sesame pods be plump and twist-free! 🌟