
Propagation
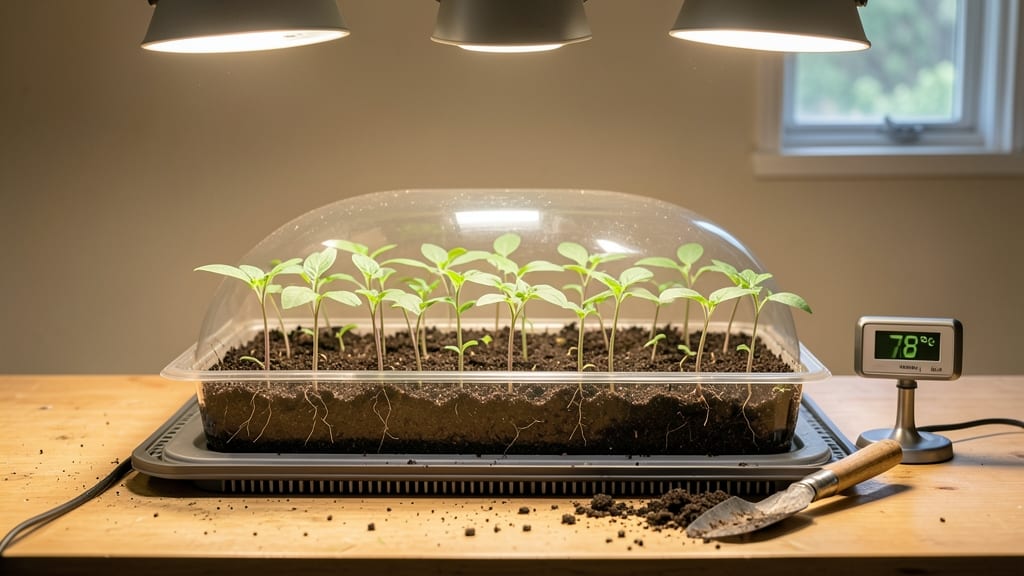
Warming mats cut germination time in half for finicky seeds like peppers and tomatoes. 🌱 I’ve used them for years—especially for my slow-starting heirloom varieties—and the difference between a cold tray and a warm one is night and day.
What once took weeks now sprouts in under a week, and the seedlings come up strong instead of leggy.
You’ll need a mat that matches your seed tray size, a reliable thermometer, and a power source nearby. The best ones maintain 70-85°F consistently, which is perfect for most vegetables.
Just place your seed-starting mix on the mat, sprinkle seeds, and let the gentle heat do the work—no more waiting for the soil to warm up naturally.
With the right setup, you’ll see those first tiny green hooks breaking through soil in 3-7 days, depending on the seed. The mat keeps moisture even, prevents cold shock, and gives you a head start on the growing season.
Plus, it’s a game-changer for seeds that struggle in cool conditions, like basil or parsley.
Fair warning: don’t overcrowd your tray or skip the thermometer—uneven heating can lead to mold or weak sprouts. But once you master it, you’ll never go back to waiting for nature to warm up on its own. Here’s how to get it right the first time.
📚 In This Guide
- What you need
- Instructions
- Tips and common mistakes
- Wrapping up and next steps
What you need
- ● Seed starting warming mat – Choose one with adjustable heat settings (ideally 60–95°F). A 12" x 24" mat works for most trays.
- ● Seed trays or containers – 1020 or 50-cell trays (or small pots) with drainage holes.
- ● Seed starting mix – Lightweight, sterile potting mix (avoid garden soil). A 10-quart bag covers most setups.
- ● Seeds – Fresh, high-quality seeds (check germination rates on packets!).
- ● Spray bottle – For gentle watering (avoid soaking the mix).
- ○ Thermometer (optional but helpful) – To monitor soil temp (digital probe type is easiest).
- ● Humidity dome or plastic wrap – Keeps moisture in while seeds sprout.
- ● Grow lights – If starting indoors without natural light (LED or fluorescent, 12–16 hrs/day).
- ● Heat mat cover – Protects from drafts (a thin blanket or insulated tray mat works).
- ● Seedling heating pad – For extra warmth if your mat isn’t powerful enough.
- ● Labels & markers – To track seed varieties and planting dates.
How to use seed starting warming mats for faster germination
Here’s how I get seeds sprouting in half the time—no fancy equipment, just a little heat.
🌱 Step 1: Prepare Your Seed Trays and Soil
Fill your seed trays with moistened seed-starting mix to within ¼ inch of the rim. Press down gently so the surface is firm but not packed—this helps roots anchor properly. I like to use a spray bottle to moisten the mix evenly, avoiding clumps that can block water flow. The soil should feel like a damp sponge, not dripping or bone-dry.
Arrange your trays on the warming mat, spacing them evenly. If using multiple trays, leave ½ inch between edges so heat circulates. This step is critical: uneven heat distribution can lead to patchy germination, where some seeds sprout and others rot. I always double-check by running my hand over the mat—it should feel uniformly warm, not hot in spots.
💧 Step 2: Position the Mat and Set the Temperature
Place the warming mat on a flat, stable surface—like a shelf or countertop—where it won’t get jostled. Most seed-starting mats maintain a consistent 70-75°F temperature, which is ideal for most seeds. Check your mat’s instructions, though; some models let you adjust the heat. I keep mine plugged in 24/7 until germination is complete.
Cover the trays with a clear plastic dome or plastic wrap to trap moisture and heat. This creates a mini greenhouse effect that speeds up germination. Watch for condensation on the inside of the cover—this is normal and means the humidity is right. If you see water droplets forming, that’s your sign the setup is working.
⏰ Step 3: Monitor and Maintain Optimal Conditions
Check your seeds daily for the first signs of sprouting, usually within 3-7 days depending on the seed type. Fast germinators like basil or lettuce may pop up in just a few days, while slower seeds like peppers can take up to two weeks. I keep a small notebook nearby to track which seeds I’ve planted and when I expect them to sprout.
Once 50% of seeds have sprouted, remove the plastic cover immediately. Leaving it on too long can cause damping-off, a fungal disease that turns seedlings to mush overnight. After removing the cover, keep the mat running until all seeds have germinated. You’ll see the first true leaves emerge within a few more days—that’s your cue to start adjusting light exposure.
☀️ Step 4: Transition to Light and Harden Off Seedlings
After all seeds have sprouted, move the trays under a grow light or to a south-facing window where they’ll get 12-14 hours of light daily. Seedlings need this light to prevent them from growing leggy and weak. I position the grow light 2-3 inches above the tallest seedlings and raise it as they grow to maintain that distance.
Once seedlings have 2-3 sets of true leaves, it’s time to harden them off. Start by moving the trays outside for 1-2 hours daily in a shaded spot, gradually increasing their time outdoors over 7-10 days. This prepares them for life in the garden. I always do this on an overcast day to avoid shocking the seedlings with too much sun too soon.
✂️ Step 5: Transplant and Care for Strong Starts
When seedlings are 3-4 inches tall and have developed a sturdy root system, they’re ready to transplant. Gently remove them from the trays, keeping the root ball intact. Plant them in their final containers or garden beds, burying them to the same depth they were in the trays. Water them deeply right after transplanting to help settle the soil around the roots.
After transplanting, keep the warming mat nearby for a few days if your garden soil is still cool. This extra warmth helps the roots establish quickly. You’ll notice stronger, more resilient plants that are less likely to wilt or struggle in cooler weather. Once they’re fully acclimated, you can retire the mat—your seedlings will be thriving on their own.
Tips & tricks for perfect seed starting with warming mats
Here's what nobody tells you about maximizing those gentle heat waves for faster, stronger sprouts.
Soil Moisture Secret: The seed-starting mix should feel like a damp sponge—not dripping wet, not bone-dry. I learned this the hard way after watching seeds rot from soggy soil. Use a spray bottle to mist until water runs through the bottom drainage holes but stops immediately. This keeps roots oxygenated while maintaining the perfect moisture level for germination.
Heat Distribution Check: Before placing trays, run your hand over the warming mat to ensure even warmth. Uneven heat causes patchy germination where some seeds sprout while others remain dormant. If you notice hot spots, rotate trays daily or use a thin layer of aluminum foil between the mat and trays to diffuse heat more evenly.
Germination Timeline: Those 3-7 days for sprouting depend entirely on seed type and conditions. I keep a small notebook to track different seeds—fast germinators like lettuce may pop up in 3 days, while slower ones like peppers can take up to 2 weeks. The warming mat cuts this time in half compared to room temperature germination, but consistency matters more than speed.
Light Transition Strategy: When moving seedlings to 12-14 hours of light, position your grow light 2-3 inches above the tallest plants. I adjust this distance every 2-3 days as seedlings grow to prevent leggy, weak stems. A simple ruler taped to your light stand makes this adjustment effortless and precise.
Pro Tips for Seed Starting Warming Mats
- Here's what nobody tells you about maximizing those gentle heat waves for faster, stronger sprouts.
- Soil Moisture Secret: The seed-starting mix should feel like a damp sponge—not dripping wet, not bone-dry. I learned ...
- Heat Distribution Check: Before placing trays, run your hand over the warming mat to ensure even warmth. Uneven heat ...
Frequently asked questions
about seed starting warming mats—because every gardener deserves a little extra help!What temperature should a warming mat maintain for optimal germination?
A warming mat should ideally keep seeds between 65°F to 85°F (18°C to 29°C), depending on the plant type. Check the seed packet for specific needs—most veggies and herbs thrive in the mid-70s (°F). Overheating (above 90°F/32°C) can damage seeds, while temps below 60°F (15°C) slow germination.
How long can I leave seeds on a warming mat before transplanting?
Most seeds germinate within 5–14 days on a warming mat, but avoid overusing it. Once sprouts appear, transfer seedlings to a sunny window or grow light. Keep the mat on for 1–2 hours daily (or as needed) to maintain warmth, but remove it once seedlings are sturdy enough to handle natural light.
Can I use a warming mat without a heat mat controller?
Technically yes, but not recommended. Warming mats without controllers can overheat or fail to regulate temperature consistently. If you skip the controller, monitor closely with a thermometer and limit runtime to 6–8 hours/day. For best results, pair it with a simple plug-in controller (~$15–$25).
What’s a good alternative if I don’t have a warming mat?
Try these DIY or store-bought alternatives:
- Bottom heat: Place seed trays on top of a refrigerator or heat lamp (keep 6–12 inches away).
- Insulation: Use a heating pad (low setting) under trays or wrap them in a blanket for passive warmth.
- Grow lights: Some LED grow lights emit gentle heat—check specs for dual warmth/light features.
For stubborn seeds (like peppers or tomatoes), these methods work but may take 2–3 days longer than a dedicated mat.
Why aren’t my seeds germinating even with a warming mat?
Check these common culprits:
- Moisture: Keep soil damp (not soggy)—use a spray bottle or bottom-watering tray.
- Depth: Plant seeds too deep? Follow packet instructions (most need ¼-inch coverage).
- Freshness: Old seeds (2+ years) may fail—test viability with a paper towel germination test.
- Light: Some seeds (e.g., lettuce) need light to sprout—cover trays until germination.
If issues persist, try a new batch of seeds or adjust the mat’s placement for even warmth.
Wrapping up and next steps
Starting seeds with a warming mat is a game-changer for gardeners eager to see quick, healthy germination—especially in cooler climates or early spring. Whether you're a seasoned pro or a beginner, these mats provide consistent warmth, faster sprouts, and stronger seedlings without the guesswork.
The key is patience and precision: monitor moisture, avoid overcrowding, and let those tiny roots thrive under gentle heat.
Now that you’re ready to dive in, grab your seeds and warming mat—your future garden is just a few weeks (and a little warmth) away! 🌱✨ Happy planting!