
Propagation
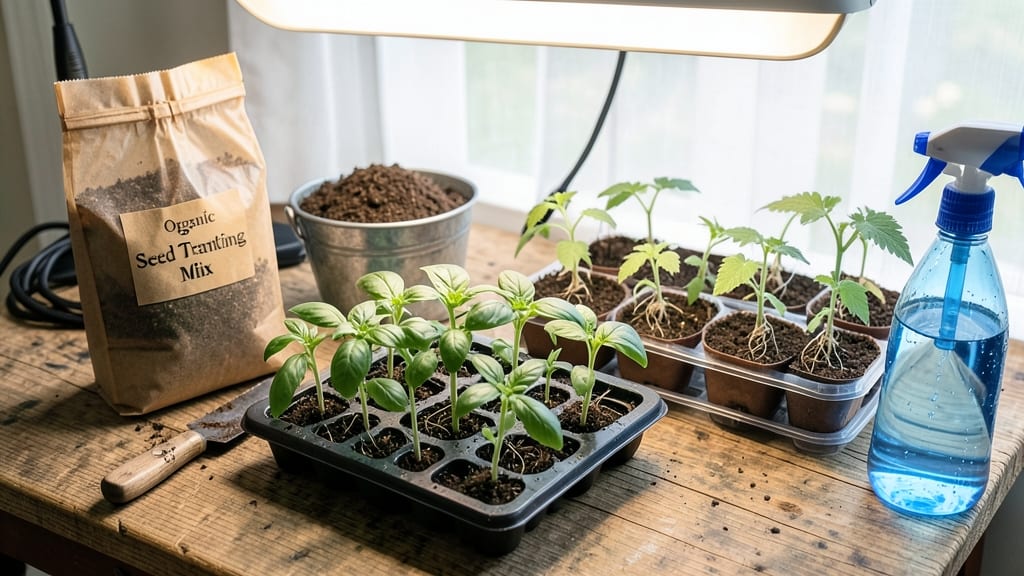
The right seed starting soil means the difference between fluffy seedlings and sad, squishy messes. 🌱 I've lost count of the trays of seeds that drowned or molded in regular potting mix—until I learned the secret of a sterile, airy blend designed just for tiny roots.
This isn't your garden's heavy dirt or even standard potting soil. Seed starting mix needs to stay loose, drain fast, and block fungal spores that lurk in regular soil.
Commercial mixes work, but DIY versions (50% peat or coco coir, 30% perlite, 20% vermiculite) give you control over texture and drainage. The goal? A medium so light your seedlings feel like they're floating.
You'll see roots branching out within days, not weeks, and stems staying sturdy as they reach for light. No more leggy, weak seedlings that flop over at the slightest breeze. The key is keeping it moist but never soggy—think damp sponge, not swamp. For beginners, pre-mixed bags are foolproof.
For the rest of us, adjusting ratios based on your climate (more perlite in humid areas) makes all the difference. Let's get those seeds off to the right start!
📚 In This Guide
- What you need
- Instructions
- Tips and common mistakes
- Wrapping up and next steps
What you need
- ● Seed starting soil mix: 10–12 quarts (enough to fill seedling trays or pots). Look for a sterile, peat-based or coco coir blend (e.g., FoxFarm Seedling Mix or Black Gold Seedling Mix).
- ● Seedling trays or pots: 72-cell trays (for tiny seeds) or 6–8" pots (for larger seeds). Biodegradable pots are a plus!
- ● Perlite or vermiculite: 1–2 cups per 12 quarts of soil (for aeration and moisture retention). Perlite is lighter; vermiculite holds more water.
- ● Sterilized containers: Clean buckets or bins for mixing (disinfect with a 10% bleach solution or boiling water).
- ● Seeds: Your chosen varieties—check seed packets for depth and spacing needs!
- ● Fine mist spray bottle: For gentle watering (avoid disturbing seeds).
- ● Plastic wrap or humidity dome: To retain moisture and warmth during germination.
- ● Grow lights or sunny windowsill: 12–16 hours of light daily (LED grow lights are ideal).
- ● Slow-release fertilizer: Mix in 1 tsp per gallon of soil (e.g., Osmocote Smart-Release for steady nutrients).
- ● pH test kit: Ensure soil is in the 5.8–6.2 range (ideal for most seeds).
- ● Heating mat: For seeds needing warmth (e.g., peppers, tomatoes).
- ● Label markers: Track seed varieties and planting dates!
- ● Compost or worm castings: 5–10% of the mix for extra nutrients (pasteurize first!).
How to create the perfect seed starting soil mix
Here's the foolproof method I use to create a sterile, airy mix that gives seedlings the best start.
🌱 Step 1: Gather Your Base Materials
Start with 50% peat moss or coconut coir—this holds moisture without suffocating roots. I measure 2 parts of this base into a clean wheelbarrow or large bin. Peat moss is lightweight and retains water, while coconut coir is more sustainable and drains slightly better.
Next, add 30% perlite or vermiculite—this is your aeration agent. I use perlite because it stays open and prevents compaction. Spread it evenly over the peat moss, then mix gently with a garden fork or large spoon. This creates air pockets that young roots need to breathe.
🌱 Step 2: Add Organic Matter for Nutrients
For 20% of your mix, incorporate a fine, well-aged compost or worm castings. I sift mine through a ¼-inch mesh screen to remove any large chunks that could harbor pathogens. This adds essential nutrients without overwhelming tender seedlings.
If you're starting heat-loving plants like peppers or tomatoes, I like to blend in a ¼ cup of balanced organic fertilizer per 4 cubic feet of mix. This gives seedlings a gentle nutrient boost without burning them. Mix everything thoroughly until the color is uniform.
💧 Step 3: Test and Adjust Moisture
Squeeze a handful of your mix—it should hold together lightly but not drip water. If it feels too dry, gradually add warm water while mixing until it reaches that perfect damp-but-not-wet consistency. I use a spray bottle for fine adjustments at the end.
For extra sterility, I microwave 1 cup of the mix at a time for 90 seconds to kill any pathogens. Let it cool completely before combining with the rest. This step is especially important if you're using garden soil or compost that might carry fungus or bacteria.
✂️ Step 4: Store and Use Properly
Keep your mix in a sealed container to preserve moisture and freshness. I use 5-gallon buckets with lids—they're easy to store and let me scoop out exactly what I need. Label each batch with the date and contents so you can track how long it's been sitting.
Use your mix within 3-6 months for best results. Over time, organic matter breaks down and the structure degrades. If you notice compaction or a musty smell, it's time to make a fresh batch. Fresh mix means healthier seedlings every time.
Tips & tricks for perfect seed starting soil
Here's what nobody tells you about making this mix work like a pro—details that make all the difference for strong, healthy seedlings.
Mixing Technique: When combining your 50% peat moss or coconut coir with 30% perlite, use a garden fork to gently lift and turn the materials rather than stirring vigorously. This preserves the air pockets that roots need to breathe. I learned this the hard way after compacting my first batch—roots need space to grow, not a dense brick!
Sterility Secret: The 90-second microwave treatment for 1 cup at a time is your best defense against damping-off disease. After microwaving, let the mix cool completely before combining with the rest—hot mix can kill beneficial microbes. I keep a small microwave just for this purpose, and it's saved me from countless seedling losses.
Organic Matter Tip: For that 20% compost or worm castings, I recommend using worm castings if you're starting delicate seedlings like lettuce or herbs. They're gentler than regular compost and provide slow-release nutrients. Always sift through that ¼-inch mesh screen—large chunks can harbor pathogens that will stunt your seedlings.
Storage Wisdom: Those 5-gallon buckets with lids are a game-changer for organization. I label each batch with the date and plant type (like "Tomato Starter - 3/15") so I can track how long it's been sitting. Pro tip: Store buckets in a cool, dark place—light can cause algae growth in the mix over time.
Pro Tips for Seed Starting Soil
- Here's what nobody tells you about making this mix work like a pro—details that make all the difference for strong, healthy seedlings.
- Mixing Technique: When combining your 50% peat moss or coconut coir with 30% perlite, use a garden fork to gently lift and turn the materials rather than stirring vigorously.
- Sterility Secret: The 90-second microwave treatment for 1 cup at a time is your best defense against damping-off disease.
Frequently asked questions
Got questions about seed starting soil? You’re not alone! Here are answers to the most common concerns—so you can grow confidently from seed.
What’s the difference between seed starting mix and regular potting soil?
A seed starting mix is sterile, lightweight, and packed with organic matter to encourage root growth. Regular potting soil is denser, may contain weeds or pathogens, and lacks the airiness seedlings need. Think of it like this: seed mix is the fluffy cloud your tiny roots deserve!
When should I switch from seed starting mix to regular soil?
Once seedlings have 2–3 sets of true leaves (not just the initial seed leaves) and are sturdy enough to handle, it’s time to transplant. Harden them off first by exposing them to outdoor conditions gradually. Aim for 4–6 weeks after germination, depending on the plant.
Can I make my own seed starting mix at home?
A simple DIY mix includes 50% peat moss or coconut coir, 30% perlite or vermiculite, and 20% compost or worm castings. Sterilize it by baking in the oven at 200°F (93°C) for 30 minutes to kill pests and diseases. Pro tip: Add a dash of mycorrhizal fungi for extra root boost!
Why are my seedlings dying even though I’m using seed starting mix?
Common culprits include overwatering (roots need air!), damping off (a fungal disease from excess moisture), or poor drainage. Ensure trays have drainage holes, avoid soggy soil, and consider adding a fungicide like cinnamon powder or hydrogen peroxide (1 part to 10 parts water) as a preventative.
How long can I reuse seed starting mix?
Ideally, use it once to avoid buildup of pathogens or salt deposits. If you must reuse it, sterilize it again (bake or microwave) and mix in fresh perlite/compost. However, leftover mix is great for propagating cuttings later—just ensure no disease is present!
Wrapping up and next steps
Starting seeds is an exciting journey, and the right seed starting soil is your secret weapon for healthy, thriving seedlings! 🌱 A sterile, airy mix—whether homemade or store-bought—ensures strong roots, disease resistance, and the perfect foundation for growth.
With the right ingredients and a little patience, you’re well on your way to a bountiful harvest.
Now that you’re armed with knowledge, grab your gloves and get planting! 🚀 Try experimenting with different soil blends, keep those seedlings cozy under lights, and watch them flourish. Happy growing—your future garden awaits!