
Lawn
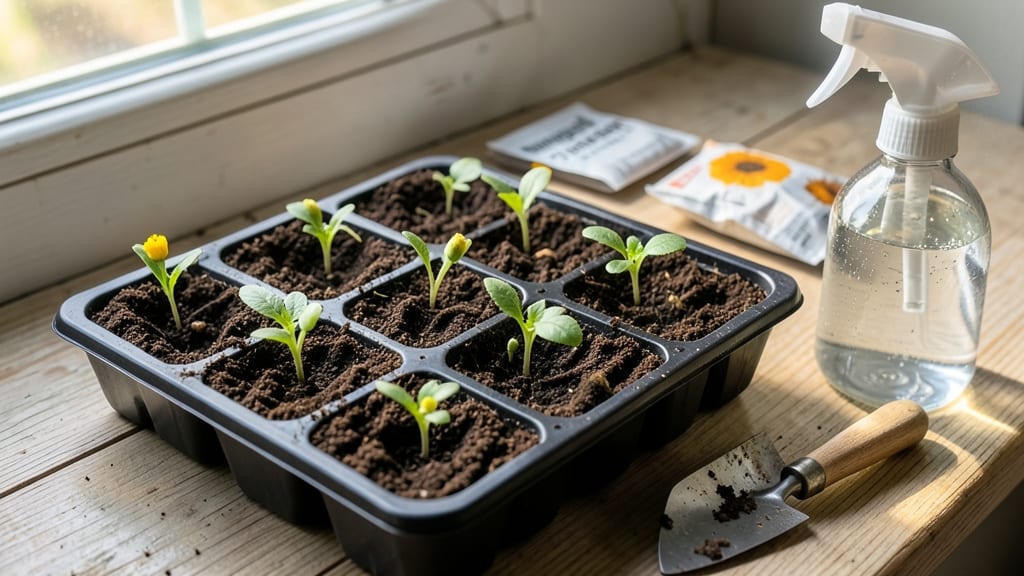
The right seed starter potting soil turns flimsy seeds into strong seedlings in half the time. 🌱 I learned the hard way that regular potting mix—too dense, too heavy—strangles tiny roots before they even get started.
This lightweight loam, packed with peat moss and perlite, gives seeds the airy, moisture-retentive foundation they need to break through soil like they're racing to the surface.
Most store-bought blends already combine the perfect ratio of organic matter and drainage aids, but the key is sterilizing it first to kill fungus or weed seeds lurking in the mix. My go-to method? Bake it in the oven at 200°F for 30 minutes—simple, effective, and safer than chemical treatments.
The result? Seeds germinate in 3-5 days instead of dragging out for weeks. You'll spot the difference immediately: seedlings emerge with sturdy stems and vibrant cotyledons, ready to handle transplanting without shock. The secret isn't just the ingredients—it's keeping that mix consistently moist (not soggy) and warm.
A seedling heat mat makes all the difference in cool springs. For beginners, stick with pre-mixed organic blends until you're comfortable experimenting. The biggest mistake? Reusing last year's soil—even if it looks fine. Fungal spores and pests build up over time, turning your starter tray into a seedling graveyard.
Fresh is always faster.
📚 In This Guide
- What you need
- Instructions
- Tips and common mistakes
- Wrapping up and next steps
What you need
- ● Seed starter potting soil: 1–2 gallons (lightweight, sterile, and well-draining; look for a mix labeled "seed starter" or "organic")
- ● Containers: Seed trays or cell packs (100–200 cells)
- ● OR Small pots (2–4 inches in diameter)
- ● Seeds: Your chosen variety (check seed packets for planting depth)
- ● Watering can or spray bottle: With a fine mist nozzle
- ● Label markers: And labels or popsicle sticks for plant ID
- ○ Gloves: To keep hands clean (optional but handy!)
- ● Trowel or small shovel: For transferring soil (helpful for larger batches)
- ○ Heat mat (optional): For faster germination (especially for slow starters like peppers or tomatoes)
- ● Misting spray: For gentle watering without disturbing seeds
- ● Clear plastic wrap or dome: To retain humidity (remove once sprouts appear)
- ○ Fertilizer (optional): A balanced, water-soluble starter fertilizer (5-10-5 ratio)
How to mix your own fast-germinating seed starter potting soil
Here's the lightweight loam blend I use to get seedlings popping in half the time.
🌱 Step 1: Combine the Base Components for Airy Texture
Start with 50% peat moss—this holds moisture while keeping roots from suffocating. I measure it by volume, not weight, since we're making a fluffy mix. Add 30% perlite next; this is your secret weapon for aeration. The perlite will stay white and crumbly even after mixing—don't confuse it with the darker pumice.
Last comes 20% vermiculite, which holds moisture better than perlite but still drains well. Sift everything together gently with your hands or a fine-mesh screen. You want no clumps larger than a pea—those'll create air pockets that stunt root growth. This blend stays loose enough to let tiny roots spread quickly, which is why your seedlings will germinate so fast.
💧 Step 2: Add Nutrients and Moisten Gradually
Mix in 1 tablespoon of balanced fertilizer (5-5-5 or 10-10-10) per 4 quarts of dry mix. This gives seedlings a gentle nutrient boost without burning tender roots. I like to sprinkle it over the dry components first, then stir thoroughly before adding water.
Now comes the moisture step—this is where most people mess up. Sprinkle warm water slowly while stirring with a clean hand or trowel. You want the mix to feel like a damp sponge, not a dripping mess. Press a handful gently: it should hold together but not crumble. If it sticks to your fingers, add more perlite; if it falls apart, add a splash more water. This moisture level keeps seeds from drying out while preventing rot.
⏰ Step 3: Test and Adjust for Ideal Germination Conditions
Fill a small container with your mix and press it down lightly—it should feel firm but still springy, like a well-used pillow. Drop a few seeds on top and cover them with ¼ inch of the same mix. Water gently from the bottom by placing the container in a tray of water for 10 minutes, then let it drain completely.
Place the container in a warm spot (75-80°F) and cover it loosely with plastic wrap. Check daily for condensation—if you see water droplets on the inside of the wrap, your mix is too wet. If it feels dry to the touch after 24 hours, add a light mist. The goal is consistent moisture without sogginess. You'll see sprouts in 3-7 days with this mix, sometimes even faster.
☀️ Step 4: Maintain Proper Moisture After Germination
Once seedlings emerge, remove the plastic wrap immediately to prevent damping-off disease. Water from the bottom again by placing the tray in ½ inch of water for 5 minutes, then let it drain completely. You'll know moisture is right when the soil surface looks slightly damp but not glistening.
I like to use a spray bottle for top-ups between waterings—this keeps the soil surface from becoming crusty while preventing overwatering. The mix should stay moist but never soggy. You'll see strong, dark green seedlings with sturdy stems in 2-3 weeks, ready for transplanting. The key is consistency: this lightweight blend works hard to give your roots the perfect start.
Tips & tricks for perfect seed starter mix
These simple tricks will help you create the ideal environment for your seeds to sprout quickly and grow strong.
Ingredient Selection: For the best results, use fresh, high-quality peat moss that's light and fluffy. I've found that bagged peat moss from garden centers works perfectly, but avoid anything that looks compacted or old. The perlite should be clean and white—never use the darker pumice by mistake, as it won't provide the same aeration. Vermiculite should expand when moistened, indicating it's still effective at moisture retention.
Mixing Technique: When combining your components in Step 1, I recommend using a large plastic bin or clean trash can for mixing. This gives you plenty of room to work and prevents spills. After sifting, give your mix a final check by running your fingers through it—you should feel a nice, even texture without any gritty bits. This careful mixing ensures your seeds won't encounter any surprises when they start to grow.
Moisture Management: The damp sponge test in Step 2 is crucial—don't skip it! I've learned the hard way that too-wet mix can cause rot, while too-dry mix prevents germination. For extra accuracy, use a kitchen scale to measure water: aim for about 20% of your total mix weight in water. This precise moisture level creates the perfect balance for seed development.
Temperature Control: Maintaining that 75-80°F range during germination is key. If your home runs cooler, consider using a seedling heat mat set to 75°F underneath your containers. I've found that placing trays on top of refrigerators (which are often warm) works well too. Just be sure to monitor closely—consistent warmth is what accelerates that 3-7 day germination window we're all aiming for.
Pro Tips for Seed Starter Potting Soil
- These simple tricks will help you create the ideal environment for your seeds to sprout quickly and grow strong.
- Ingredient Selection: For the best results, use fresh, high-quality peat moss that's light and fluffy. I've found tha...
- Mixing Technique: When combining your components in Step 1, I recommend using a large plastic bin or clean trash can ...
Frequently asked questions
Got questions about seed starter potting soil?
You’re not alone! Here are answers to the most common queries to help you grow with confidence.
What’s the difference between seed starter soil and regular potting soil?
Seed starter potting soil is specifically formulated for germination—lighter, fluffier, and packed with nutrients to encourage fast root development. Regular potting soil is denser and better suited for established plants. Think of it like a gym membership for seeds: starter soil gives them the perfect environment to thrive!
When should I use seed starter potting soil vs. transplanting into garden soil?
Use seed starter soil only for germination (first 2–4 weeks). Once seedlings sprout 2–3 true leaves, transplant them into garden soil or a larger pot with regular potting mix. Hardening off (acclimating to outdoor conditions) for 5–7 days beforehand helps prevent shock.
Can I make my own seed starter mix at home instead of buying it?
A simple DIY mix is 50% peat moss or coconut coir, 30% perlite or vermiculite, and 20% compost or worm castings. Sterilize the mix by baking it at 200°F (93°C) for 30 minutes to kill pests/diseases. Pro tip: Add a pinch of mycorrhizal fungi to boost root growth!
Why are my seeds rotting or moldy in the starter soil?
Overwatering or poor drainage are the usual culprits. Ensure your containers have drainage holes, and water only when the top inch feels dry. If mold appears, sprinkle a thin layer of sand or cinnamon on top to inhibit fungus. Airflow is key—avoid crowding seedlings and use a fan on low for 10–15 minutes daily.
How long can I reuse seed starter potting soil?
Reuse it once or twice for fast-growing seeds (like lettuce or radishes), but discard it after slow germinators (e.g., tomatoes) to prevent disease buildup. Sterilize reused soil with hydrogen peroxide (1 part peroxide to 10 parts water) or bake it to reset nutrients. Fresh is best for optimal results!
Wrapping up and next steps
Choosing the right seed starter potting soil is your first step toward a thriving garden—lightweight, nutrient-rich loam gives seedlings the perfect foundation for fast root growth and strong germination. 🌱 Whether you’re a novice or a seasoned gardener, the key is balance: moisture retention, aeration, and sterilization to keep pests at bay.
Now that you’re armed with the best practices, grab your soil, get planting, and watch those tiny sprouts transform into lush greenery!
Ready to take it further? Try experimenting with organic amendments like worm castings or compost to supercharge your mix. Happy growing! 🌿